 by
by 
TABLE OF CONTENTS
Your motherboard (no matter its size) provides numerous different connectors and sockets, all of which have a singular purpose: to help you connect a myriad of devices and peripherals to your computer.
Down below we’ll cover one such connector – the AAFP header – what it’s for, how to use it, and further explain how you can best maximize its potential.
There’s a lot of ground to cover, so let’s begin!
What’s the AAFP Connector?
The AAFP Connector (short for Analog Audio Front Panel) is a 10-1 pin header that allows you to connect the front audio ports on your PC case directly to your motherboard’s sound card/chip.
Most enclosures have a microphone/3.5mm headphone jack at the front, right next to the USB ports and the Reset and Power buttons. You can make these audio jacks work by plugging the AAFP connector into the motherboard.
In other words: the AAFP header provides the convenience of using these front ports to plug in your headphones/microphone instead of using the hard-to-reach audio ports on your motherboard’s I/O shield on the rear of the case.
Where Is It Located on the Motherboard?
As a general rule of thumb, the AAFP connector can be found near the very bottom of the motherboard – below the PCI-e slots, adjacent to the main case connections (Power, Reset, Power LED, and HDD LED).
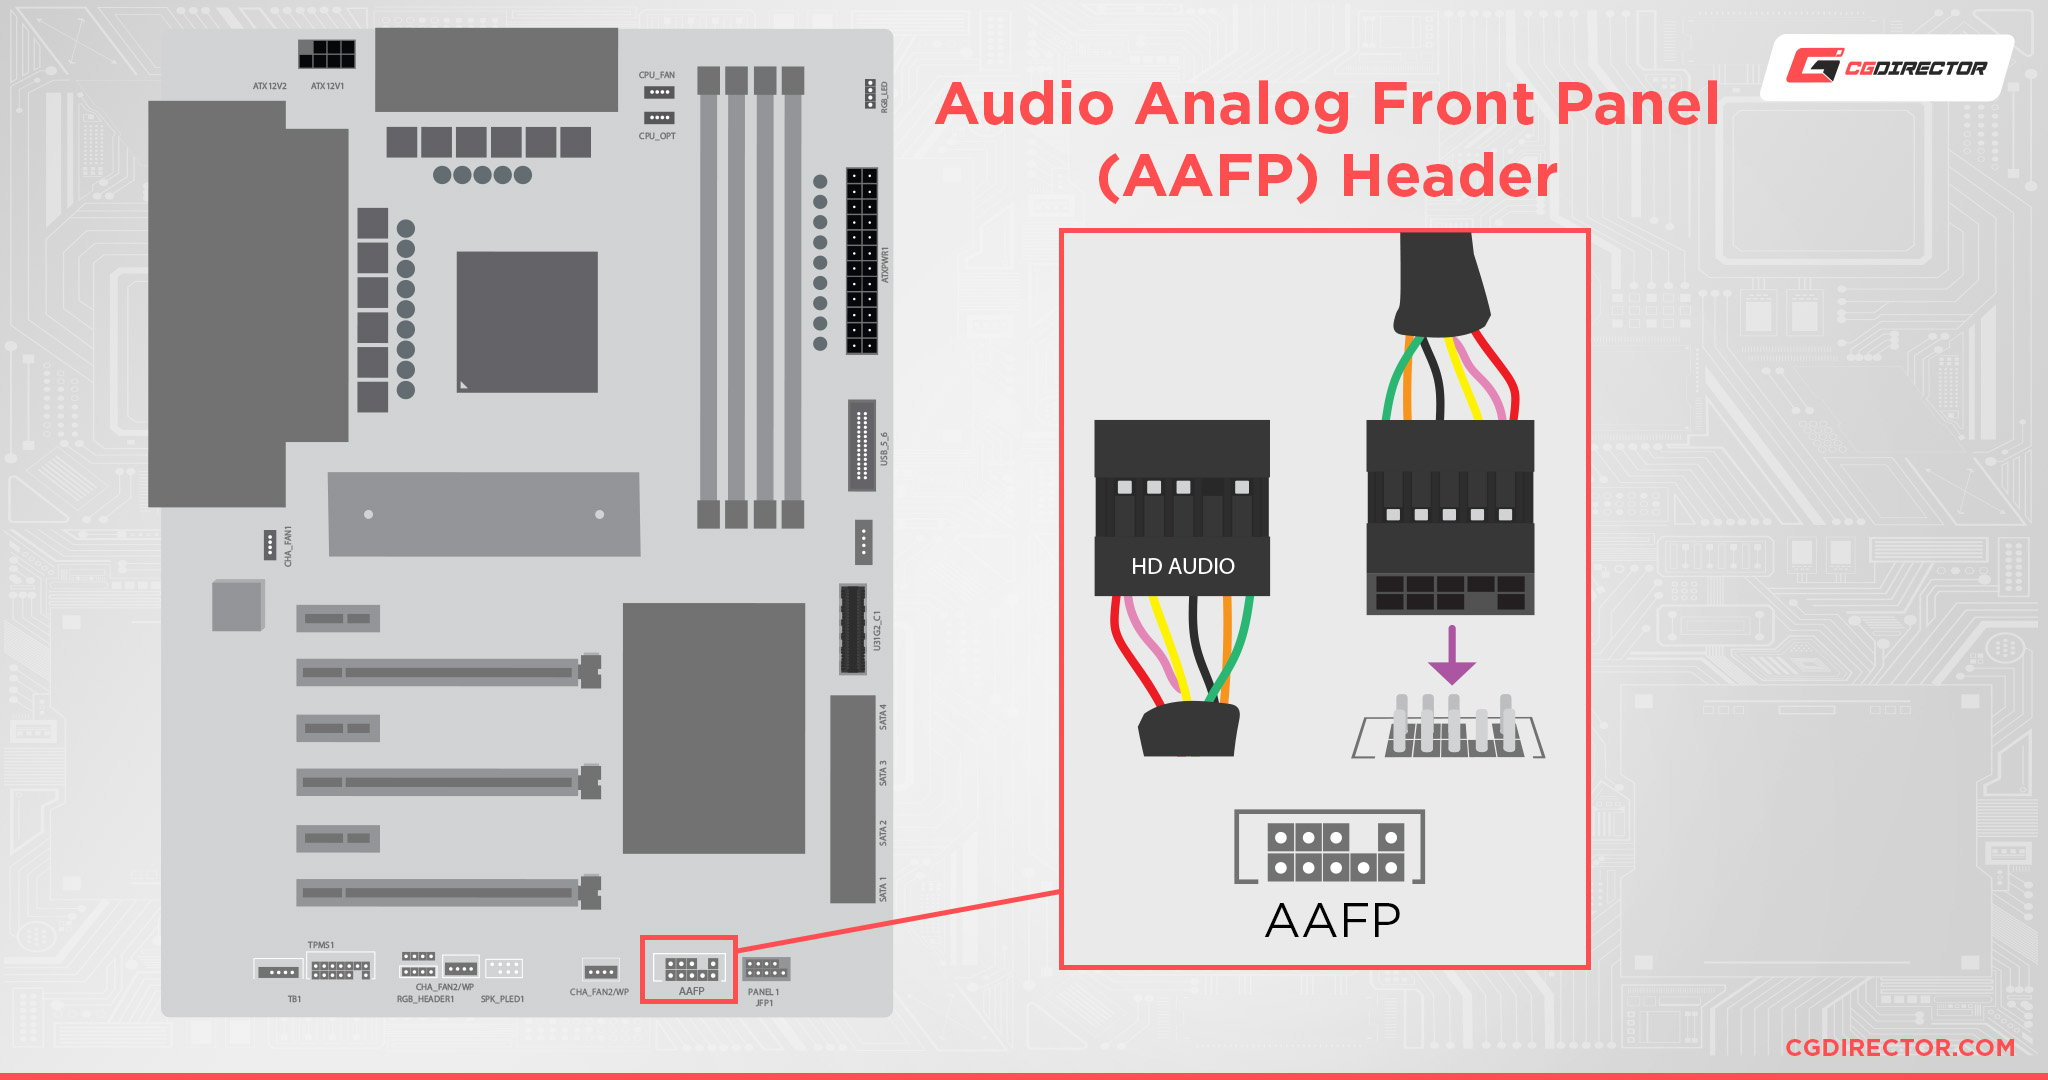
The cable that connects the AAFP header to the front of the case is most often labeled as HD Audio. If you have an old enclosure, it may feature an AC’97 cable or perhaps even both. But more on that later.
The procedure is exceedingly simple: all you have to do is plug the PC case’s aforementioned HD Audio cable into the AAFP connector on your motherboard and you’ll be good to go! (Be sure to match up the pins correctly, as it’ll only fit one way)
There’s also a very slight chance of the AAFP connector being labeled differently – like JAUD1 or F_Audio, for instance.
AC’97 or HD Audio Connector?
The AC’97 and HD Audio connectors may look the same, but their pinouts are totally different; hence, you can’t use them interchangeably.
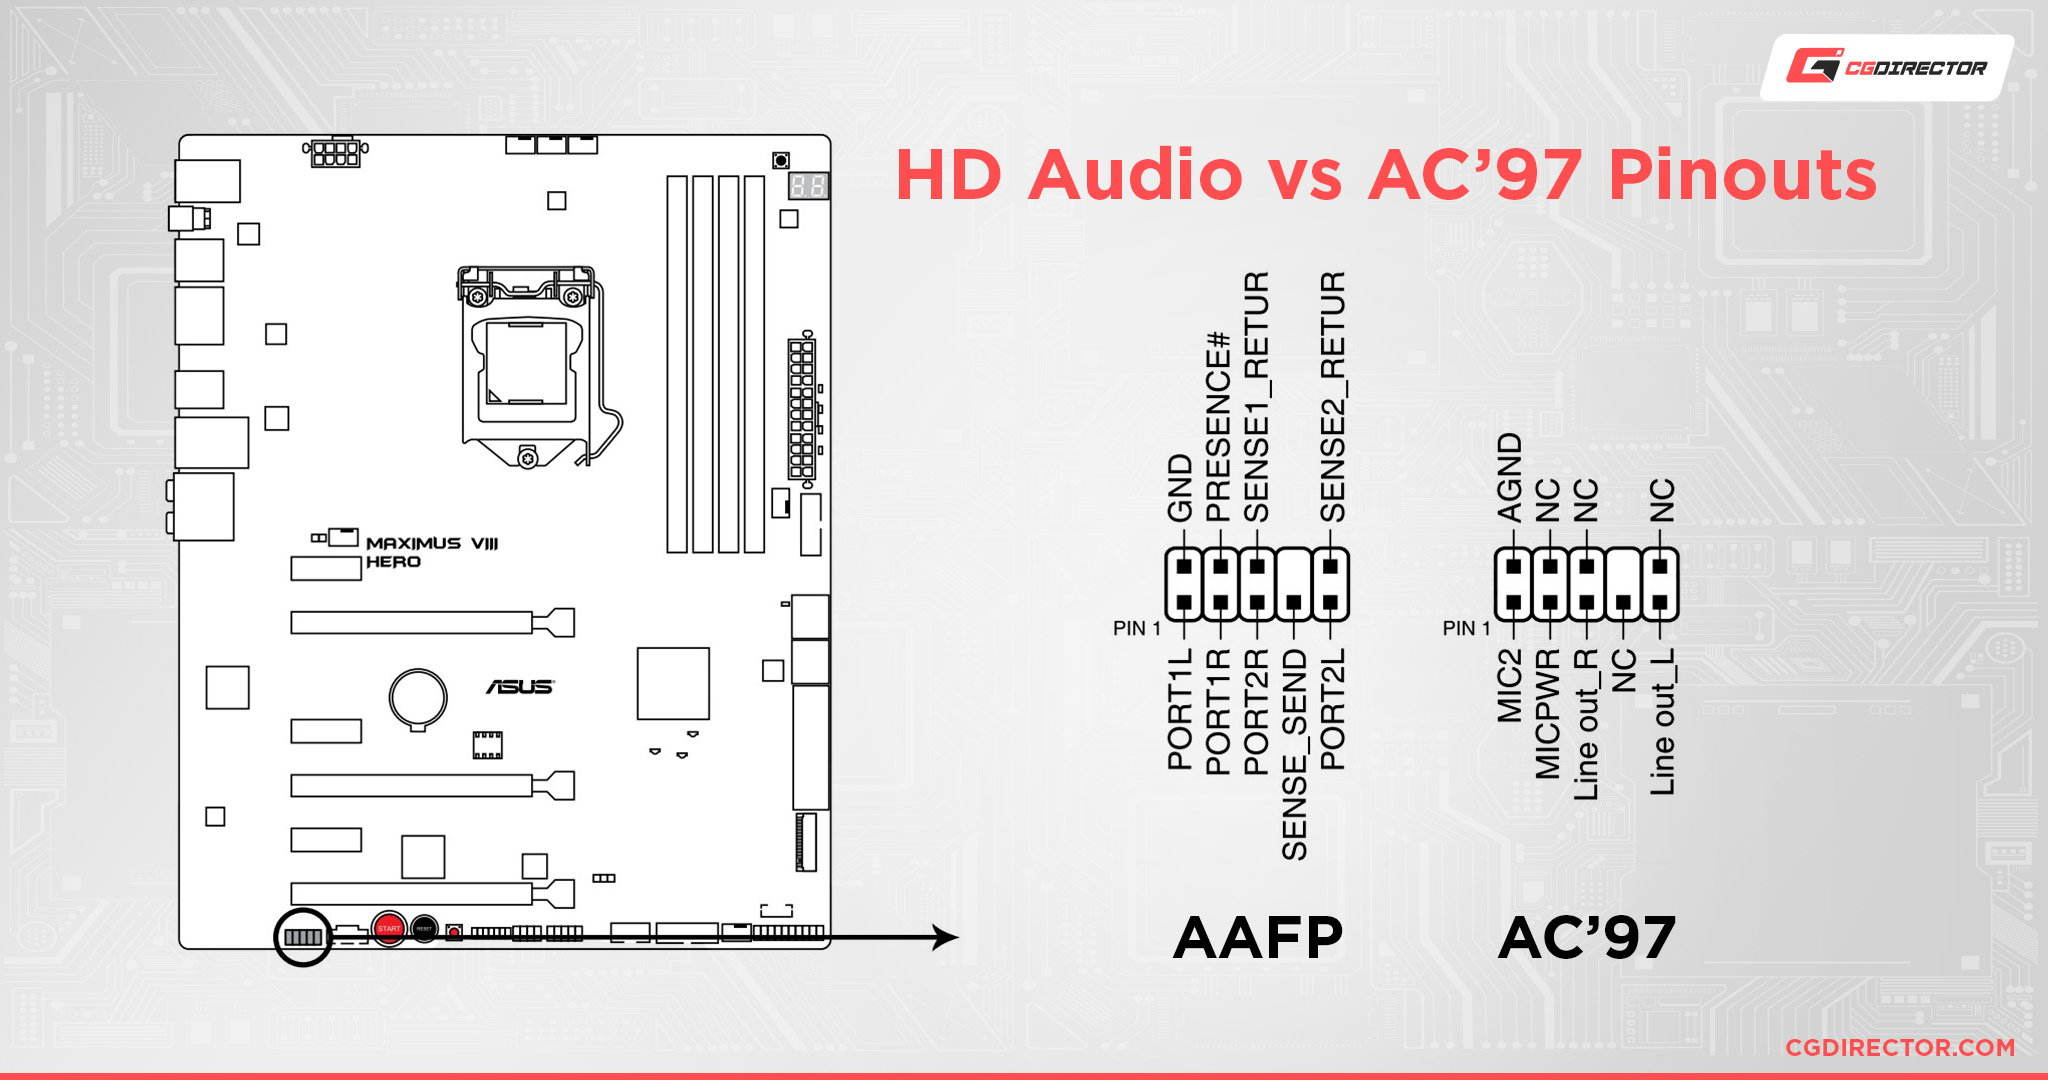
For instance, plugging an HD Audio Connector into an AC’97 AAFP socket might cause the rear audio to stop working.
This is because, unlike the AC’97, the HD Audio Connector has different front and rear outputs on the audio codec. It also has jack detection capabilities that allow it to sense whether or not the jack is vacant.
On the other hand, plugging an AC’97 header into an HD Audio socket could cause certain detection issues as AC’97 uses pins that loop back audio from the front panel to the rear jacks.
These pins are also responsible for disconnecting the rear audio connections when a device is plugged into the front panel.
Which One’s Better?
HD Audio was meant to replace legacy AC’97 audio and, therefore, has more advantages when compared to the latter.
For one, the HD Audio connector has a 30-bit resolution, in addition to a higher sampling rate.
The AC’97 connector, on the other hand, provides an audio output at 20-bit stereo resolution, with a lower sampling rate.
So, if your case has both, there’s really no reason to pick AC’97 over its more feature-rich successor.
Front Audio vs. Rear Audio vs. Dedicated Sound Card: What’s Best For You?
The answer is…. it depends. If you occasionally use headphones and aren’t concerned with the audio quality, you can choose the front audio jacks or even the headphone jack on your monitor.
The front panel audio ports don’t use shielded cables and often share a ground cable with the front panel USB connectors. This makes them prone to signal interference and, thus, can cause a minimal buzzing sound/static noise when used.
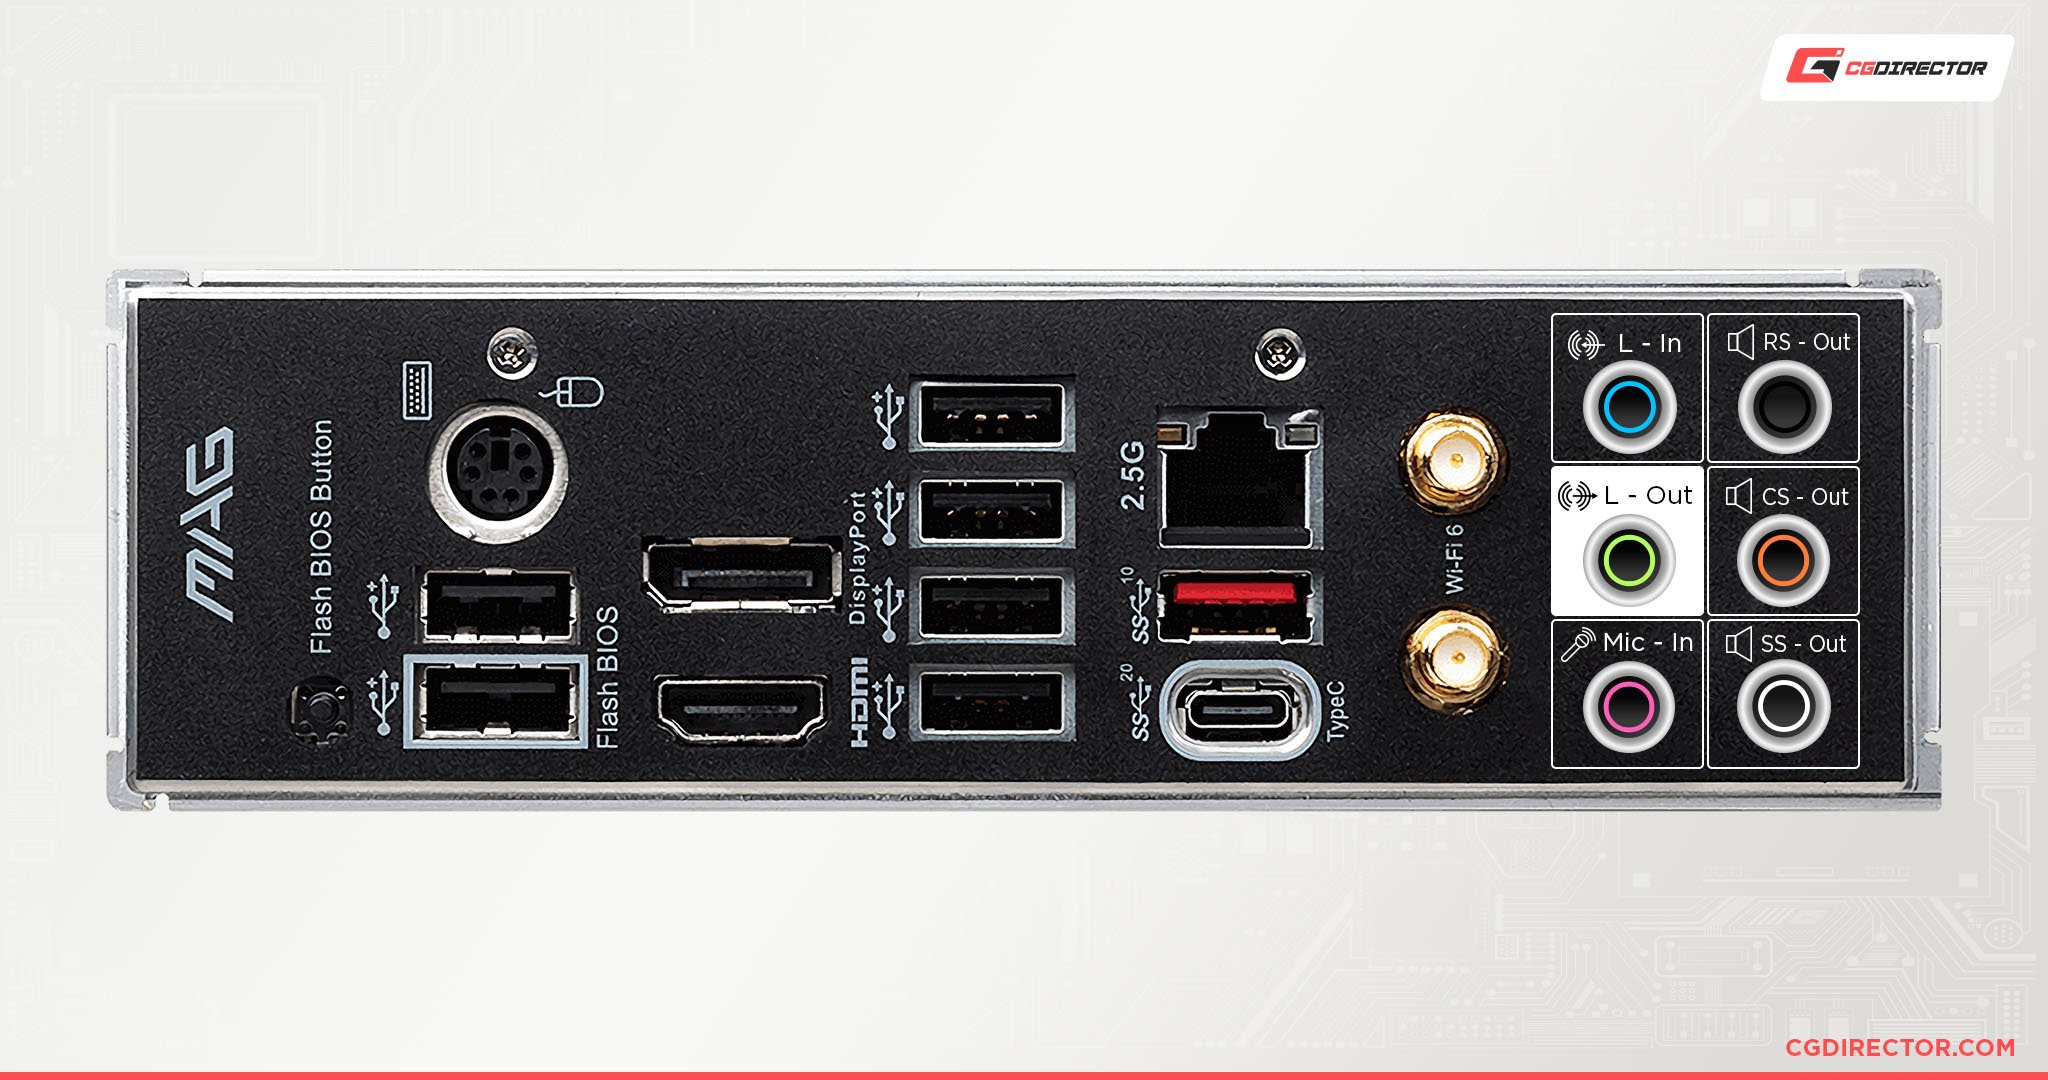
For most users, it’s best to use the rear audio ports as they offer better quality audio, with support for a stereo speaker setup, but it’s not as convenient as you’ll need a longer cable for headphones, especially.
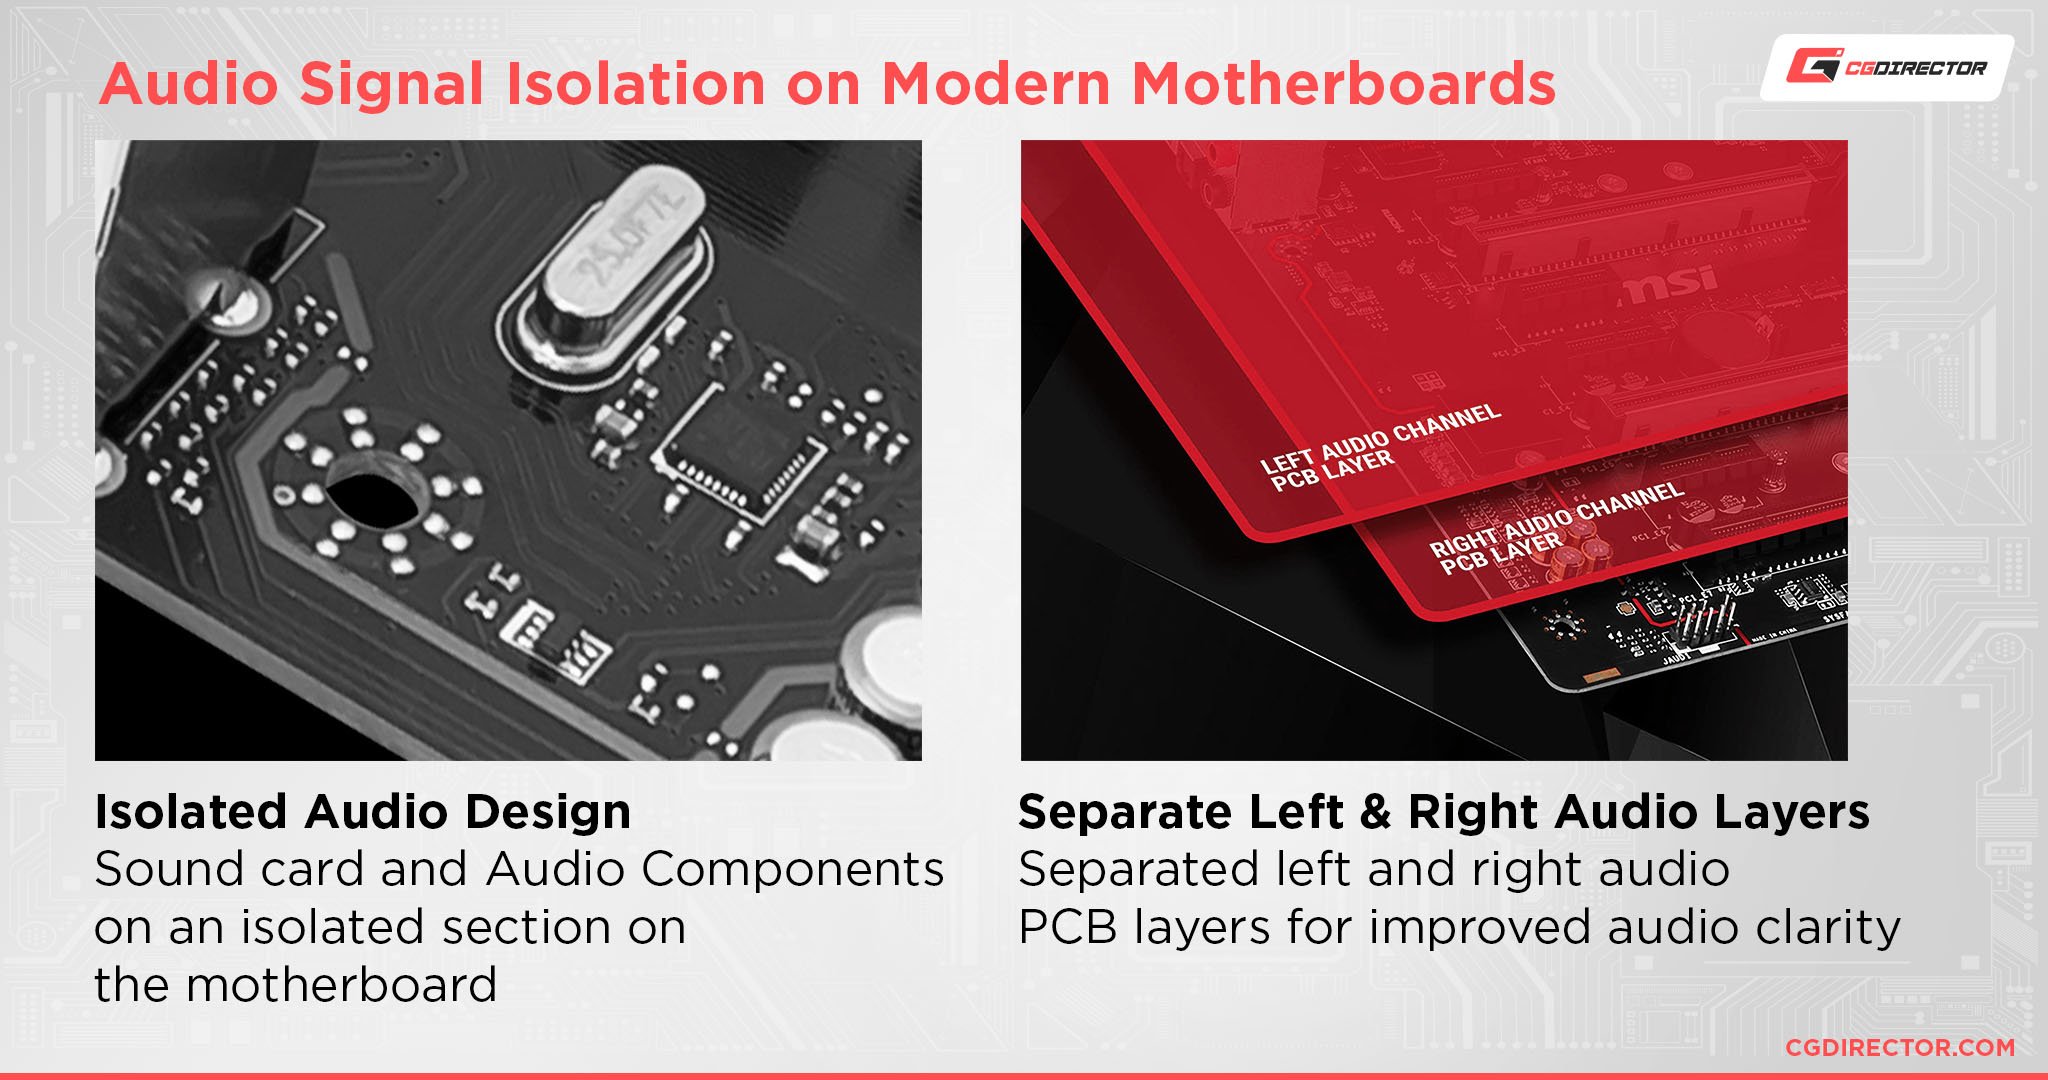
Although sound cards were more popular in the old days, the onboard sound quality has become much better thanks to shielding components that eliminate the signal interference for rear audio ports.
So, you aren’t likely to observe a step up in audio quality even if you plug in a dedicated sound card.
For audiophiles and content creators, it’s recommended to invest in external DAC/AMP setups as they provide better quality audio with the added benefit of being versatile and not requiring any drivers.
FAQ
How Do I Remove the Crackling Sound That Appears When I Use the Headphone Jack?
The crackling could be due to loose connections in the AAFP socket.
Double-check them to ensure everything is alright. Otherwise, as mentioned above, it could be due to electromagnetic interference caused by poor shielding.
As a workaround, you can forgo the front panel altogether and plug your headphones into the rear jacks. You can buy a 3.5mm extender cable if your cable is too short.
If the crackling still doesn’t stop, you can use the following software fixes:
- Right-click on the volume icon on the Taskbar and click on Sounds.
- Click on the Playback tab. You will see a list of playback devices; one of these could be the culprit behind the crackling/buzzing. Right-click on the devices and click on Disable. Keep doing so until only one playback device remains enabled.
- Next, right-click on it and select Properties.
- Click on the Advanced tab and select 16-bit, 44100 Hz (CD Quality) from the drop-down menu. Also, uncheck all options below this setting.
- Lastly, click on the Spatial sound tab and ensure it is toggled Off.
How Do I Set up a Surround Sound System?
Your motherboard should have six rear audio connections. These are color-coded, and you must plug the connectors in the correct ports to get the best audio experience from your front, back, and side speakers.
This article covers audio jacks in great detail so make sure to give it a read!
Over To You
This article has, hopefully, given you all the information you need regarding AAFP connectors and the way in which they should be used.
If you have any questions, feel free to comment down below! And, in case you need any help, head over to our forum and ask away!
![Where Do You Connect PC Fan PWM Cables To? [Beginner’s Guide]](https://www.cgdirector.com/wp-content/uploads/media/2023/12/Where-Do-PWM-Cables-Go-Beginners-Guide-Twitter-1-594x335.jpg "Where Do You Connect PC Fan PWM Cables To? [Beginner’s Guide]")
![How To Connect Front Panel Cables To Your Motherboard [Guide]](https://www.cgdirector.com/wp-content/uploads/media/2024/01/How-To-Connect-Front-Panel-Cables-To-Your-Motherboard-Twitter-copy-1-594x335.jpg "How To Connect Front Panel Cables To Your Motherboard [Guide]")


0 Comments