 by
by 
TABLE OF CONTENTS
Ever wondered what the funky LED numbers on your ASRock motherboard mean?
They flash a couple of times when you boot your PC, but what exactly do they do?
Well, if you’ve ever had the misfortune of dealing with some sort of hardware issue with one of these motherboards, then I’m sure you understand what they’re for.
And if not, don’t worry, ’cause I’ll be focusing on them in this article to give you all the info you need to deal with these helpful little codes if you ever find yourself staring at one 😉
What Are Motherboard Error/Post/Beep Codes?
Motherboard error codes, also known as POST (Power-On Self-Test) codes, are alphanumeric, two-digit messages displayed by a computer’s motherboard to indicate hardware or configuration issues.

Basically, these codes are tiny red numbers/letters you can see flashing on a small LED screen somewhere on the motherboard when a problem is detected.
Compared to throwing stuff at the wall and hoping for the best, POST codes can help you quickly diagnose and resolve problems without professional assistance.
Beep codes, on the other hand, are audible signals emitted by the motherboard’s speaker to indicate specific hardware issues. These codes may consist of a series of long and short beeps or a combination of both.
Keep in mind that there really isn’t much of a difference between POST codes and beep codes.
People generally refer to LED codes as POST or error codes and any audible codes as beep codes. Basically, All beep codes are POST codes, but not all POST codes are beep codes.
What Are ASRock Dr. Debug Codes?
ASRock Dr. Debug codes are POST codes used by ASRock motherboards. That’s it.
It’s their fancy name for error codes basically. Nothing special beyond that. These codes are usually displayed on a small LED screen located on the motherboard.
And using Dr. Debug codes is simple. When your motherboard encounters an issue during the boot process, it will display a specific code on the Dr. Debug LED screen.
Simply refer to a list of ASRock Dr. Debug codes, and you can determine the cause of the issue and figure out how to fix it.
Where Do I Find All the ASRock Dr. Debug Codes for My Motherboard?
Simple. The manual that came with your motherboard. All the codes you want and their meanings can usually be found toward the end of most manuals—the front legend should tell you where it is.
If you no longer have access to the manual, however, you can also find this information on the ASRock website.
Simply visit the support page for your specific motherboard model by searching it up, and then download the user manual. You’ll get a PDF of the complete manual and it’ll have the Dr. Debug codes you need.
In addition, many online forums and communities dedicated to PC building and troubleshooting can provide valuable information and resources on Dr. Debug codes. Our own forum, for example, is a terrific place to get help with any sort of technical issue you might be facing!
I also recommend taking a look at r/buildapc or the ASRock forums as well!
The Most Common ASRock Dr. Debug Codes and What They Mean
00 – Not Used
Code 00 is a tricky one. Don’t be confused by the “not used” label, that doesn’t mean that this code isn’t important or not used. Nonsensical, I know, but it is what it is.
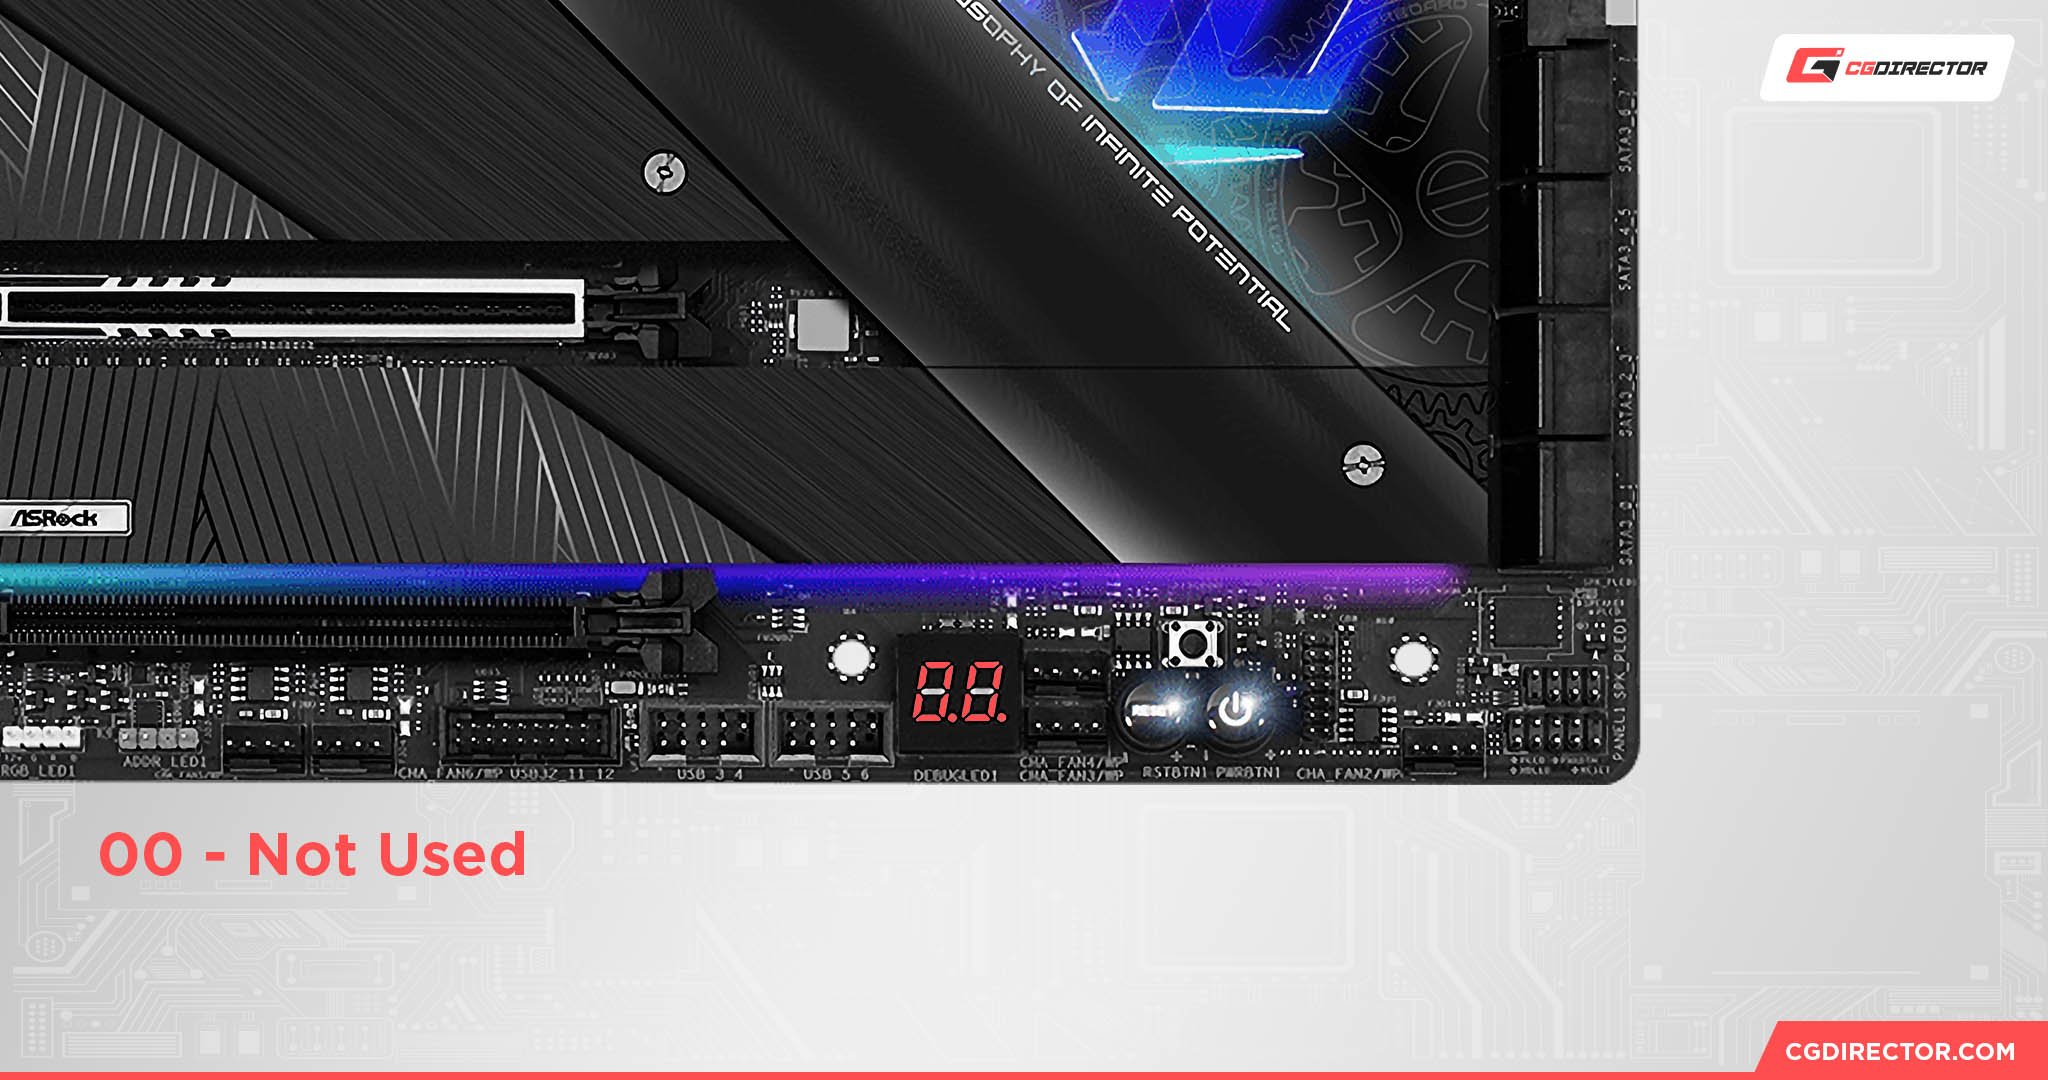
Regardless, this code generally indicates that your ASRock motherboard is not receiving power correctly, or there is a problem with the CPU.
Here are some steps to take to troubleshoot this code:
- Check the power connections: Make sure all power cables are correctly connected to the motherboard, including the 24-pin ATX power connector and the additional 4 or 8-pin CPU power connector. If any cables look loose or broken, reattach/replace them, and restart your system.
- Check the CPU: Start by reseating your CPU and seeing if there are any physical defects with either the CPU or CPU socket on the motherboard. Make sure no pins are bent and that there is no debris present. Ideally, check the CPU on a different motherboard as well, if you have one available to you.
- Reset the BIOS: If neither of those options help, try resetting the BIOS by removing the CMOS battery for a few minutes, then reinstalling it. This will restore the BIOS to its default settings, which may resolve the 00 error code.
- RMA/Professional Check-Up: If everything fails, then RMA-ing the motherboard or bringing it to a professional are the only options left sadly.
50 – 55 – Memory Initialization Errors
Codes 50 through 55 indicate that your motherboard has run into some problem with the RAM you have installed.

This can be caused by a variety of factors such as improperly seated RAM, incompatible modules, or just plain ol’ faulty RAM.
Here are some steps to take to troubleshoot these codes:
- Check the RAM compatibility: Take a look at your motherboard’s QVL list to ensure you’re using compatible RAM modules. You can find any motherboard’s QVL info by searching up the model, going into the support tab, and then selecting the appropriate “Memory QVL” option.
- Inspect the RAM modules: Carefully remove the RAM modules from their slots and check for any visible damage or dust buildup—especially on the gold contact pads. Clean the modules and their contacts gently with a soft cloth or a can of compressed air and then reattach them to see if that fixes it.
- Test each RAM module individually: If the above doesn’t work, try inserting a single module into the first memory slot and then boot your system. If it boots successfully, repeat the process with the remaining modules, one at a time. If a specific module causes the error code to reappear, that module may be faulty.
- Test the motherboard’s memory slots: If all RAM modules work by themselves, test each memory slot on the motherboard next by inserting a known working module into each slot and booting up your PC. If a specific slot causes the error code, this may indicate a malfunctioning slot, and you may need to consider RMA-ing the motherboard—there’s usually no point in trying to fix an issue like this by yourself or by taking it to a professional because it’s too much effort.
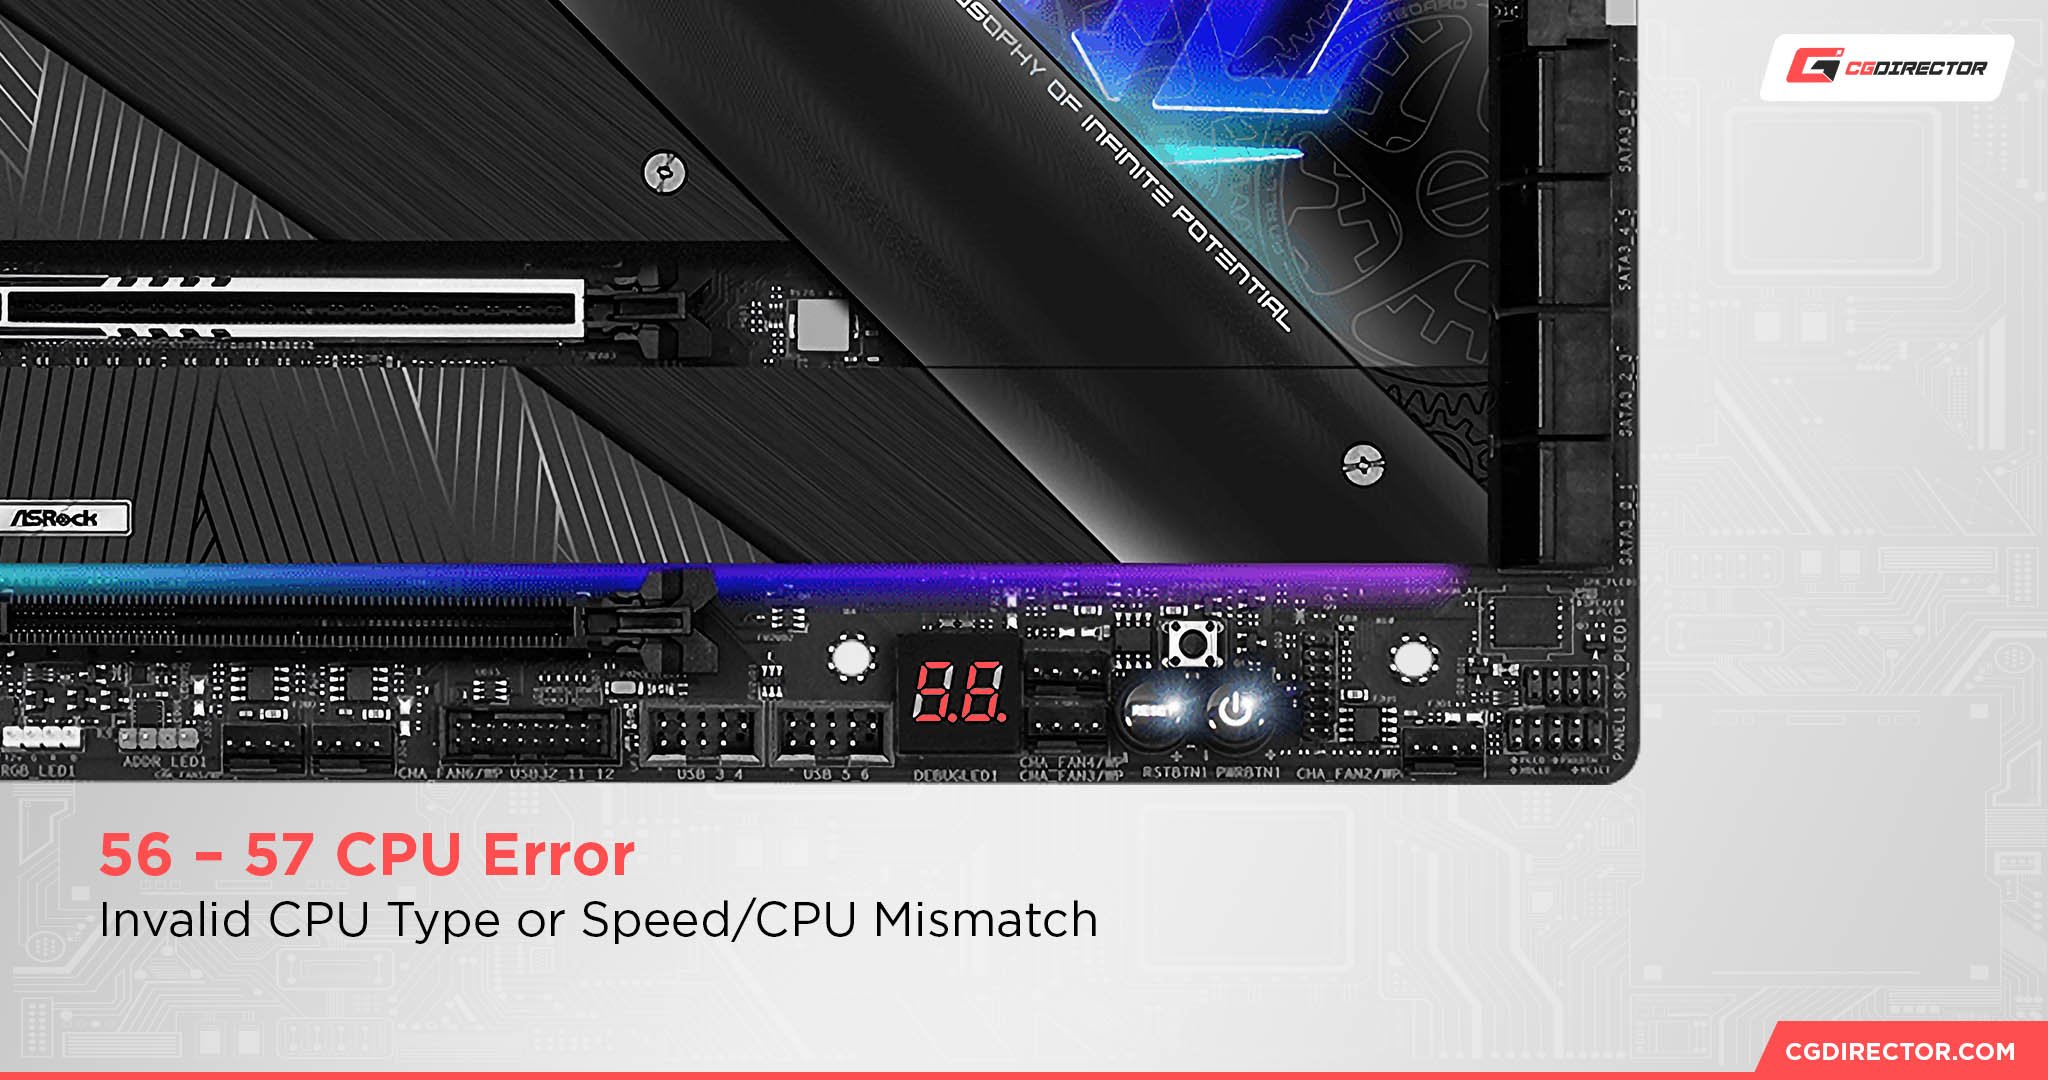
56 – 57 – Invalid CPU Type or Speed/CPU Mismatch
Codes 56 and 57 indicate that there is an issue with your system’s CPU. This can be caused by an incompatible or improperly installed CPU, an incorrect BIOS configuration, or a faulty CPU.
Here are some steps to take to troubleshoot these codes:
- Check the CPU compatibility: As with RAM, using an incompatible CPU can cause these error codes. Consult your motherboard’s CPU support list (Usually in the place as the QVL list).
- Follow the steps outlined for code 00: The troubleshooting steps outlined above for code 00 are what you should follow for this error as well.
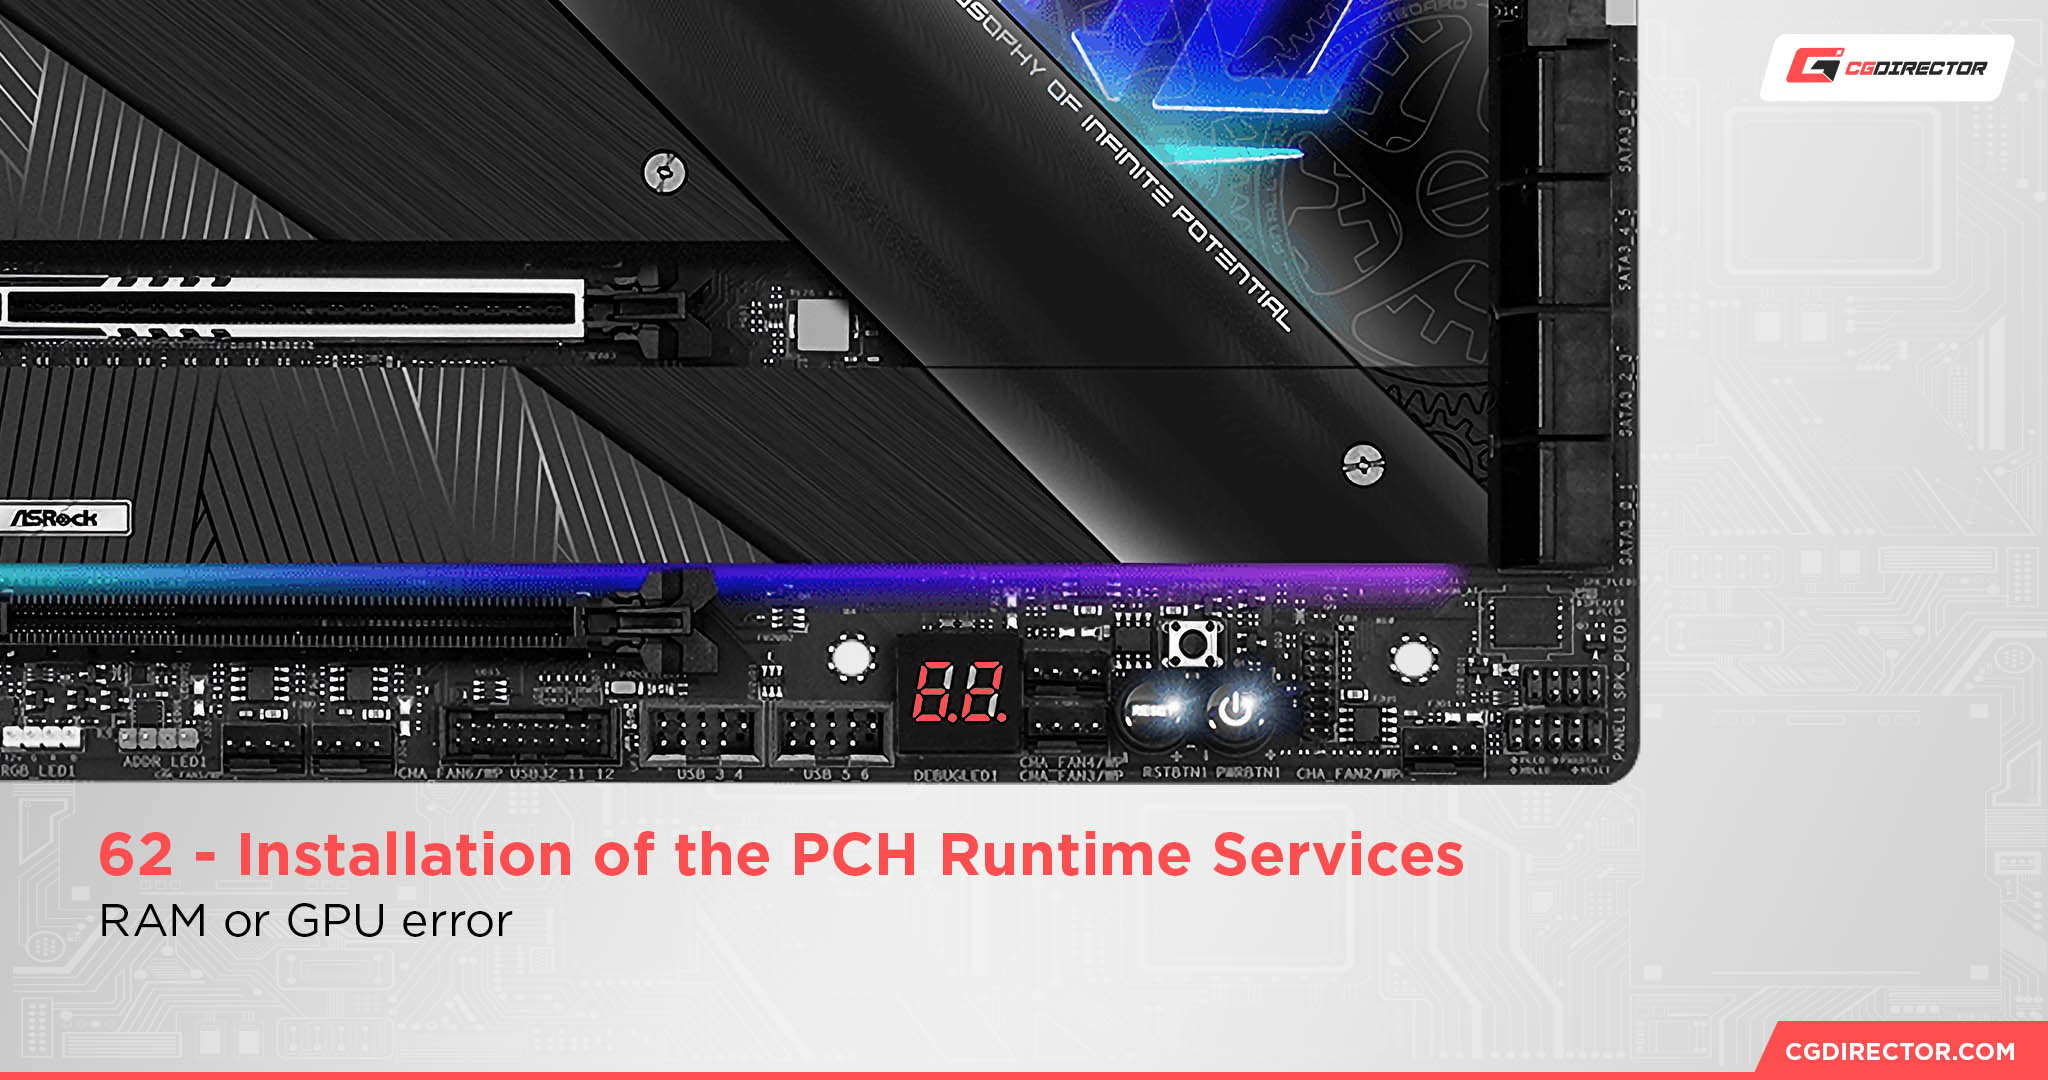
62 – Installation of the PCH Runtime Services
Code 62 indicates a problem with the BIOS, RAM, or GPU. You just have to kinda fiddle with it a bit to figure this one out.
Here are some steps to take to troubleshoot this code:
- Reset the BIOS: As mentioned earlier, resetting the BIOS can fix many issues. Remove the CMOS battery for a few minutes, then reinstall it to reset the BIOS to its default settings.
- Update the BIOS: If resetting the BIOS doesn’t resolve the issue, try updating your motherboard’s BIOS to the latest version.
- Inspect the motherboard: If the issue persists, check the motherboard for any signs of damage or debris, and clean it gently with a soft cloth or a can of compressed air.
- Follow the steps outlined for codes 50 – 55: This error can be caused by faulty RAM as well, so you should follow the steps allowed for the RAM errors just to make sure it’s not the RAM.
- Check with no/different GPU: The last thing you can do is check the GPU. You can do this by either switching it out with a different GPU or using the integrated GPU in your CPU—if you have a CPU that has one. Make sure that you switch the monitor cable from your GPU to the one in your motherboard if you use the iGPU!
- Seek professional help: If none of these steps help, the only options left are to consult a professional technician or consider RMA-ing the motherboard.
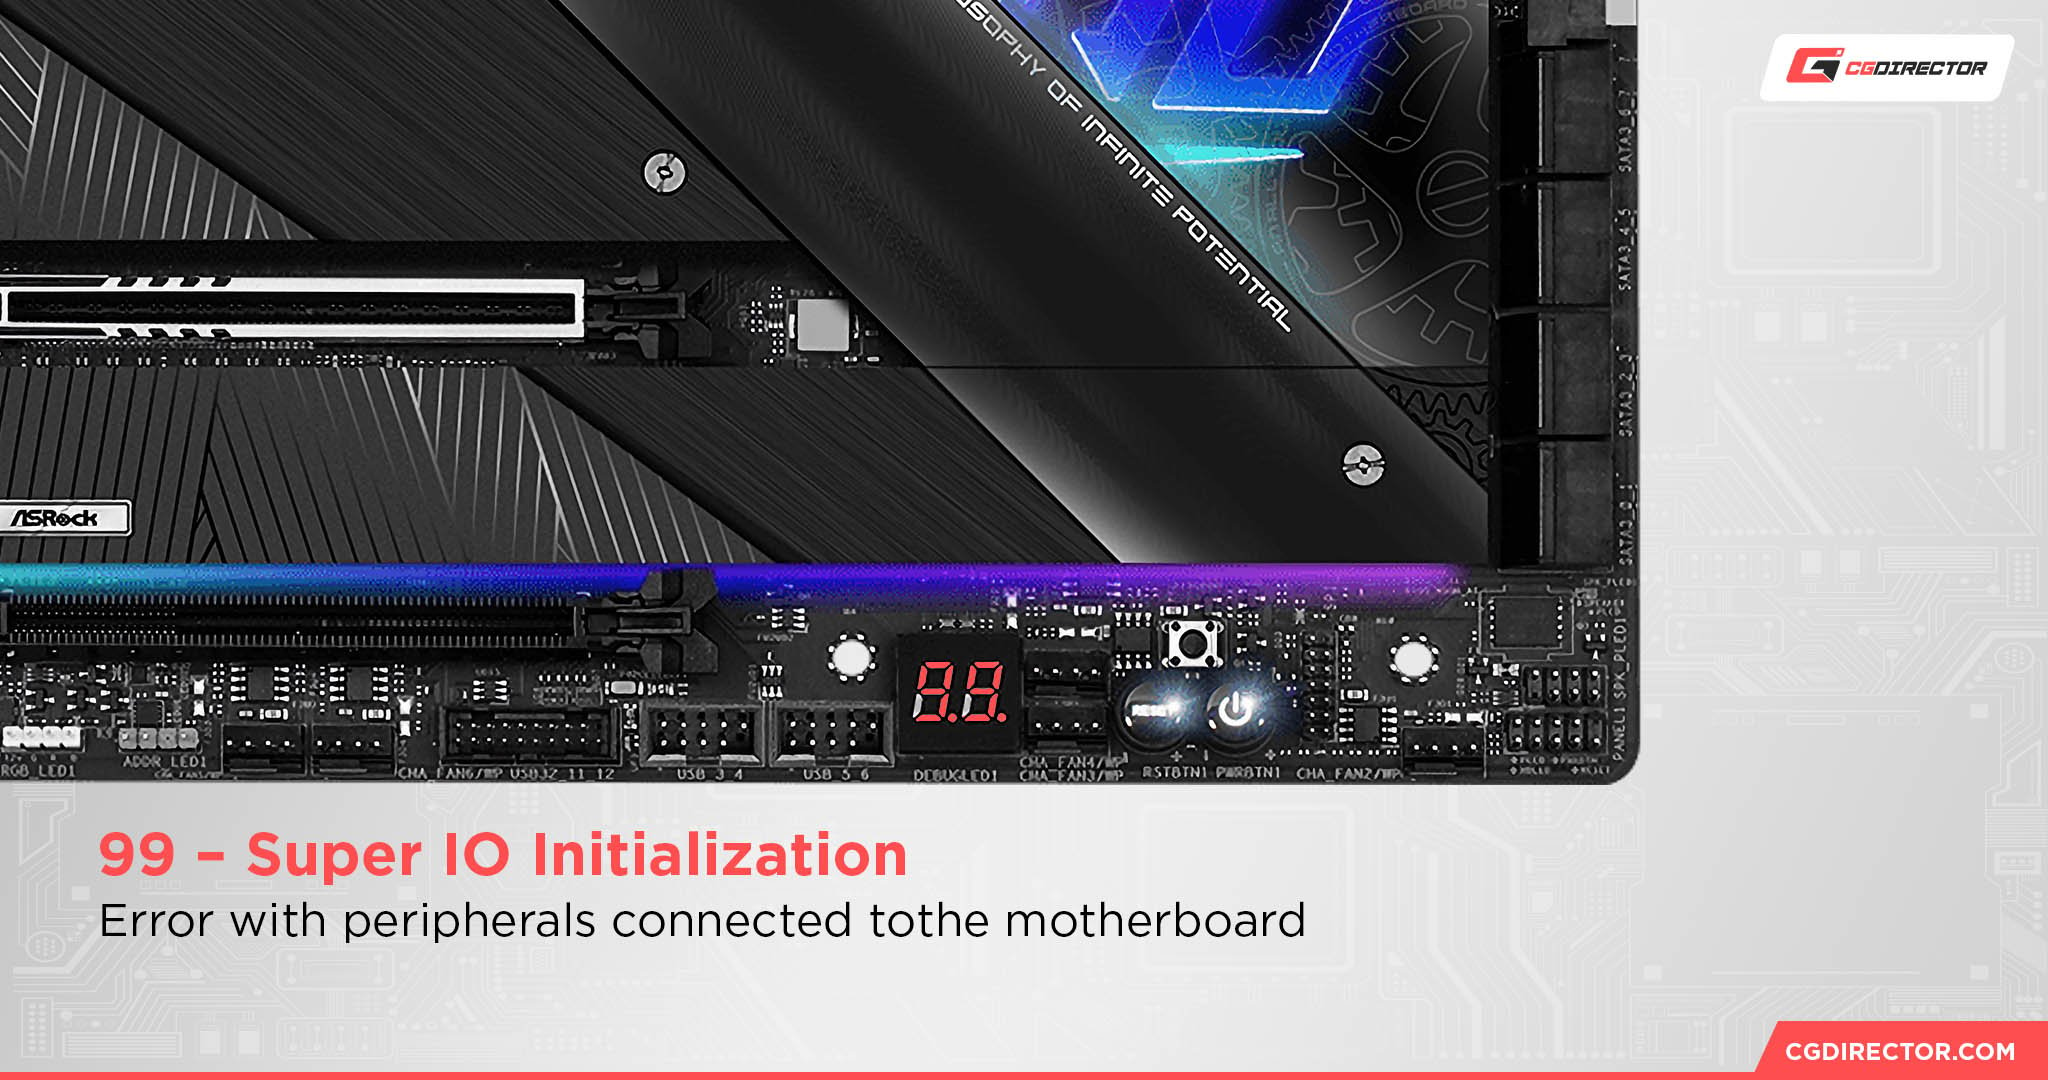
99 – Super IO Initialization
Code 99 generally means that there’s a problem with one or more of the external things plugged into the PC. Stuff like keyboards and mice, USBs, etc.
Here are some steps to take to troubleshoot this code:
- Disconnect all peripherals: Unplug all peripherals connected to your system and then restart ir. If the error disappears, reconnect the peripherals one by one to determine which one is the culprit.
- Inspect the motherboard: If the error persists, check the motherboard for any signs of damage or debris, and clean it gently with a soft cloth or a can of compressed air. Not all that likely to solve the issue, but it’s always better to do the easy stuff first before taking out a sledgehammer.
- Reset the BIOS: Again, resetting the BIOS can resolve many issues. Remove the CMOS battery for a few minutes, then reinstall it to reset the BIOS to its default settings.
- If first boot, connect a keyboard: If you’re turning a system on for the first time, and you don’t have a keyboard attached, sometimes the computer can throw a hissy fit. So connect a keyboard and see if that solves it.
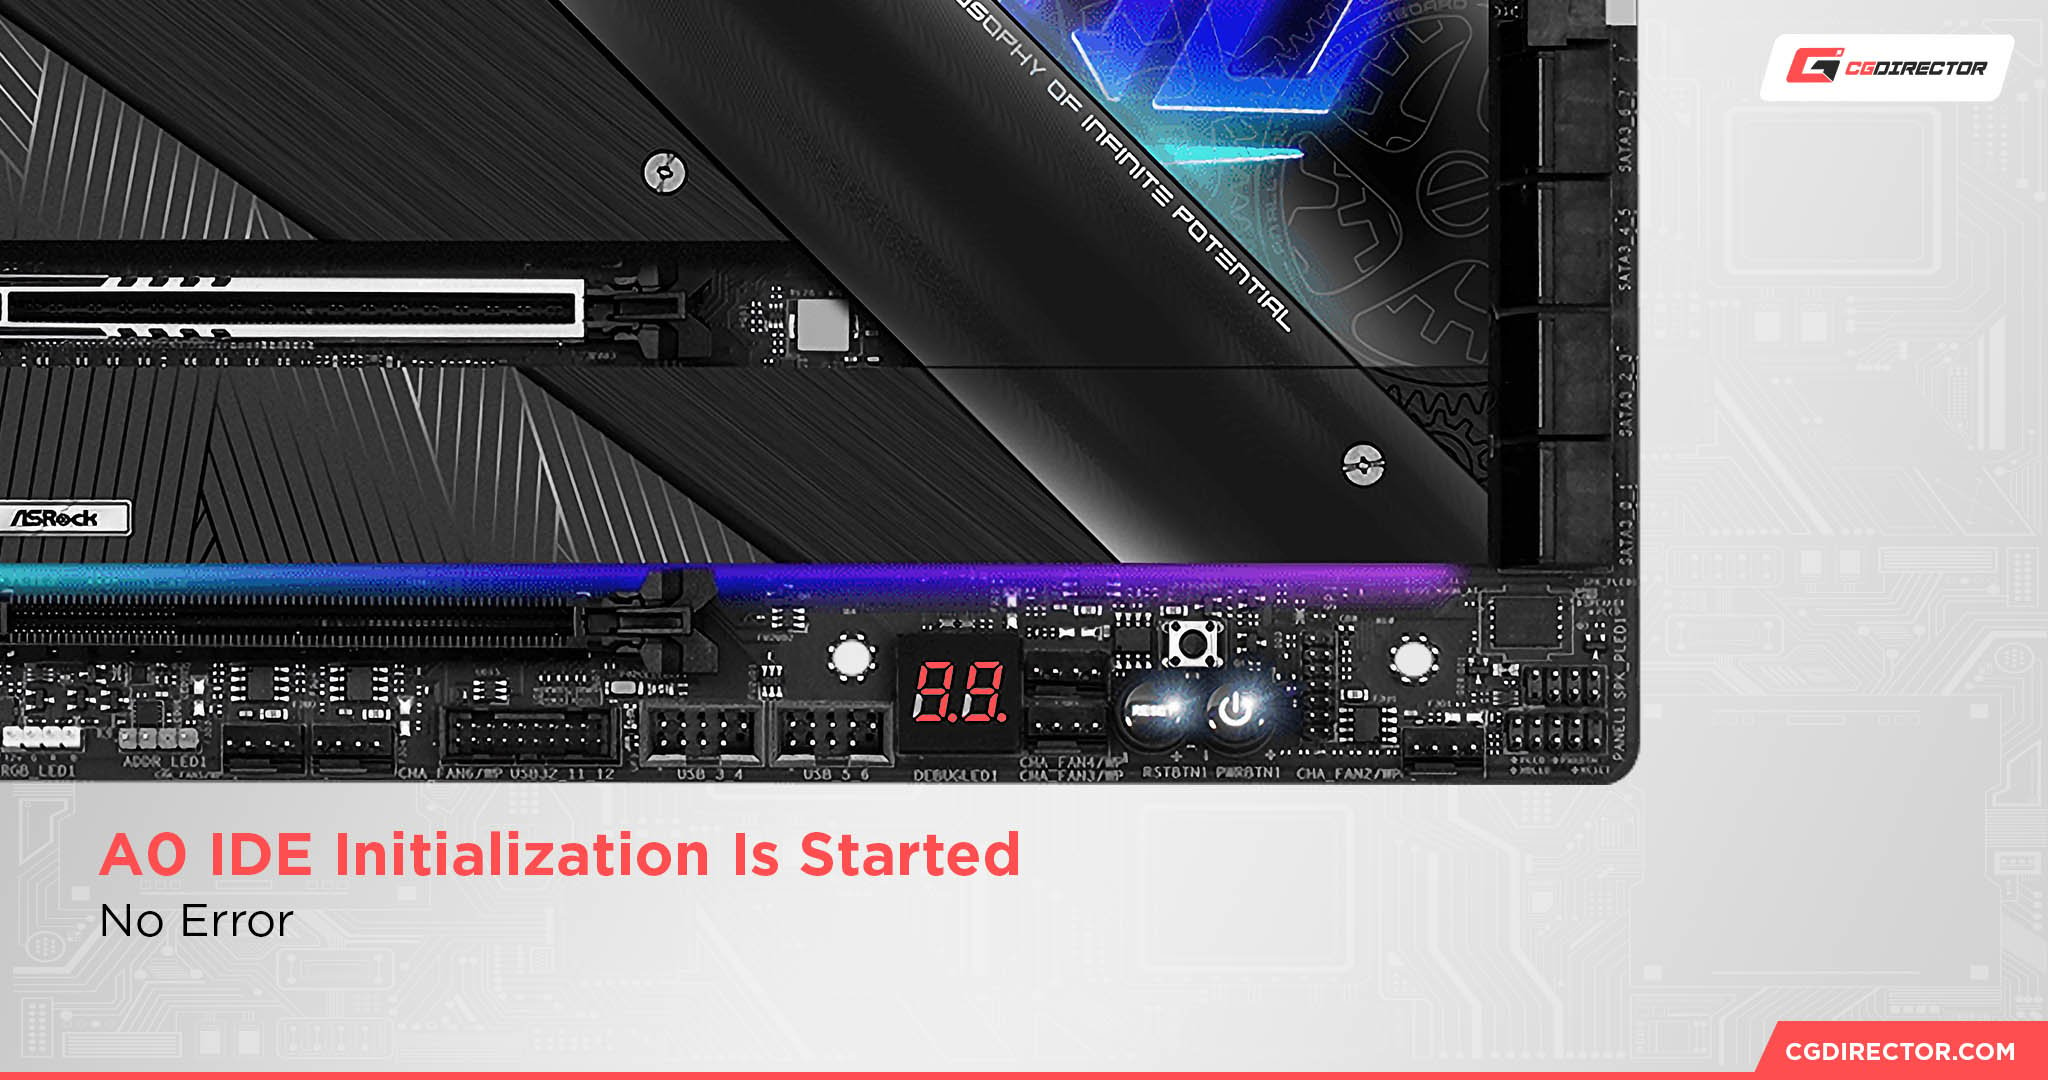
A0 – IDE Initialization Is Started
The A0 error code is one of the “good” ones. This is typically a normal status code that indicates the system is initializing its storage devices.
However, if your system hangs or fails to boot with this code displayed, it might indicate an issue with your storage drives.
Here are some steps to take to troubleshoot this code:
- Check the storage device connections: Ensure all cables connecting your storage devices (such as hard drives and SSDs) to the motherboard are properly attached. Loose, disconnected, shoddy cables can cause the system to hang during the initialization process.
- Test the storage devices: If the connections are secure, try disconnecting all storage devices and booting your system with a single device connected. If your system boots successfully, reconnect the remaining devices one at a time to determine which device is causing the issue.
- Update the BIOS: If the issue persists, try updating your motherboard’s BIOS to the latest version.
- Reset the BIOS: I know I probably sound like a broken clock at this point, but resetting the BIOS really does help with a lot of issues. Pull out the CMOS battery and then wait for a few minutes before putting it back in.
A2 – IDE Detect
Code A2 indicates that your motherboard is currently detecting IDE devices connected to the system, such as hard drives and SSDs.

If your system seems to be stuck on this code, it could be due to having too many storage drives. Motherboards can get a little confused sometimes on which drive to boot into.
Here are some steps to take to troubleshoot this code:
- Use only the OS drive: If you have multiple storage drives, use only the one with your OS in it, or the one that you plan on putting your OS in. After you boot into your OS, your BIOS should’ve figured it out by that point, but if not, you can also manually change your boot priority in the BIOS.
- Follow the steps outlined for code A0: If the above doesn’t work, then I’d suggest following the troubleshooting steps for code A0 as that can also help.
FAQ
Do All Motherboards Have Beep Codes?
Yes, most motherboards come with beep codes—unless you’re using some wildly esoteric one.
Be careful though, because most motherboards these days don’t have any onboard speakers to send out the beeps. Meaning that you need to have plugged a speaker or headphones into the motherboard to hear any beep codes.
Do All ASRock Motherboards Have Dr. Debug LED Codes?
While pretty much all motherboards have beep codes, not all ASRock motherboards come with Dr. Debug LED codes.
Dr. Debug LED codes are sadly only available on select ASRock motherboards, specifically those that cater to enthusiasts and gamers.
These motherboards usually come with a higher price tag and offer more advanced features compared to their mainstream counterparts.
It’s unfortunate because it doesn’t cost that much extra to include a tiny LED screen on the motherboard, but it still hasn’t become a standard thing on all motherboards.
How Do I Disable the Dr. Debug LED Codes on an ASRock Motherboard?
As always, I highly, highly suggest that you don’t mess with the LED codes. They’re annoying right up until you’re slapped with an error and you can’t figure it out.
So if you really wanna make them less obtrusive, I’d suggest getting some opaque tape and covering them up.
If you just don’t care though and are willing to deal with the potential consequences, you can usually turn them off in the BIOS under the “Advance” section.
What Does It Mean When a Motherboard Doesn’t Beep?
If your motherboard doesn’t beep during the POST process, it’s usually because of one of these two things.
It could be functioning perfectly fine and didn’t have any boot codes to give. Or it could be that you simply haven’t plugged in any speakers/headphones to hear the beeps.
Over to You
Have any other questions about PC components? Feel free to ask us in the comments or our forum!
![Where Do You Connect PC Fan PWM Cables To? [Beginner’s Guide]](https://www.cgdirector.com/wp-content/uploads/media/2023/12/Where-Do-PWM-Cables-Go-Beginners-Guide-Twitter-1-594x335.jpg "Where Do You Connect PC Fan PWM Cables To? [Beginner’s Guide]")
![How To Connect Front Panel Cables To Your Motherboard [Guide]](https://www.cgdirector.com/wp-content/uploads/media/2024/01/How-To-Connect-Front-Panel-Cables-To-Your-Motherboard-Twitter-copy-1-594x335.jpg "How To Connect Front Panel Cables To Your Motherboard [Guide]")


0 Comments