 by
by  USB Ports That Are Not Working On Your PC")
TABLE OF CONTENTS
USB ports, or Universal Serial Bus ports, are one of the most used (and essential) parts of your PC; they allow you to plug in all your necessary peripherals, such as your mouse and keyboard, and also carry out tasks like transferring files without any hassle.
That’s why it can be utterly devastating if your front USB ports suddenly start playing up.
But don’t worry — usually, the problem can be solved in a few simple steps. Below, we’ll explain what causes a front USB port to stop working, how to effectively troubleshoot the problem, and also several tried and tested solutions.
Let’s dive in!
Why Has My Front USB Port Stopped Working?
It can be totally distressing when your front USB port stops working on your PC. However, this doesn’t immediately indicate that the port is physically damaged or that there’s a hardware defect.
Usually, the underlying cause is pretty easy to fix and is actually to do with corrupt drivers, your system settings, or the connection itself (i.e. cables aren’t plugged in properly, or a cable is faulty and just needs replacing).
How to Fix Front USB Ports That Are Not Working On PC: Step-by-Step Guide
Before we delve any further, it’s worth restarting your PC if you haven’t already.
Yes, it sounds simple, but you’ll be surprised how often a quick restart can fix PC-related problems, especially when it comes to faulty front USB ports!
After the restart, if your front USB ports still aren’t working, the first step is to troubleshoot the problem.
Step 1. Troubleshooting the Front USB Ports
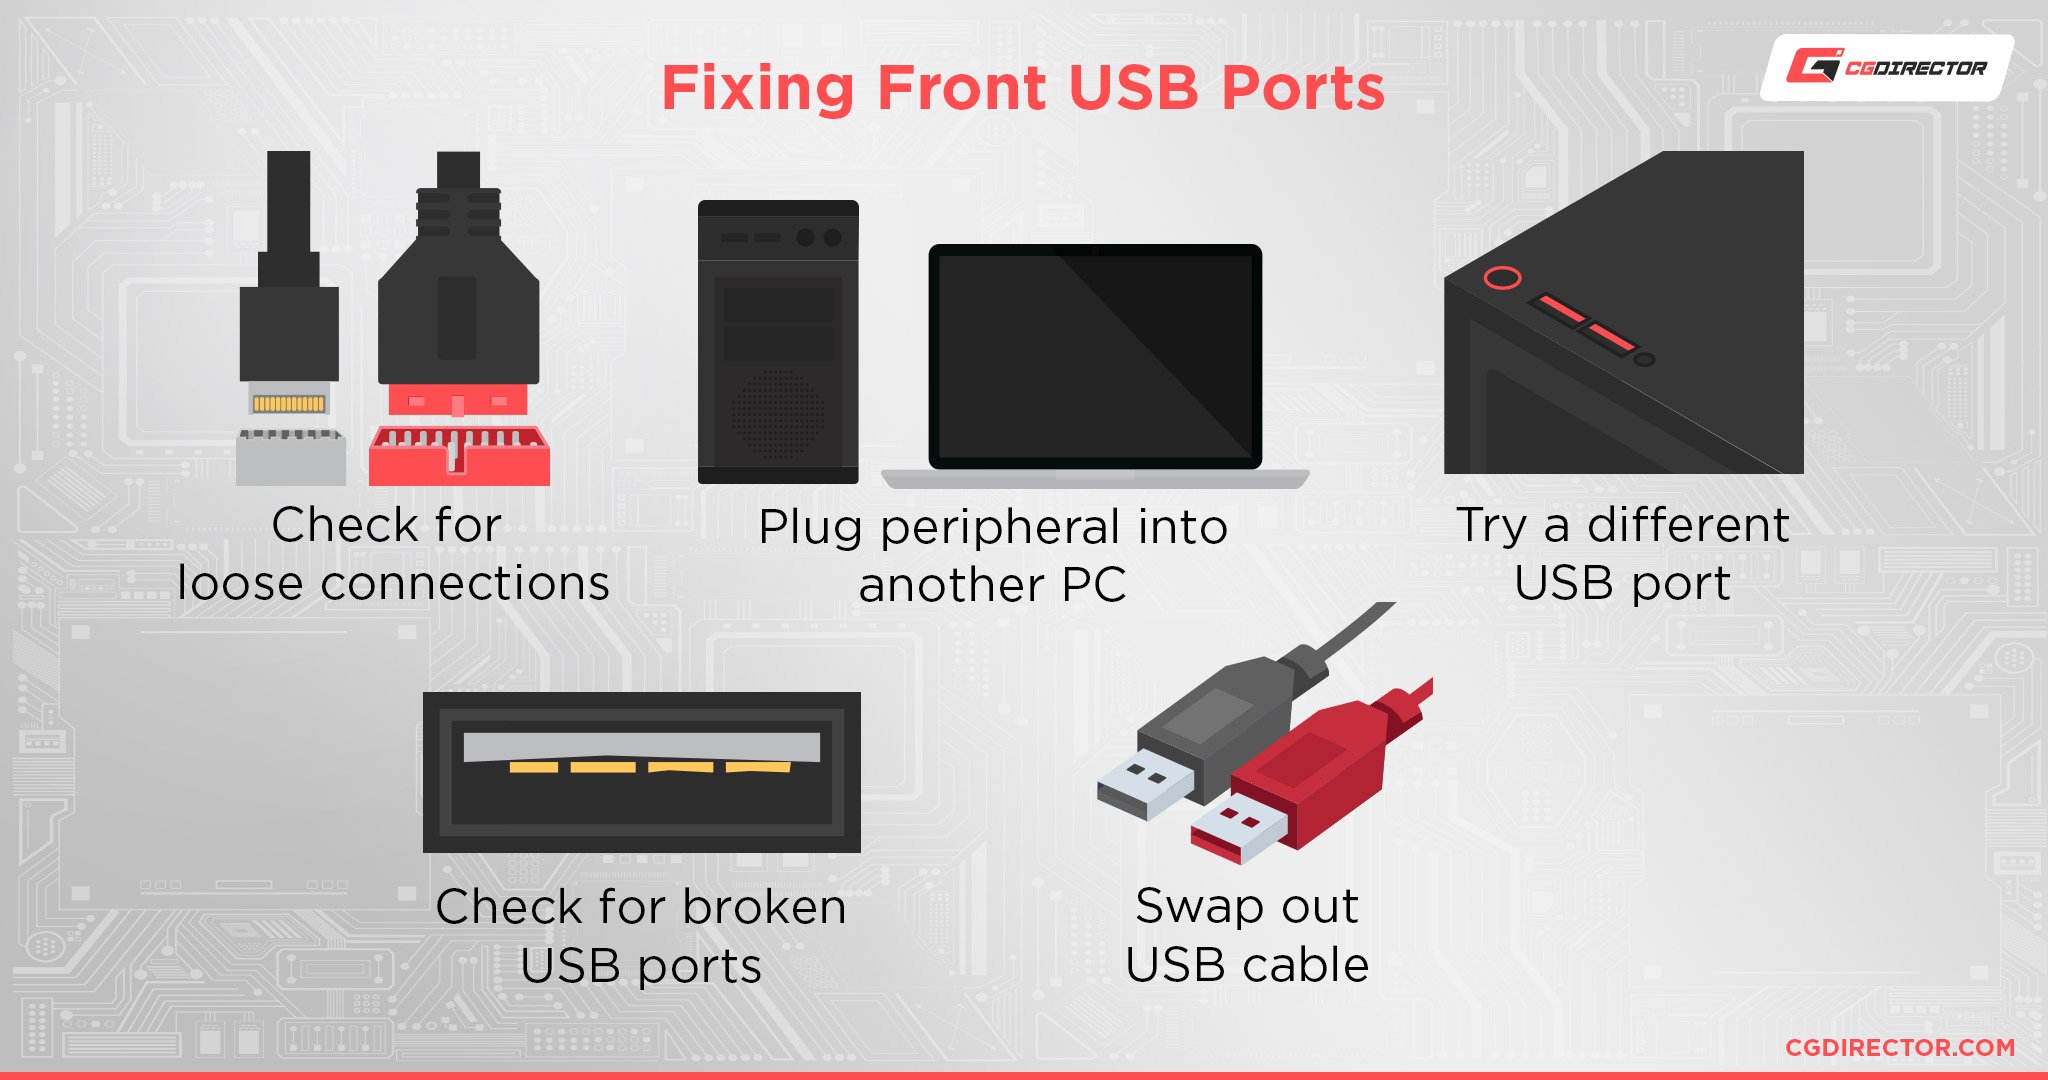
You can troubleshoot to identify the root cause — whether it’s a broken USB port, system setting, or broken peripheral — in a few simple ways.
Check for Loose Connections
Ensure that the peripheral’s cable to the USB port is properly connected; it shouldn’t feel loose or fall out if you gently pull on it.
You should also check the cables that connect to the motherboard USB headers, since they may have come loose over time. You’ll need to open up your PC for this, so only proceed if you’re familiar with hardware and it doesn’t break your warranty.
Swap Out the USB Cable
The USB cable itself may be faulty — examine the cable and check for signs of damage, such as kinks, tears, or bends.
Cable damage isn’t always visible to the naked eye, so you’ll also want to try swapping out the USB cable with an alternative and see if it fixes the issue.
Plug Peripheral into Another PC
This is a quick and simple way to determine whether there’s a problem with your actual peripheral.
If it doesn’t work on another PC, then it likely has a fault. You’ll need to check troubleshooting steps for the peripheral itself or replace it entirely depending on the damage.
Test the Peripheral on Different USB Ports
Test the peripheral on all the other USB ports.
If none of the USB ports on your PC are working, then it’s likely to be related to your system settings, such as the selective suspend feature. This is especially the case if the peripheral connects fine to other devices.
Only experience an issue with the front USB port? Then it’s an indicator that the port itself has a physical problem, whether dust clogging it up or broken pins. The USB drivers might also be corrupted.
Check for a Broken USB Port
You can test this by simply inserting your USB device and gently wiggling the cable.
If it abruptly connects and disconnects, or you feel a lot of movement, then there’s likely a physical issue with the port.
Next Move
Don’t take any drastic measures just yet!
Regardless of the outcome of your troubleshooting, it’s still worth trying out the following steps to see if it solves the problem.
Step 2. Clear out Debris and Dust
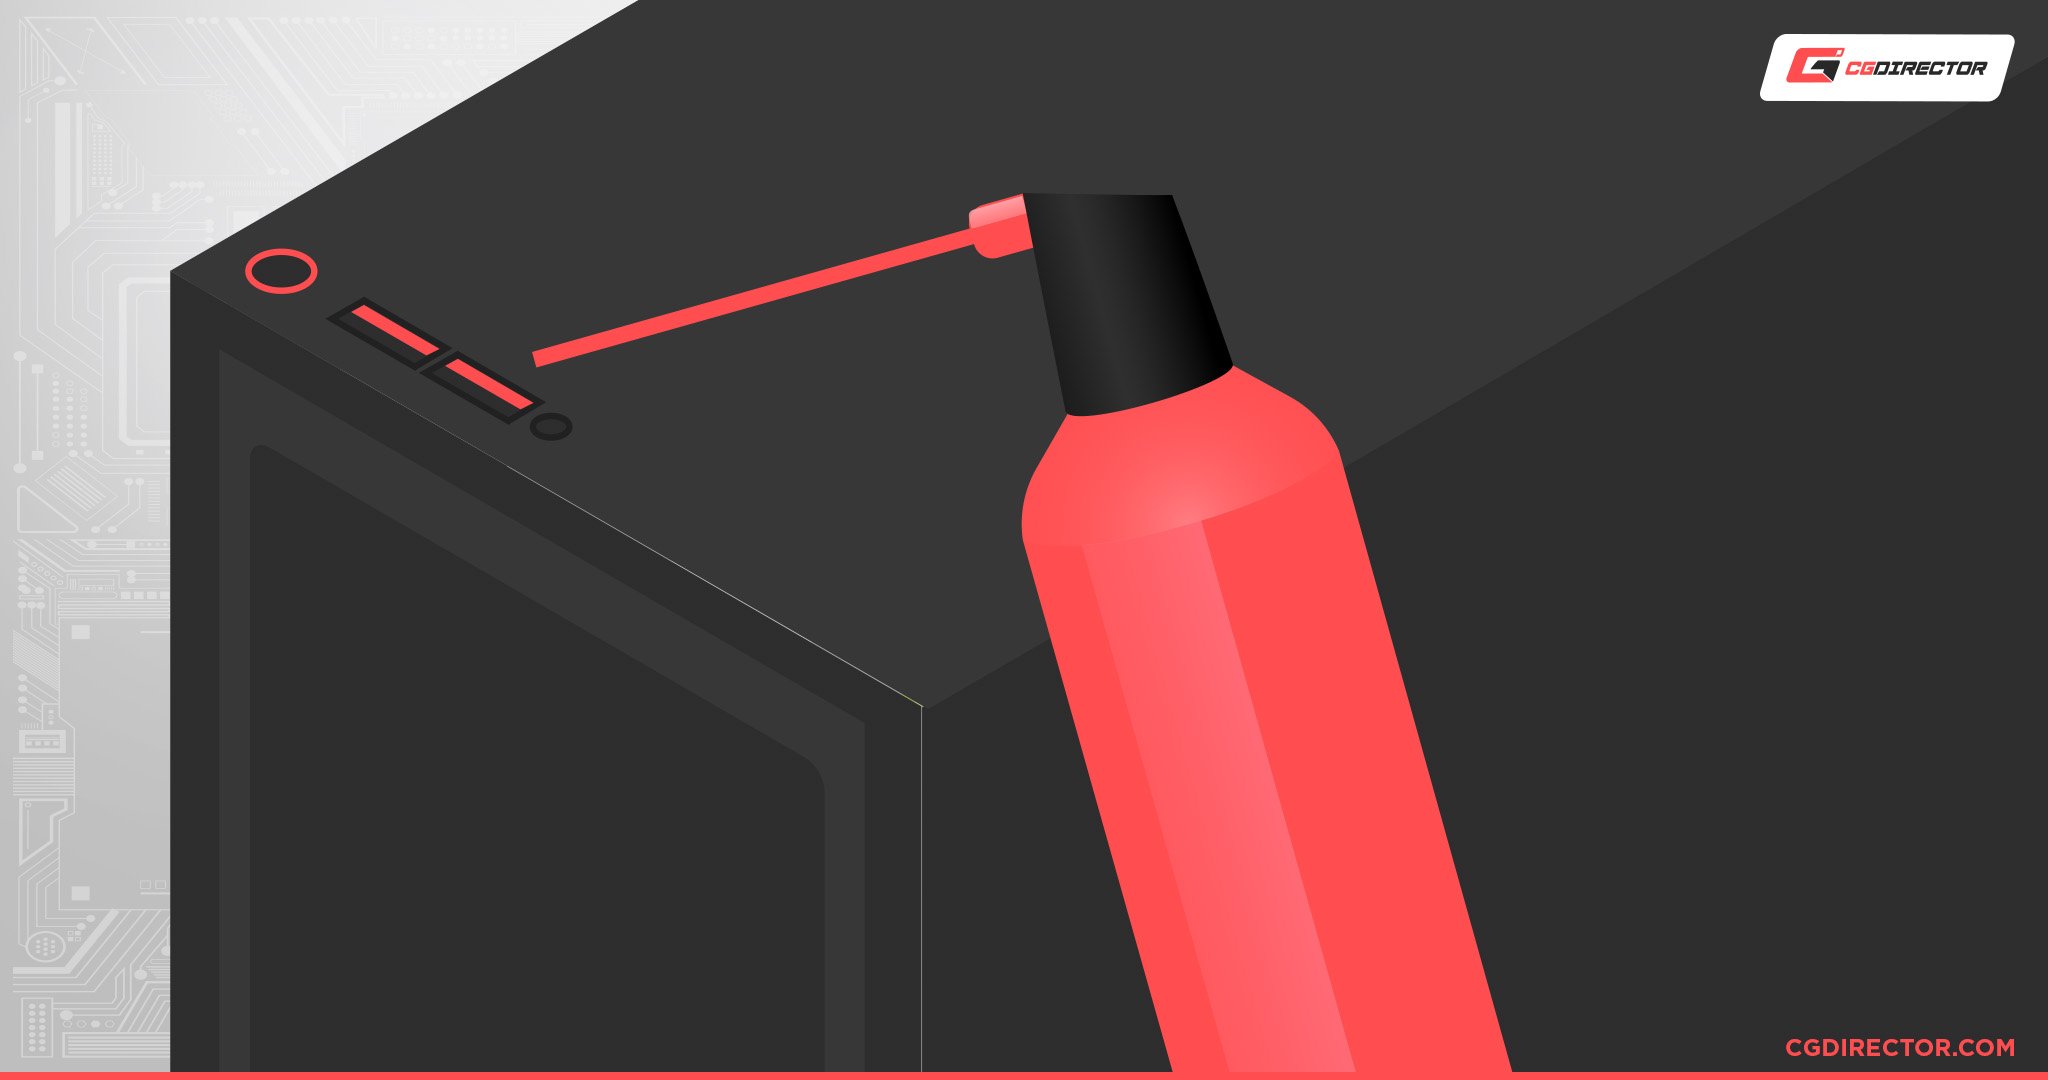
USB ports tend to collect dust, lint, and debris over time.
While a small amount of grime won’t pose an issue, it can eventually clog up the ports and cause them to stop working. It’s definitely worth inspecting your front USB ports and clearing out any debris trapped inside.
Turn off your PC. Then, using a bright flashlight — or your phone’s built-in flashlight if you don’t have one handy — have a look inside each port.
If you see any chunks of debris, use a toothpick to remove them gently. Be extremely careful while doing this, and ensure you don’t accidentally scratch the contacts.
You’ll next want to use a can of compressed air with a long, narrow nozzle to clean any remaining dust. Angle it so that the air can clear out the USB port without pushing the debris even further inside it (come at the port from the side and not straight on).
During the cleaning process, make sure you keep the can upright at all times and don’t stick the nozzle directly into the port. Doing so helps to prevent condensation build-up.
Turn your PC back on and see if the issue is now fixed. If it isn’t, you’ll next want to scan for hardware changes.
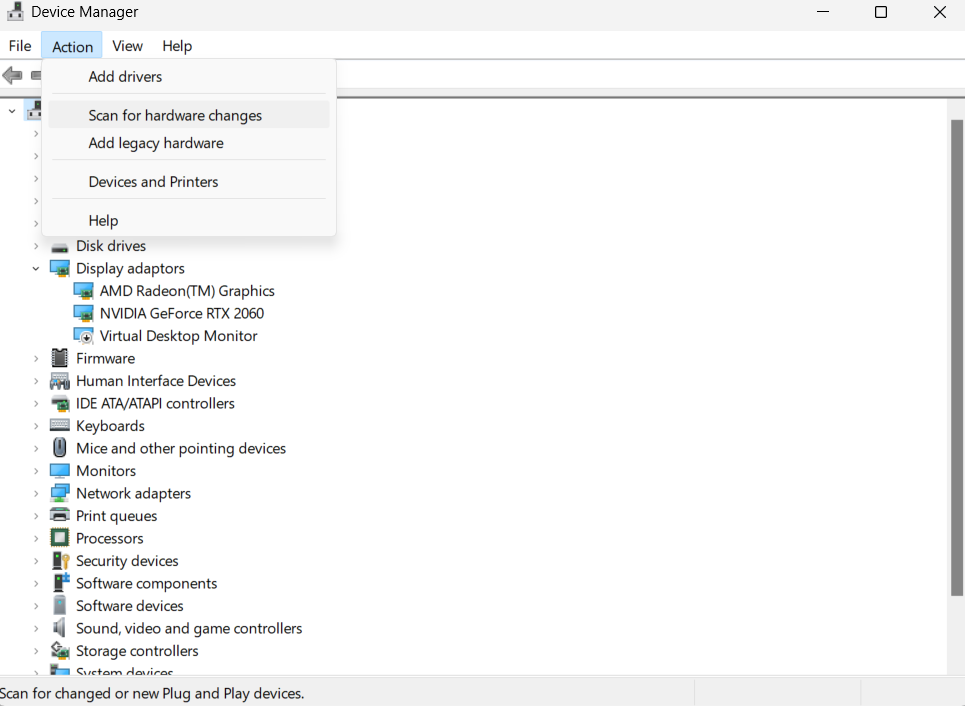
Step 3. Scan for Hardware Changes
Sometimes, for whatever reason, your PC stops recognizing your front USB ports or any devices that connect to them.
Scanning for hardware changes is the easiest and simplest solution for this:
- Go to Windows Start, type “Device” in the search bar, and then click on the “Device Manager” app when it pops up
- Ensure your PC is highlighted (left-click on it at the top)
- Select the “Action” tab, and then click on “Scan for Hardware Changes”
- Once the scan is complete, restart your PC and retry your front USB ports
Hopefully, this has now solved your problem.
If it hasn’t though, don’t worry — there are plenty more effective troubleshooting methods you can try, with one of the most common fixes being to disable and enable the USB controllers.
Step 4. Uninstall and Reinstall USB Controllers
Your USB drivers may have become corrupted, so it’s definitely worth reinstalling them to get them back in working order.
While it may sound complicated, the process is super simple and only takes a few steps:
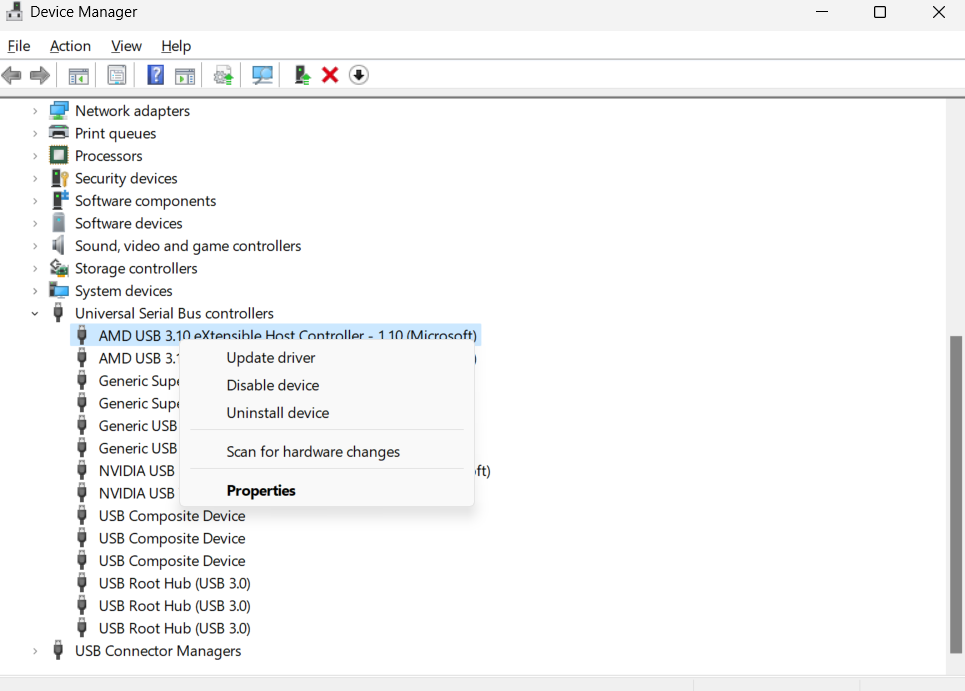
- Go back into the “Device Manager” (see steps above), but this time scroll down to the “USB Serial Controllers” option. Double-click on it to expand it
- Right-click on the “USB Host Controller” option, then click “Uninstall Device.” This will typically take a few seconds
- Once complete, repeat this process for every “USB Host Controller” option available
- Restart your PC — the new drivers will be reinstalled automatically
You can double-check that the latest driver has been installed by selecting the USB controller’s “Properties” option and then clicking on the “Driver” tab. It’ll provide you the driver date and version information.
If the USB front ports are still not working after this, it’s likely because you have the selective suspend feature enabled.
Step 5. Disable the Selective Suspend Feature
Selective suspend is a process that automatically deactivates your USB ports to improve your PC’s battery life.
While useful, the setting can cause your front USB ports to stop working when you need them. Disabling it will ensure the ports are always active:
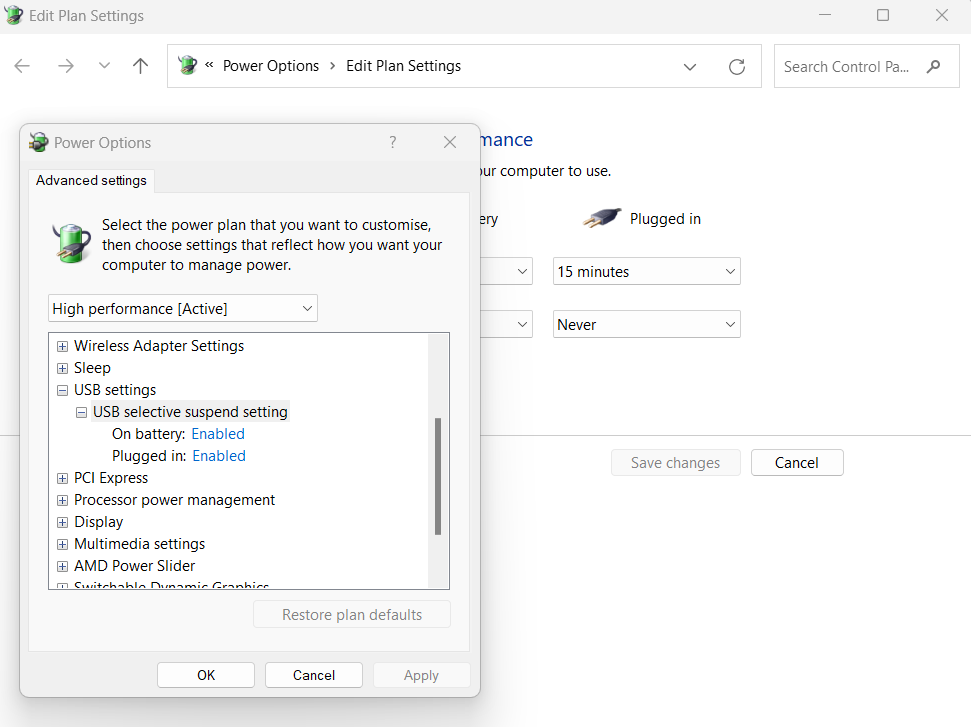
- In the Windows Search bar, type “Power Plan” and click on “Edit Power Plan” once it pops up
- Select “Change Advanced Power Settings”
- Open the “USB Settings” drop-down menu, and then click on the “USB Selective Suspend Setting”
- Disable the “On Battery” and “Plugged In” options
- Hit “Apply” to save the changes
- Restart your PC and check if the issue is solved
The selective suspend feature is usually enabled by default, and it’s definitely one of the most common causes of faulty USB ports.
Was the selective suspend feature the culprit for you? If so, let us know in the comments below. If not, another potential fix is to disable fast start-up.
Step 6. Disable Fast Startup
Fast startup is essentially a Windows feature that reduces the amount of time it takes to load up your PC.
It’s pretty convenient, but it can sometimes prevent the Windows operating system from loading up properly or detecting new hardware changes, which in turn can cause USB port issues.
Here’s how to disable fast startup:
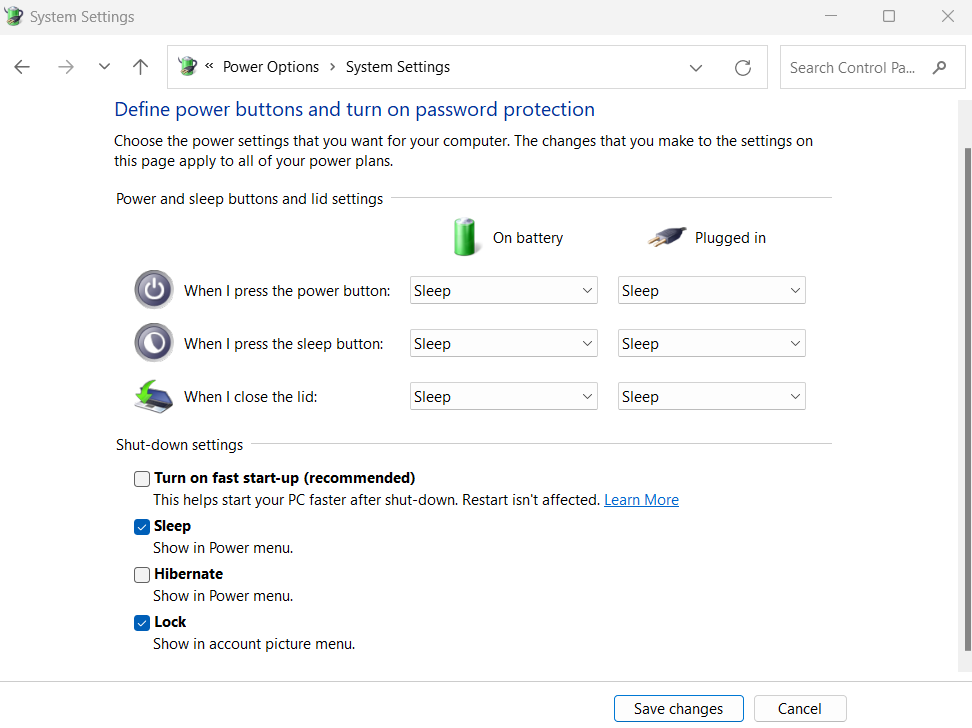
- Type “Control Panel” in the Windows search box, then open the app once it appears
- Select “Power Options,” then click on “Choose What the Power Buttons Do”
- Click “Change Settings That Are Currently Unavailable”
- Uncheck the box for “Turn on Fast Start-Up”
- Click “Save Changes”
- Restart your PC and check the front USB ports
Step 7. Run Windows Update and Hardware and Devices Troubleshooter
As a last resort, you can always try updating Windows. This typically won’t solve a USB port problem, but if nothing else has worked it’s definitely worth a try:
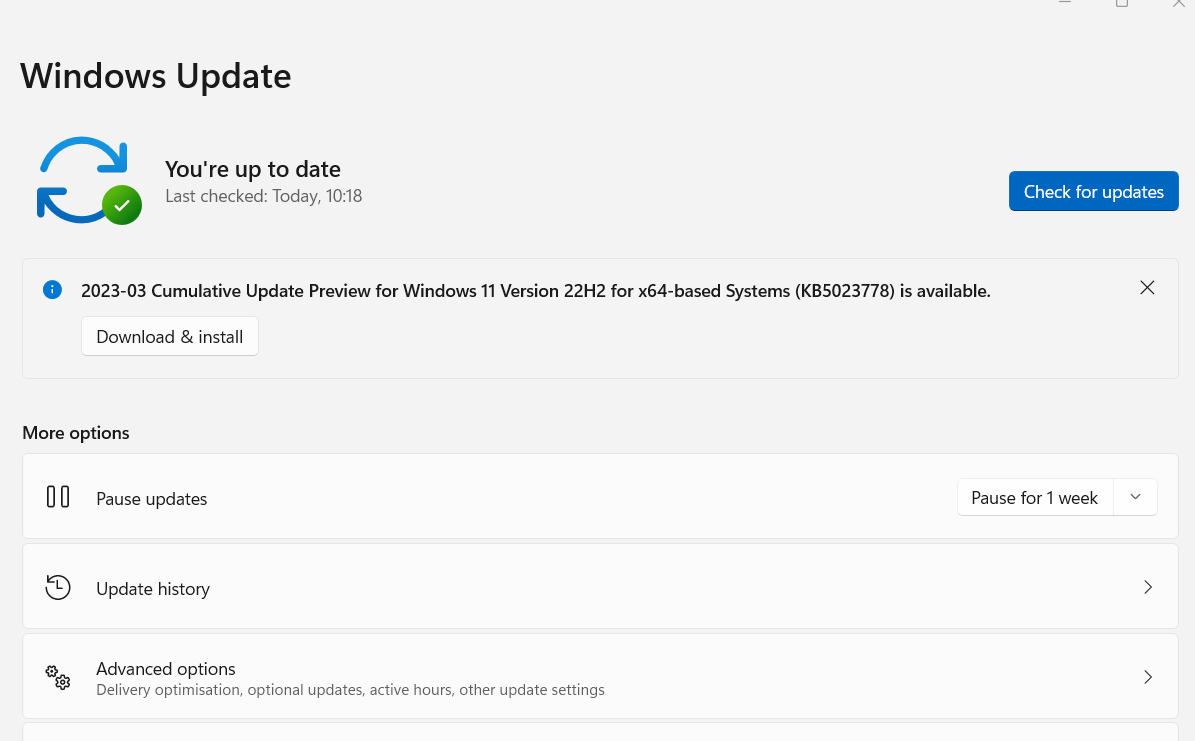
- In Windows 10, go to “Settings,” “Update & Security,” then select “Windows Update,” and click on the “Check for Updates” button. If there is an update available, go ahead and install it.
- In Windows 11, you’ll need to go to “Settings,” “Windows Update” and then select “Install Now.”
Restart your PC and check if your USB front ports are now fixed.
 You can also run the built-in hardware and devices troubleshooter — load up the “Command Prompt,” and enter the command line: “msdt.exe -id DeviceDiagnostic.” Then, follow the steps provided.
That’s a wrap of the most common fixes for a faulty front USB port. If none of the methods above have worked, then chances are, there’s something wrong with the port itself and it’ll need repairing or replacing.
You can potentially fix (or replace) a broken front USB port yourself, though this depends on the type of damage, the device, and your experience.
If you’re not comfortable with hardware and DIY, then you’ll definitely want to send your PC in for a repair instead. In the meantime, you can connect a USB hub to one of the working ports on your PC.
FAQ
What causes a front USB port to stop working on a PC?
A range of things can cause a front USB port to stop working on a PC. The port could be physically damaged, clogged up with debris, or affected by a system setting like selective suspend.
How can I add USB ports to my PC?
The easiest way to add additional USB ports to your PC is through a USB hub.
This is a device that works similarly to an extension lead; it’s fitted with several USB ports that connect to a singular port on your PC.
Why do my front USB ports only work sporadically?
The likely culprit of this is the selective suspend feature, which automatically deactivates your USB ports to save your PC’s battery life.
You can disable this feature by following our steps above (see no.6).
Over to You
Did one of our troubleshooting steps above solve the issue? Or did you come up with another solution not listed here?
Let us know in the comments down below, and if you need any more help, whether with your USB ports or another part of your PC, make sure to head over to our forum!
")
![How to Use a MacBook With the Lid Closed? [Clamshell Mode]](https://www.cgdirector.com/wp-content/uploads/media/2023/12/How-to-Use-a-MacBook-With-the-Lid-Closed-Clamshell-Mode-Twitter-594x335.jpg "How to Use a MacBook With the Lid Closed? [Clamshell Mode]")

")

0 Comments