 by
by ![How to Fix a Laptop that Won’t Connect to WiFi [2024 Guide]](https://www.cgdirector.com/wp-content/uploads/media/2023/02/How-to-Fix-a-Laptop-that-Wont-Connect-to-Wifi-2023-Twitter-1200x675.jpg "How to Fix a Laptop that Won’t Connect to WiFi [2024 Guide]")
TABLE OF CONTENTS
Wi-Fi is the modern-day equivalent of gold; it gives us access to virtually every resource in the world, allows us to connect with friends, and even work with ease.
So, when your laptop suddenly won’t connect to your Wi-Fi, it can genuinely feel like the end of the world. But don’t sweat it, in most cases, there’s typically a simple fix.
We’ll guide you through the troubleshooting process in this article, beginning with the easiest solutions to more advanced methods.
Let’s get started!
What Prevents My Laptop From Connecting to Wifi?
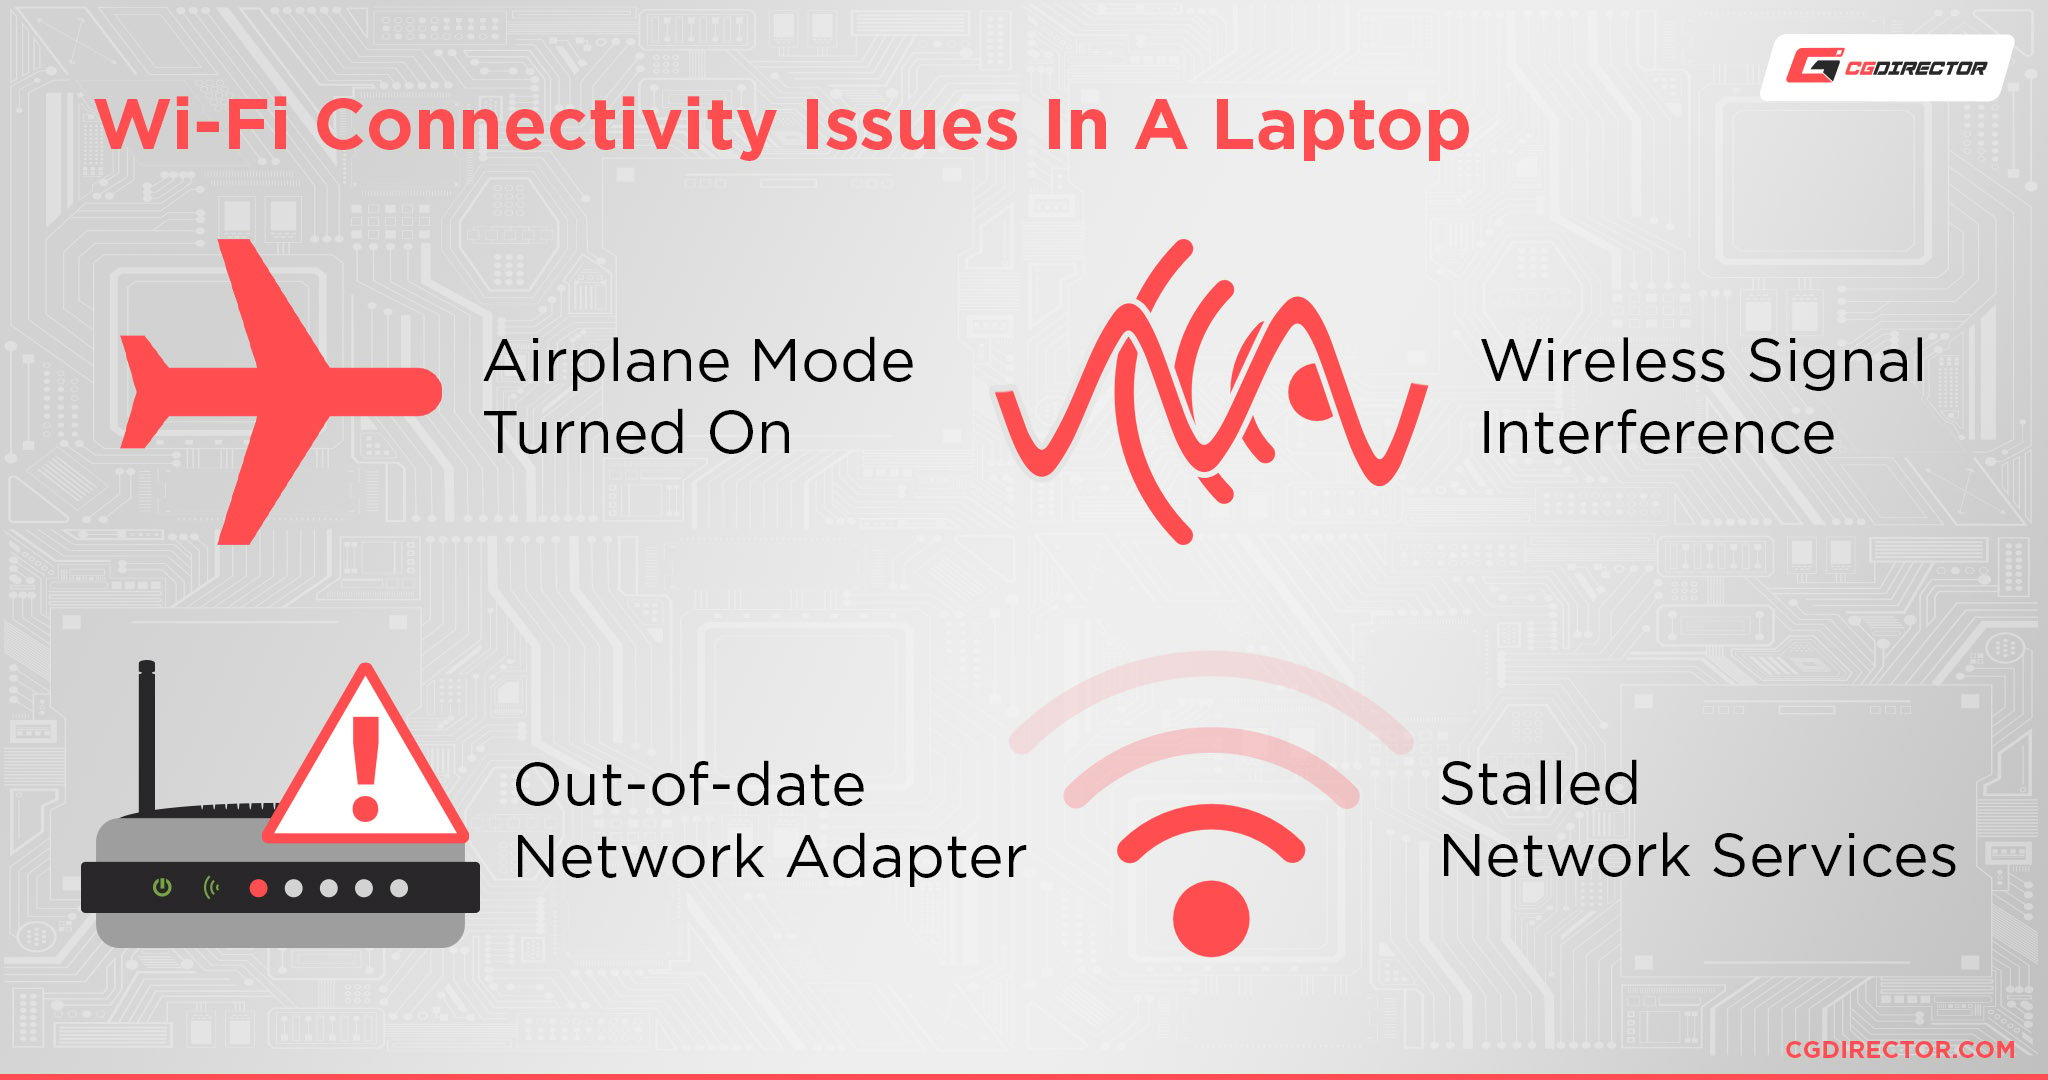
A whole range of things can prevent your laptop from connecting to Wi-Fi, including wireless signal interference, airplane mode turned on, stalled network services, and an out-of-date network adapter.
There can also be miscommunication between your device and the router, especially if you don’t restart the router regularly!
Of course, you’ll first want to determine whether there’s an actual problem with your laptop or the internet itself.
Check if you can connect to the Wi-Fi via your phone, tablet, or any other devices you have on hand. If they don’t connect, then that’s a pretty clear indicator that the problem is with your Wi-Fi.
You might have an internet outage (contact your ISP), or perhaps your router and modem aren’t working properly. Resetting them, which we discuss in step 7, is also likely to help with this.
14 Effective Ways to Fix a Laptop that Won’t Connect to Wifi
1. Check your Laptop’s Physical Wi-Fi Switch
Yes, we know. It may sound simple, but you’ll be surprised by how common of a cause this is! You — or a furry feline — may have accidentally knocked the button and switched it off.
If your laptop has a Wi-Fi switch, it’ll typically be located at the top corner of your keyboard or at the side. Have a quick scan for the button and then make sure it’s enabled.
You should also check that the Wi-Fi option is actually turned on under “Network & Internet” settings. You can access this by clicking on the network connection tab button. If the Wi-Fi is turned on, the tab at the bottom will appear blue in Windows 10/11.
2. Turn Off Airplane Mode
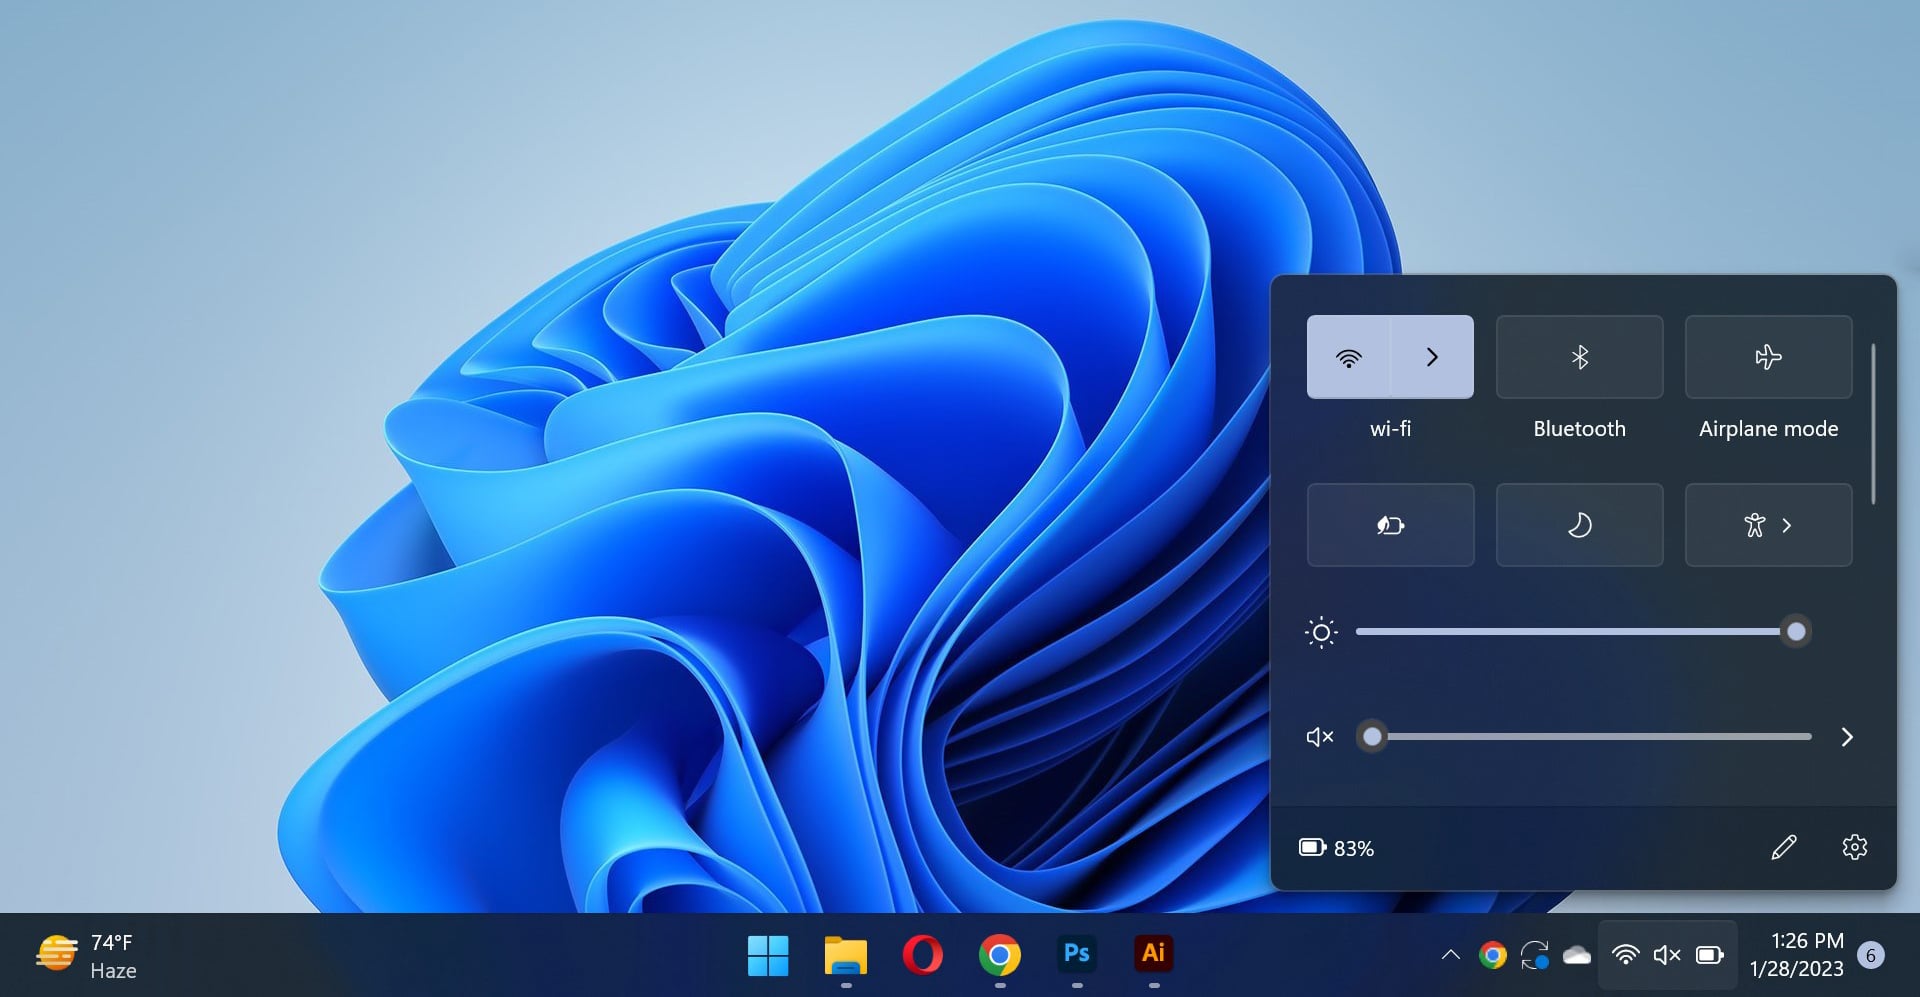
Another overlooked but a common cause is having airplane mode activated. You may have turned this on if you recently traveled, didn’t want to be disturbed by social media, or simply toggled it on by accident (especially if you have a shortcut for it).
So, it’s worth checking this and ensuring airplane mode is deactivated. You can find it in your Wi-Fi settings. It’ll look grayed out if it’s turned off.
If your airplane mode isn’t enabled, you’ll want to try out this next step:
3. Restart Windows Explorer
Restarting Windows Explorer can potentially solve your issue, especially if you’re able to connect to the actual Wi-Fi but not load up any web pages.
It’s a simple process:
- Hold down the “Ctrl,” “Shift,” and “Esc” keys to open up “Task Manager.”
- In processes, scroll down until you locate the “Windows Explorer” file.
- Right-click on it and press “Restart.”
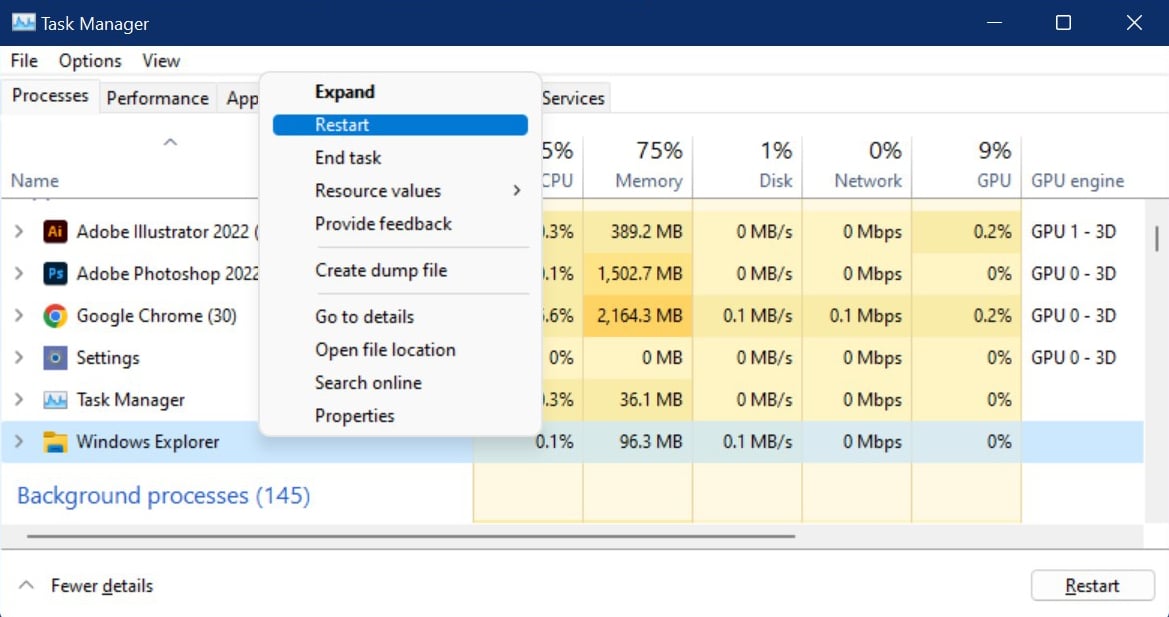

- Check if your Wi-Fi connection is back. If it isn’t, read on.
4. Forgot Saved Wireless Network
If your wireless network shows up, but it gives you the “can’t connect” message whenever you click on it, it’s possible your network profile has become corrupted.
You’ll need to forget and re-add the network to solve this issue:
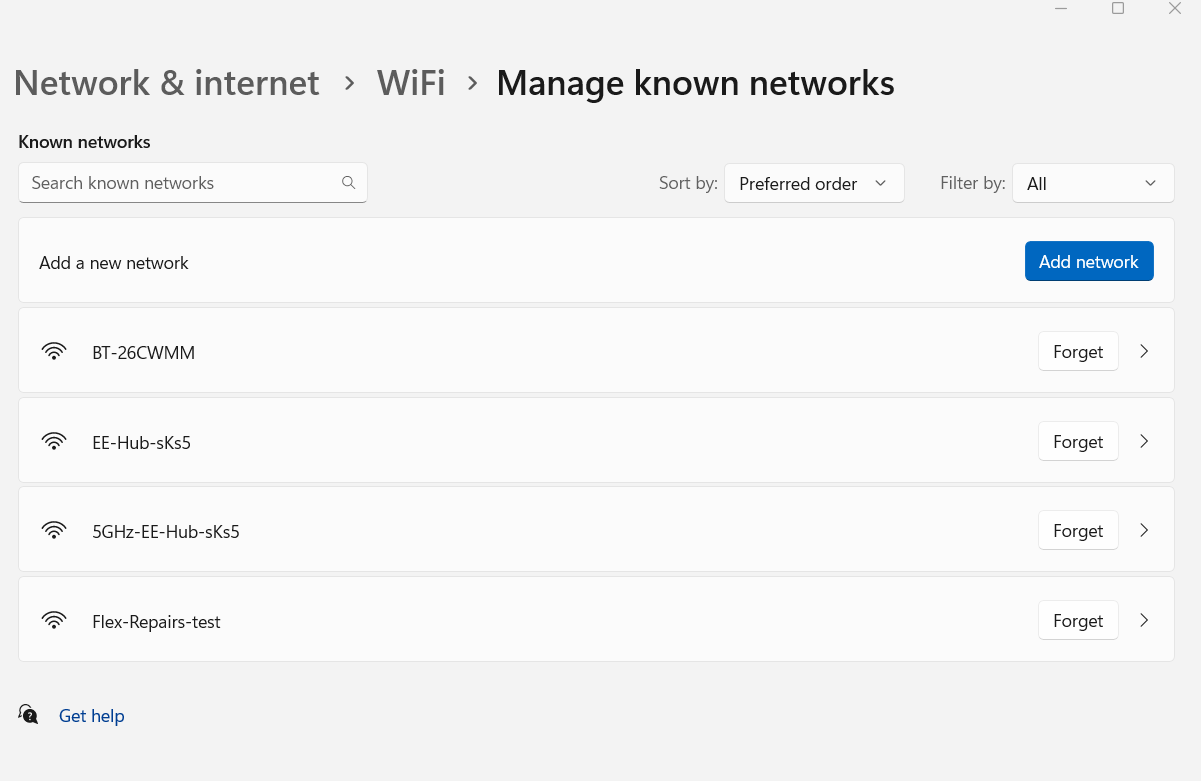
- Click on the Windows “Start” button, go to “Settings,” and then “Network & Internet.”
- Select “Wi-Fi,” then “Manage Known Networks.”
- Find the necessary Wi-Fi network and click the “Forget” option.
- Close the window to apply the changes.
- Reconnect to the Wi-Fi network (you’ll have to enter the password again).
- Proceed to step 5 if your laptop still can’t connect to it.
5. Run Network Troubleshooter
Network troubleshooter is a built-in Windows diagnostic program that can help identity and solve connectivity issues.
So, if your laptop won’t connect to the Wi-Fi, you’ll definitely want to try it out:
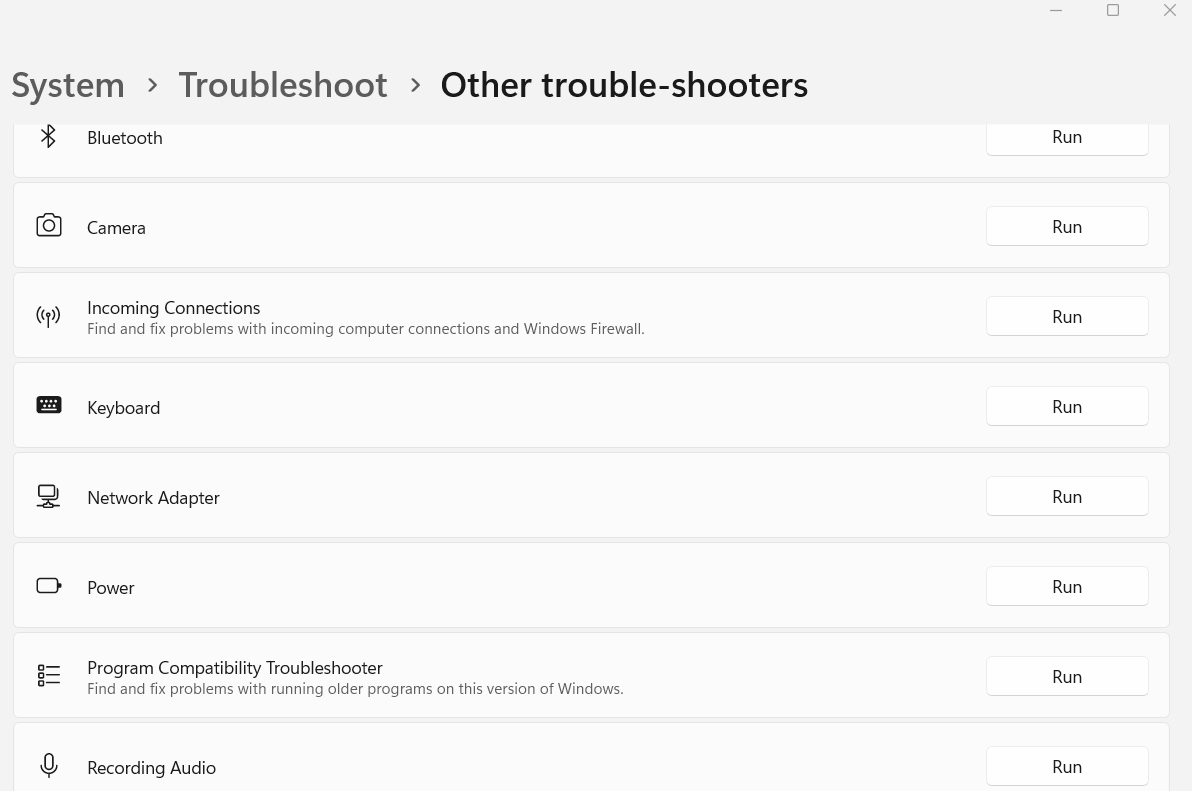
- Go to “System,” “Troubleshoot,” and then select “Other Troubleshooters.”
- Scroll down and choose the “Network Adapter” option.
- Press “Run.” Select the “Troubleshoot Problems” option.
- Select “All Network Adapters” and press “Next.”
- Follow the troubleshooting steps and then check if the problem has gone away.
Did the network troubleshooter identify and solve your issue? If not, move on to our next method.
6. Connect to Different Network Frequency Band
Some routers (dual-band routers) provide two different network bands (2.4 GHz and 5 Ghz) for you to connect to. Each has their pros and cons; 5G hz is generally faster but can’t travel as far as 2.4 Ghz.
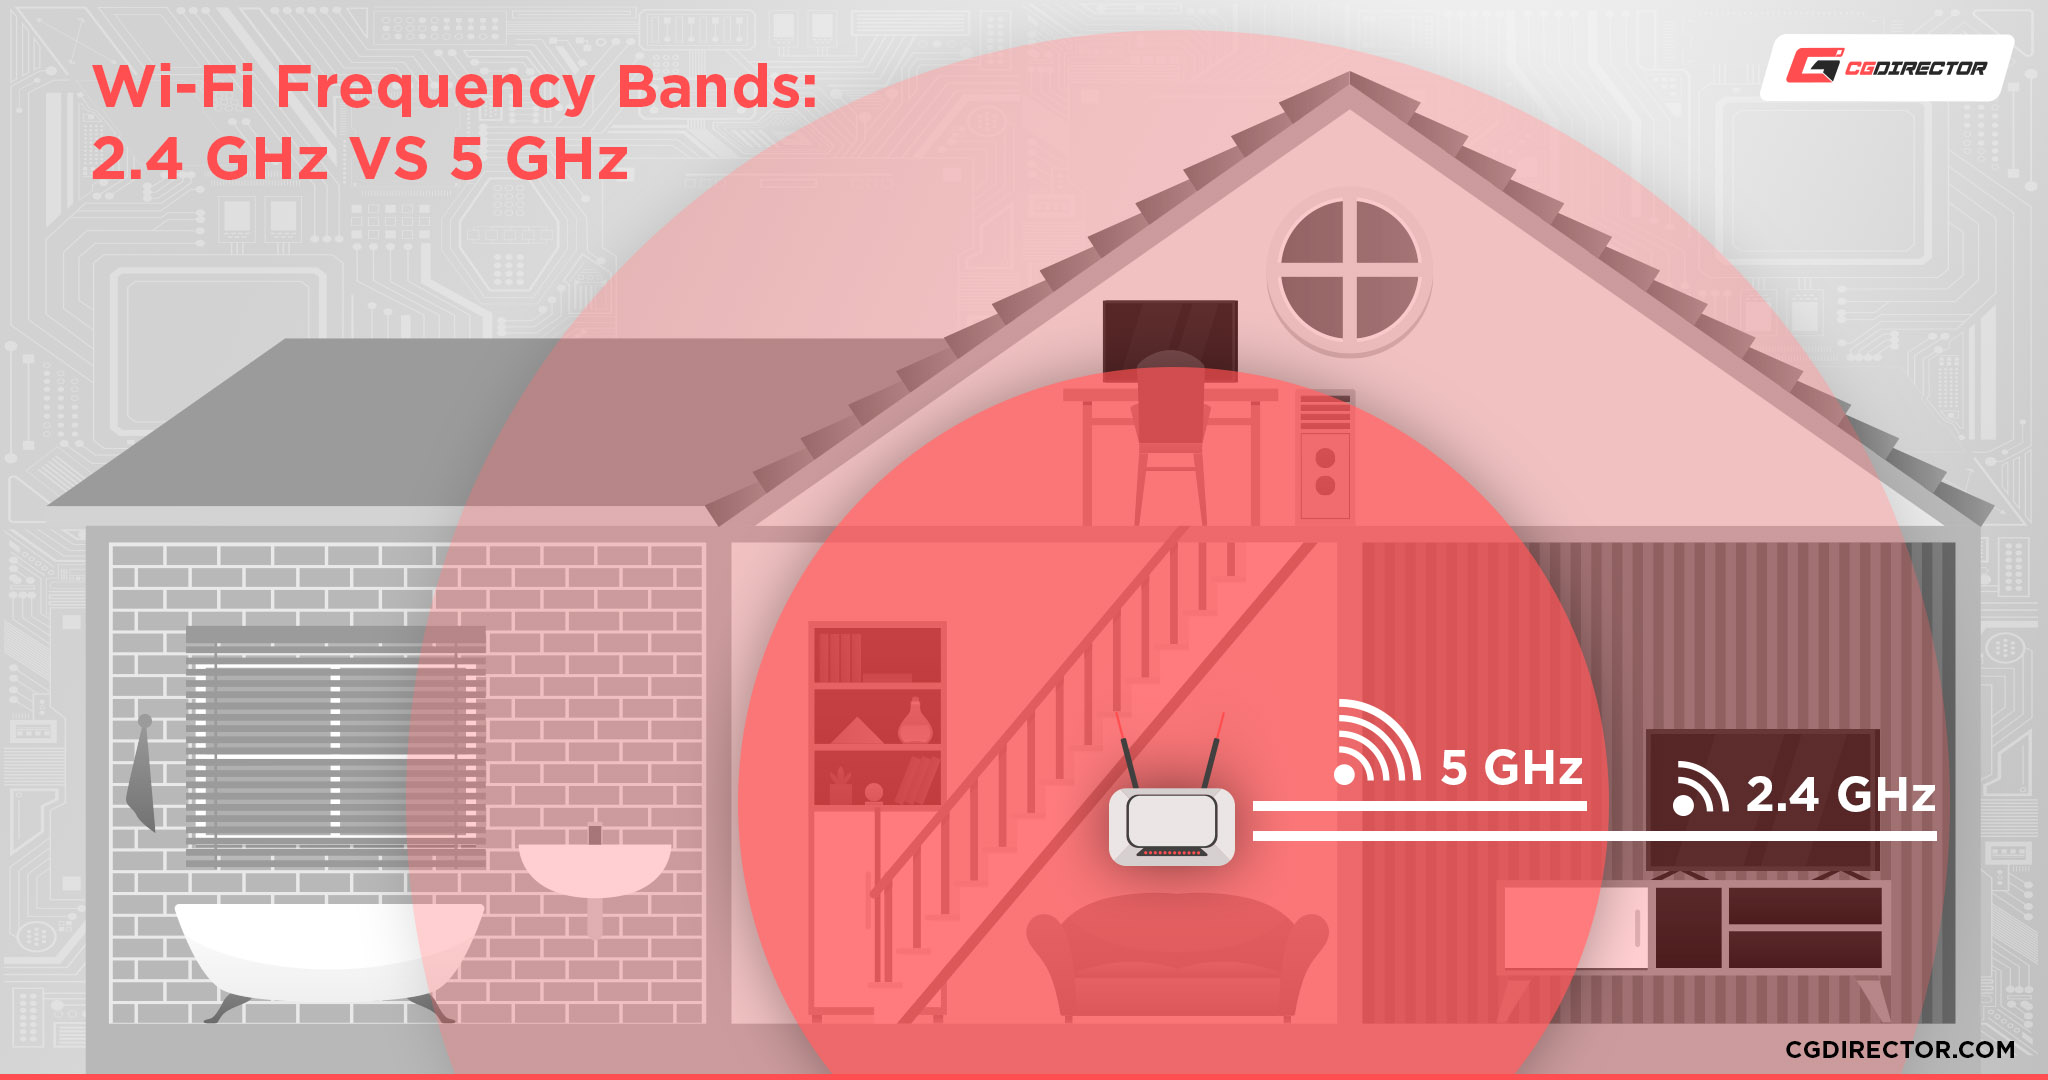
You should try connecting to a different network frequency band if the current band isn’t working. In most cases, they’ll share the same Wi-Fi network name, but end in either 2.4G or 5G.
You can also consider swapping to a different Wi-Fi channel, ideally one that’s less crowded / isn’t popular in your neighborhood.
You can use an app such as Wifi Analyzer to identify the most popular channels near your location. Not all routers allow you to change this setting, but if it does, you’ll be able to do so in the router’s advanced wireless settings:
- Open your web browser and enter in your router’s IP address (typically located on the back of the router).
- Enter your router’s admin username and password. Again, you’ll find this information on the back of the router. (as long as it hasn’t been changed)
- Open your “Wireless Settings” (sometimes located under “Advanced Settings”).
- Turn off any “Auto-Connect” option, and then select the “Channels” option.
- Change your Wi-Fi channel as desired. 1, 6, or 11 are usually your best bet.
- Apply the changes.
Be aware that these steps may differ depending on your router and the manufacturer. If you can’t figure it out, contact your manufacturer for assistance or check out the router’s manual.
If your laptop still won’t connect to the Wi-Fi, keep reading for our next troubleshooting methods.
Things get a little trickier from here on out, but don’t worry as we’ll explain things simply and provide step-by-step instructions.
7. Restart Your Router and Modem
Restarting your router and modem flushes the memory, ends stalled tasks, and resets IP assignments, all of which can fix Wi-Fi connectivity issues.
Most routers and modems are integrated nowadays, but if you have two separate devices make sure to restart them both. Here’s how to go about the process:
- Unplug the router and modem from the power outlet. Be aware that some modems have a backup battery that allows the device to run even after you unplug it from its power source. You’ll have to remove the battery as well for a restart to occur.
- Wait for at least 30 seconds, but ideally around a minute. Being patient is critical here; you need to give your devices and ISP (internet service provider) enough time to recognize that the router and modem have gone offline.
- If you have a combined unit, you can now plug it back in. It should power on automatically, but if it doesn’t simply press the power button.
- If you have two separate devices, you’ll want to plug the modem into the power outlet first. Wait for around 1 to 3 minutes to give it time to set itself back up.
- Plug the router back in, and connect any other necessary cables (such as your ethernet). Wait for a few minutes again.
- Check to see if your laptop can now connect to the Wi-Fi.
Restarting your router and modem also helps protect against malware, so it’s good practice to do this regularly.
If the issue still persists, and all the router cables are plugged in correctly (and not damaged), we recommend you next try reducing any wireless signal interference.
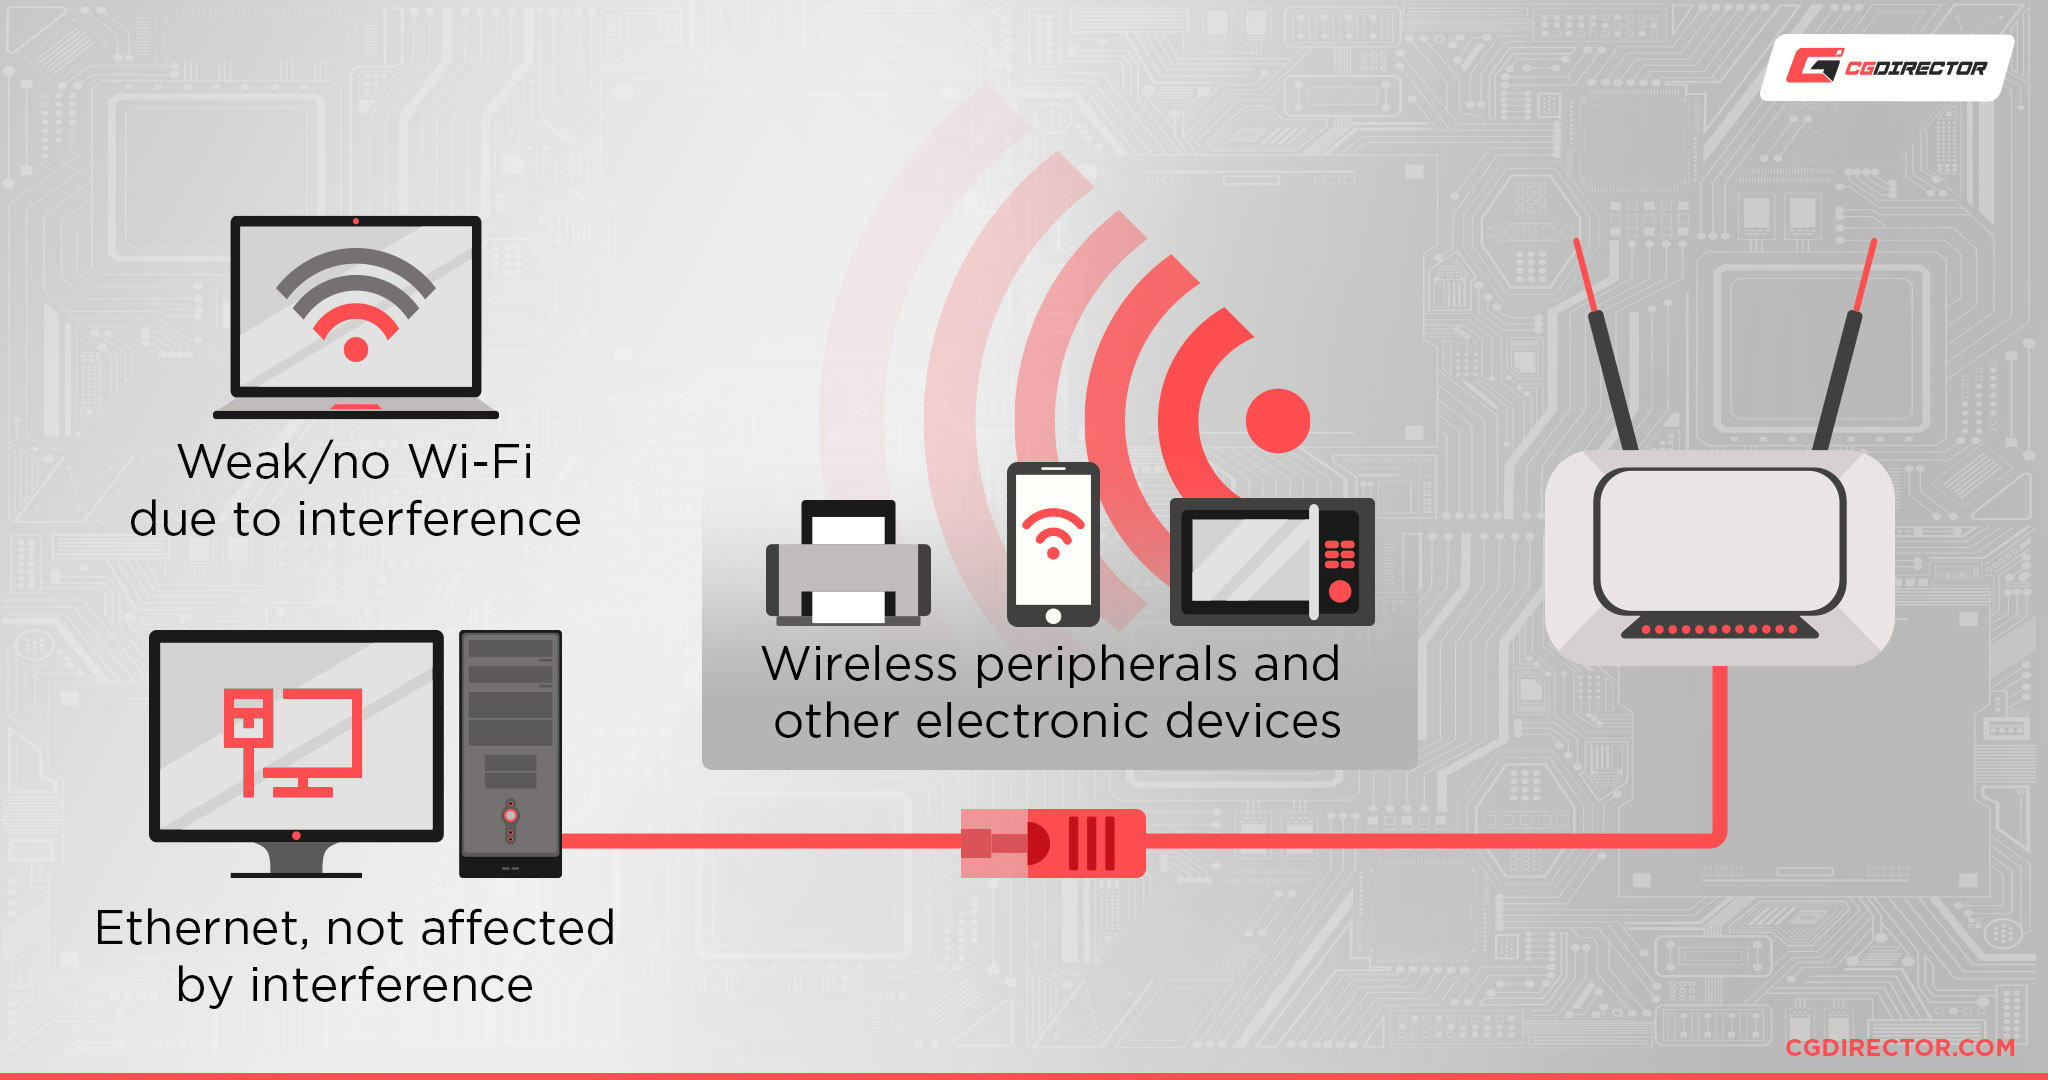
8. Reduce Wireless Signal Interference
Many things can affect the strength and reliability of your wireless connection, including the router’s physical location, the number of devices nearby, and the frequency band.
Here are a few ways you can minimize wireless signal interference (and hopefully fix your connectivity issues!):
- Reduce physical obstructions. Walls, furniture, and other devices in between your laptop and the router can all impede the signal. Ensure that the router is positioned in a space that allows for a clear connection pathway.
- Keep doors open. This is especially important if your house has thick walls, such as those made from brick and stone.
- Place the router as close as possible to your laptop. This is pretty obvious. The closer your laptop is to the router, the less the signal will have to travel and the more reliable it’ll be.
- Invest in an ethernet cable. An ethernet cable is sure to improve Wi-Fi reliability and speeds. After all, it allows your laptop to receive and transmit data instantly ( travels through a wired, direct connection with no interference).
- Swap to a different band (if applicable). Go into your router’s admin page and set the wireless band to 5 Ghz. This band is typically less congested — meaning a more reliable wireless connection for you — since not many devices operate at this frequency.
- Minimize device interference. Disconnect any unused electronic devices that run at the same frequency band, such as printers, tablets, bluetooth speakers, and smart TVs.
- Use a wireless range extender. If the above steps aren’t feasible to carry out, and you can’t keep your laptop near the router, you’ll want to invest in a wireless range extender.
Once your router is in an optimal spot, and you have made other necessary changes to minimize interference, go to your laptop and check if the issue still persists.
9. Reinstall or Update Network Adapter
Can’t see your Wi-Fi icon at all? Then the typical culprit is that, for whatever reason, your network adapter isn’t being recognized by your system. So, it’s worth reinstalling it to see if it brings back your connection.
Here’s how to go about the process:
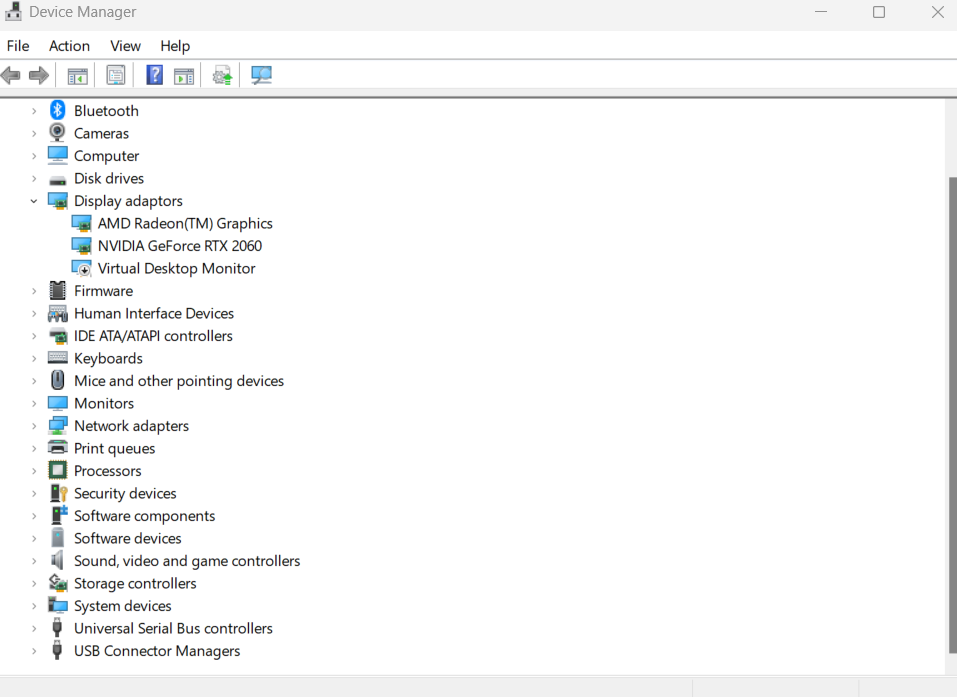
- Right-click on the Windows “Start” logo and select “Device Manager.”
- Open the “Network Adapters” tab.
- Click on the Wi-Fi adapter; there will be a few options, so make sure you select the correct one (it’ll usually have Wi-Fi written in the name).
- Right-click on the Wi-Fi adapter and select “Uninstall Device.”
- Click the “Uninstall” button.
- Restart your laptop. Windows will automatically reinstall the Wi-Fi adapter.
- Check to see if the issue is now fixed. If it isn’t, proceed to the next step.
- Go back to the Device Manager, and right-click on your Wi-Fi driver. Select “Update.”
- Choose “Browse My Computer for Drivers.”
- Select the “Let Me Pick From a List of Available Drivers” option.
- Under models, a few driver versions will appear. Select the latest version — most laptops will display a date for each one — or go through each driver version one at a time.
- Click “Next” to install, restart your laptop, and check if your Wi-Fi is now working.
- If it doesn’t, it’s possible that there’s another driver update available. You can check (and install) the latest driver version directly from your laptop manufacturer’s website.
Keep in mind that this process will cause your laptop to forget saved network passwords, so you’ll have to reenter them.
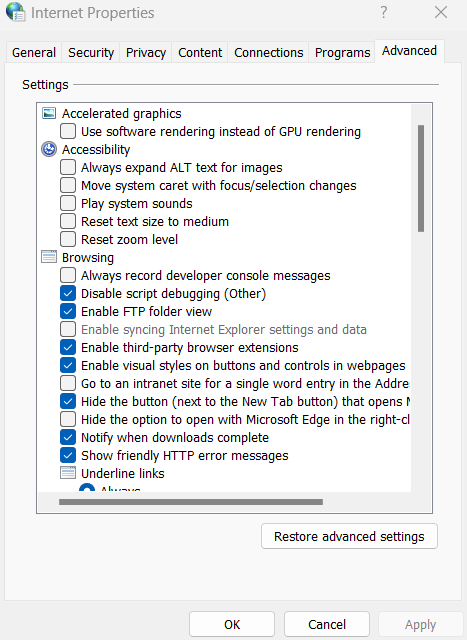
10. Restore Advanced Internet Settings
Don’t give up hope! Restoring advanced internet settings has been known to fix Wi-Fi connectivity issues.
If none of the above methods have worked, you’ll want to try the following:
- In the Windows search bar, type “Internet Options” and press enter.
- Click on the “Advanced” tab.
- Hit the “Restore Advanced Settings” button.
- Apply the changes and click “OK.”
- Restart your laptop and check if the problem is now fixed.
This fix should have you surfing the web in no time. However, if you’re still looking at the “can’t connect” pop-up, try out our next solution.
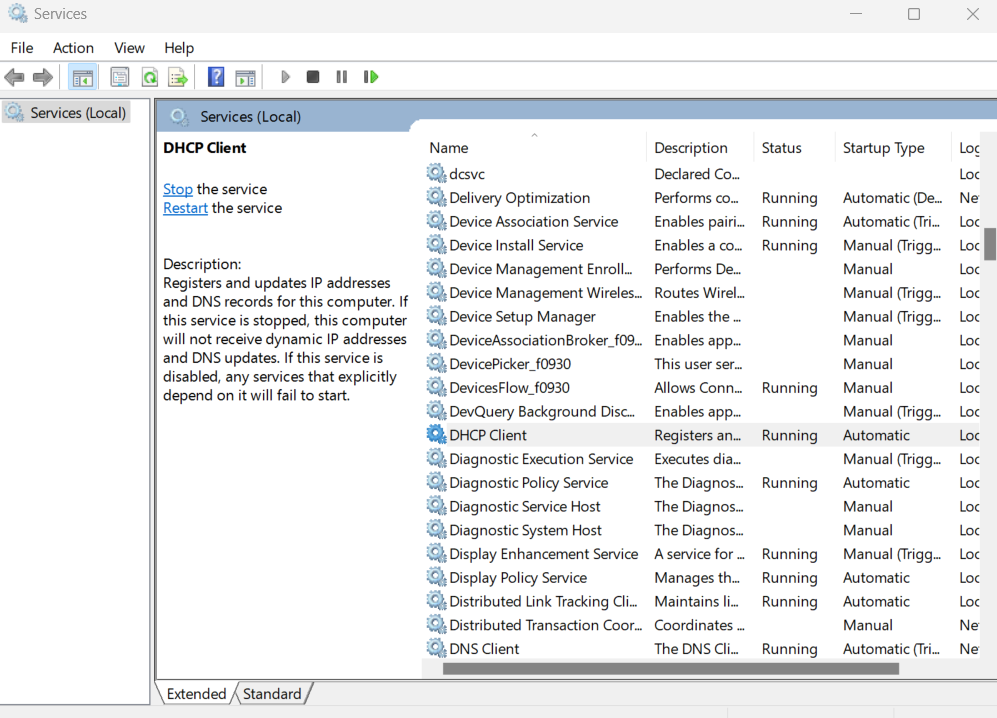
11. Check Network Services Are Running
You should make sure that all the network services are running properly. If even one of the services isn’t running, it can definitely prevent your laptop from connecting to Wi-Fi.
You can check your network services in the Task Manager:
- Hold the “Ctrl,” “Shift,” and “Esc” keys simultaneously to open up the “Task Manager.”
- Select the “Services” tab, and then click the “Open Services” link.
- Look for the “DHCP Client” and make sure its status is set to “Running.” If it isn’t, right-click on the service and select “Properties.”
- Set the startup type to “Automatic” and select “Start.”
- Apply the changes and press “OK.”
- Repeat the steps above for the following: “WLAN AutoConfig,” “Wi-Fi Direct Services Connection,” and all the network services (e.g. “Network Connected Devices,” “Network Connections” and “Network Setup Service.”) must be set to automatic or manual. You can also click “Start” the service at the top to make them run immediately.
12. Renew Your IP Address
If all your network services are running, you should consider releasing and renewing your IP address.
This process refreshes your laptop’s IP address and causes the router to immediately forget the old IP, solving any connectivity issues caused by it. You’ll need to open the command prompt to do this:
- Hold down the “Windows” and “R” keys simultaneously.
- In the search box, type CMD and hit enter to load up the command prompt.
- Type “ipconfig /release” and press enter again.
- Type “ipconfig /renew” and hit enter.
- Check to see if you can now connect to the Wi-Fi.
- If you can’t, you’ll next want to enter “ipconfig /flushdns” in the command prompt.
- Check the Wi-Fi connection again.
While you’re in the command prompt, you can also try out the following commands if the above didn’t work: enter “netsh winsock reset,” “netsh winsock reset catalog,” and then “netsh int ip reset resetlog.txt” Restart your PC.
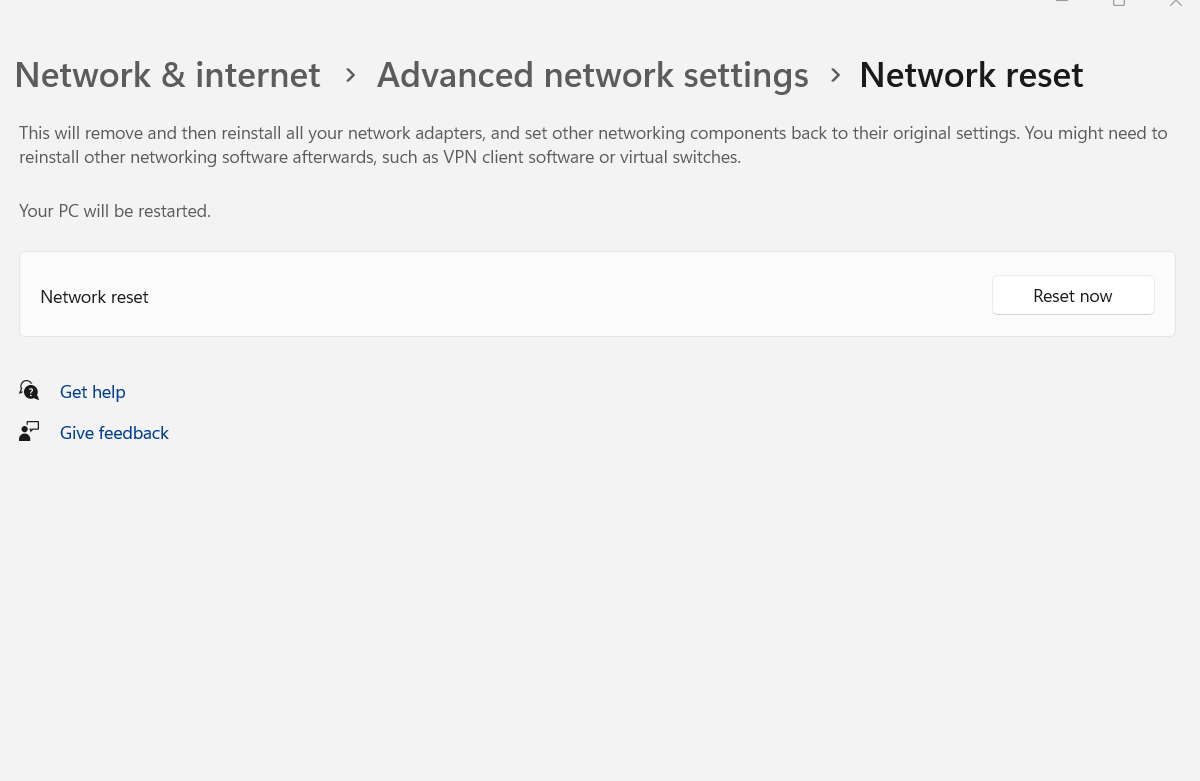
13. Perform Network Reset
As a last resort, it’s worth resetting all of your network settings. It’ll reinstall your network adapters and set other networking components back to their default state.
- Go to Windows, then select “Settings.”
- Go to “Network & Internet,” “Advanced Network Settings,” and select the “Network Reset” option.
- Select “Reset Now,” then press “Yes.” It’ll restart your laptop automatically once the reset is complete. The process typically takes a few minutes.
14. Enable DHCP and Auto DNS
Many times, especially when you’re trying to connect to a public Wi-Fi Network in a Hotel or an Airport, after connecting to the Network in question, it wants to reroute you to a Login Page inside your Browser.
This does not work, however if you haven’t been assigned a correct IP address or are allowing the use of said network/server’s DNS.
So be sure to set your DNS to “Automatic” and enable DHCP, which will let the router/network you’re connecting to assign you an IP address automatically. Here’s how to do this.
FAQ
Why Won’t My Laptop Connect to Wi-Fi But Other Devices Will?
This typically indicates a problem with your laptop itself.
It could be something as simple as having airplane mode switched on, or something a little more complex, like your network services not running properly.
Can Malware Cause My Laptop to Not Connect to Wi-Fi?
Yes, it’s possible. This is especially the case if it wreaks havoc on your network settings.
You can check for and eliminate malware using anti-virus software such as Malwarebytes.
Why Won’t My Laptop Connect to Free Wi-Fi?
Many firewalls block free Wi-Fi since they aren’t exactly secure. You’ll have to adjust your firewall settings to allow the connection to pass through.
Some public Wi-Fis also have login pages where you must enter your account details (or sign up) to use them.
So, if a Wi-Fi’s login page isn’t loading on your default browser, see if it loads up on a different browser (e.g. Chrome instead of Safari).
Over to You
Experiencing connectivity issues is a total nightmare, but hopefully one of our solutions above has worked for you.
Let us know in the comments down below. If your laptop still can’t connect to Wi-Fi, head over to our forum to speak to an expert. They’ll be more than glad to help!

![Laptop Displays — Panel Types compared [IPS/OLED/TN]](https://www.cgdirector.com/wp-content/uploads/media/2024/03/Laptop-Displays-—-Which-Panel-Technology-Should-You-Go-With-Twitter-594x335.jpg "Laptop Displays — Panel Types compared [IPS/OLED/TN]")
")


3 Comments
12 October, 2023
Worked like a charm ! Thanks !!!
27 September, 2023
This is wonderful!! Thank you very much!
18 September, 2023
Restoring the Advanced Internet Setting did the job for me! Thank you heaps!