 by
by ![How To Change RAM Speed In BIOS/UEFI [Quick & Easy]](https://www.cgdirector.com/wp-content/uploads/media/2023/06/How-To-Change-RAM-Speed-In-BIOS-Twitter-1200x675.jpg "How To Change RAM Speed In BIOS/UEFI [Quick & Easy]")
Ever wondered how to change RAM speed in BIOS, or why changing your RAM speed is so important to begin with?
Stick around and I’ll be answering these questions and a few more in rapid form! You can also skip around as you please with the Table of Contents below.
TABLE OF CONTENTS
Why RAM Speed Should Be Adjusted At Least Once
Before I dive right into it, though, it’s important to clarify why you should be doing this, to begin with.
If you bought a high-end PC or built one with some high-quality RAM, you wouldn’t be the first person to assume that’s all it takes to get the most performance.

I’m ashamed to admit that in my first PC build, I never even considered adjusting the RAM speed until after I had replaced my original RAM kit entirely, effectively leaving unused performance on the table for a long time.
That’s what this is about, more than anything— getting the performance per dollar that you actually paid for. Let’s make it happen!
How To Change RAM Speed In BIOS
First things first, you’ll want to enter your BIOS/UEFI startup. These days it’ll almost always be a UEFI, but even then, your motherboard may still call it a BIOS.
Step 0: Trigger an Advanced Startup to Restart Into BIOS
Entering your BIOS/UEFI, Method 1: The most user-friendly way to get into the BIOS is probably starting the process from within Windows if your OS is installed already.
To do this, just hit the Start button and type “Change advanced startup options”, then click it.

Within the Settings window that pops up, you can then trigger an Advanced startup. Click “Restart now” to do this.
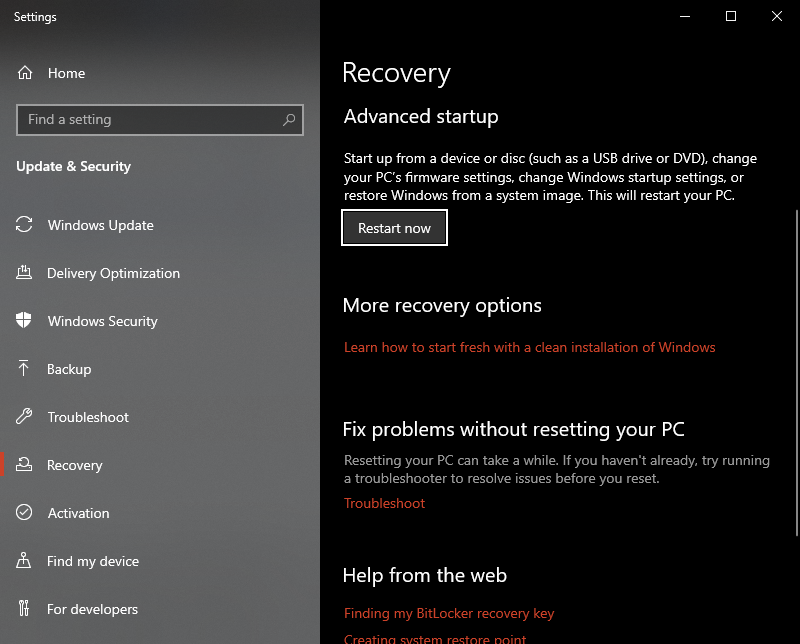
An Advanced startup will restart into a Windows troubleshooting menu that’ll look something like this:

Click on UEFI/Firmware Settings and wait for your PC to reboot and show the BIOS/UEFI Screen.
Entering your BIOS/UEFI, Method 2: Alternatively, you can restart your PC and hit the correct key on your keyboard (usually DEL or an F-row Function Key) to enter Setup as intended by your motherboard manufacturer.
The exact key for this will vary depending on the manufacturer, though, and this screen will disappear much more quickly if you’re using an SSD, so I usually teach the through-Windows method to simplify it a bit.
Step 1: Restart Into BIOS
Congratulations!
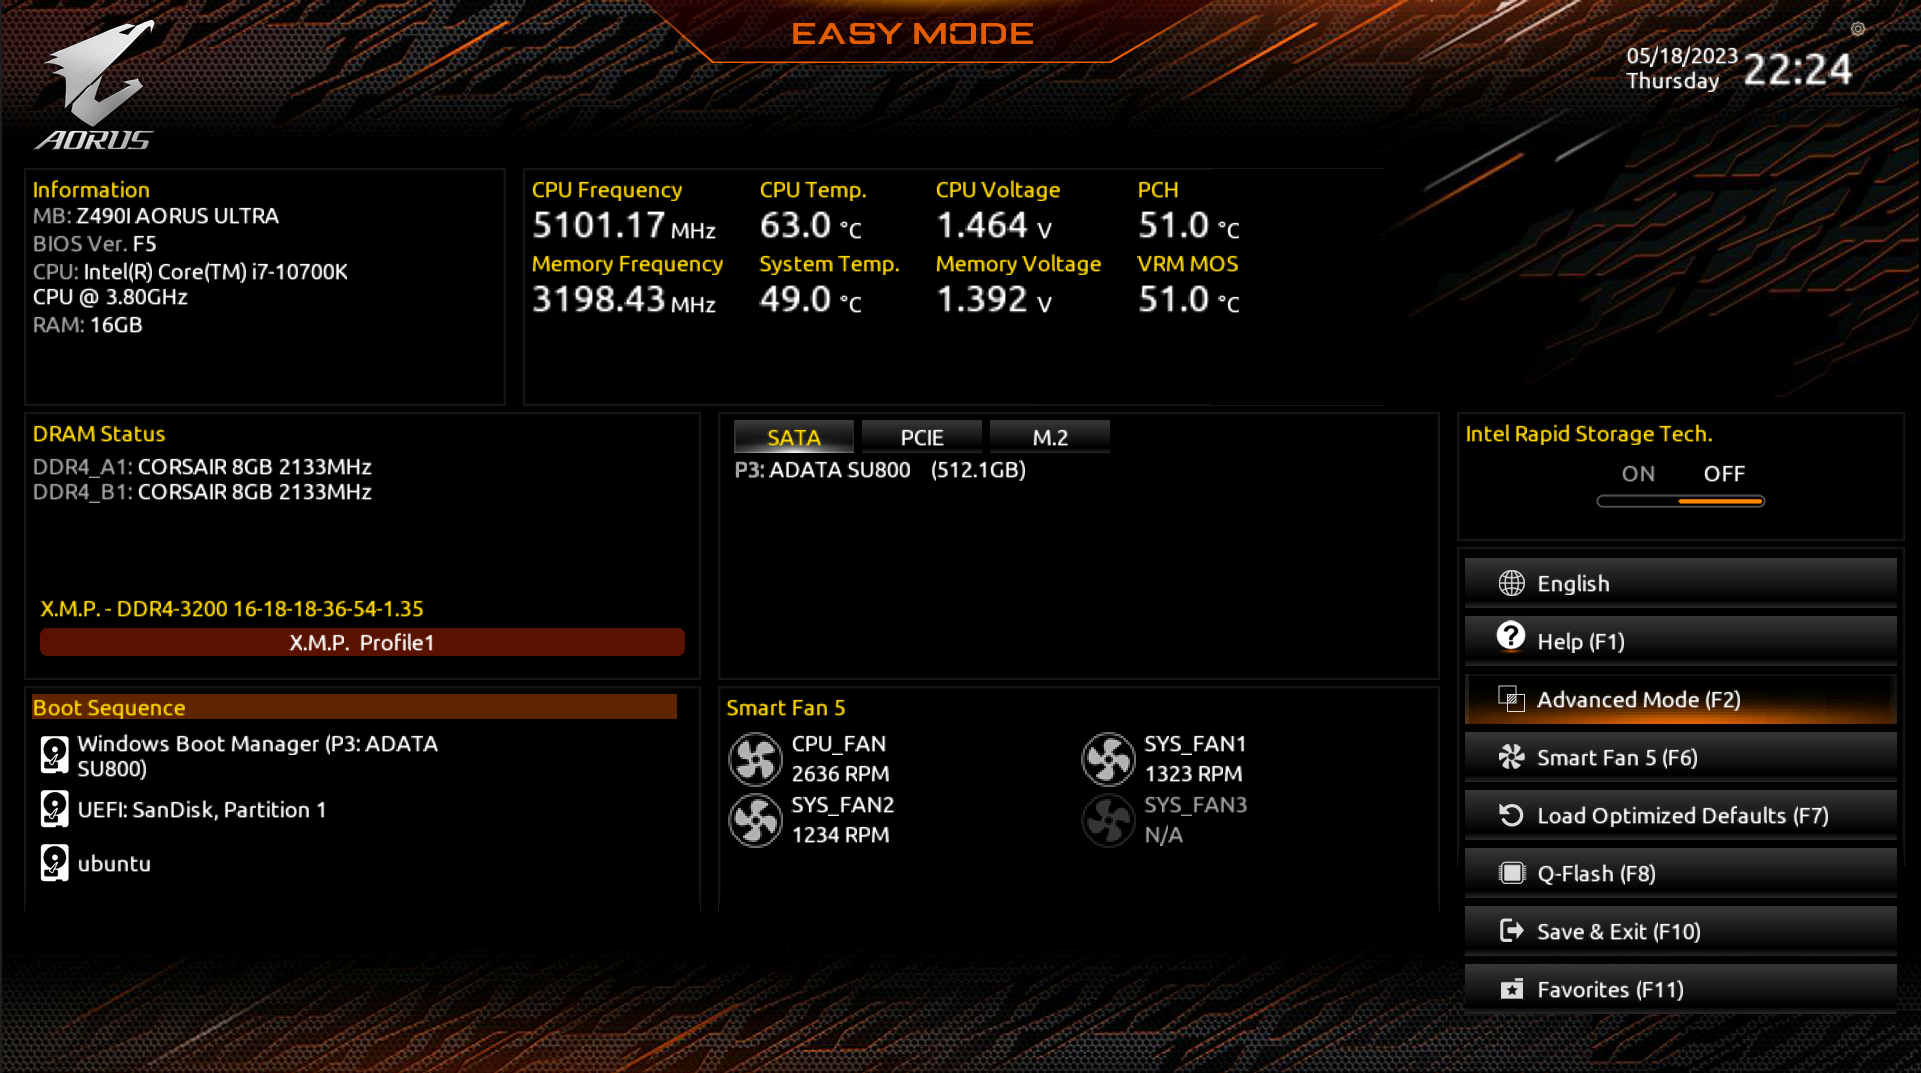
You should now be inside your BIOS or UEFI. If it looks like the screenshot below and you can use your mouse, it’s technically UEFI. If you only have keyboard input, it’s a BIOS.
They’re basically the same thing for the purposes of this guide, and general lingo, though.
Step 2: Locate Your RAM Controls
Once in your BIOS, you’ll want to find the settings that correspond to your RAM controls. These should be labeled with something like “Memory”, “RAM”, or “DRAM”.
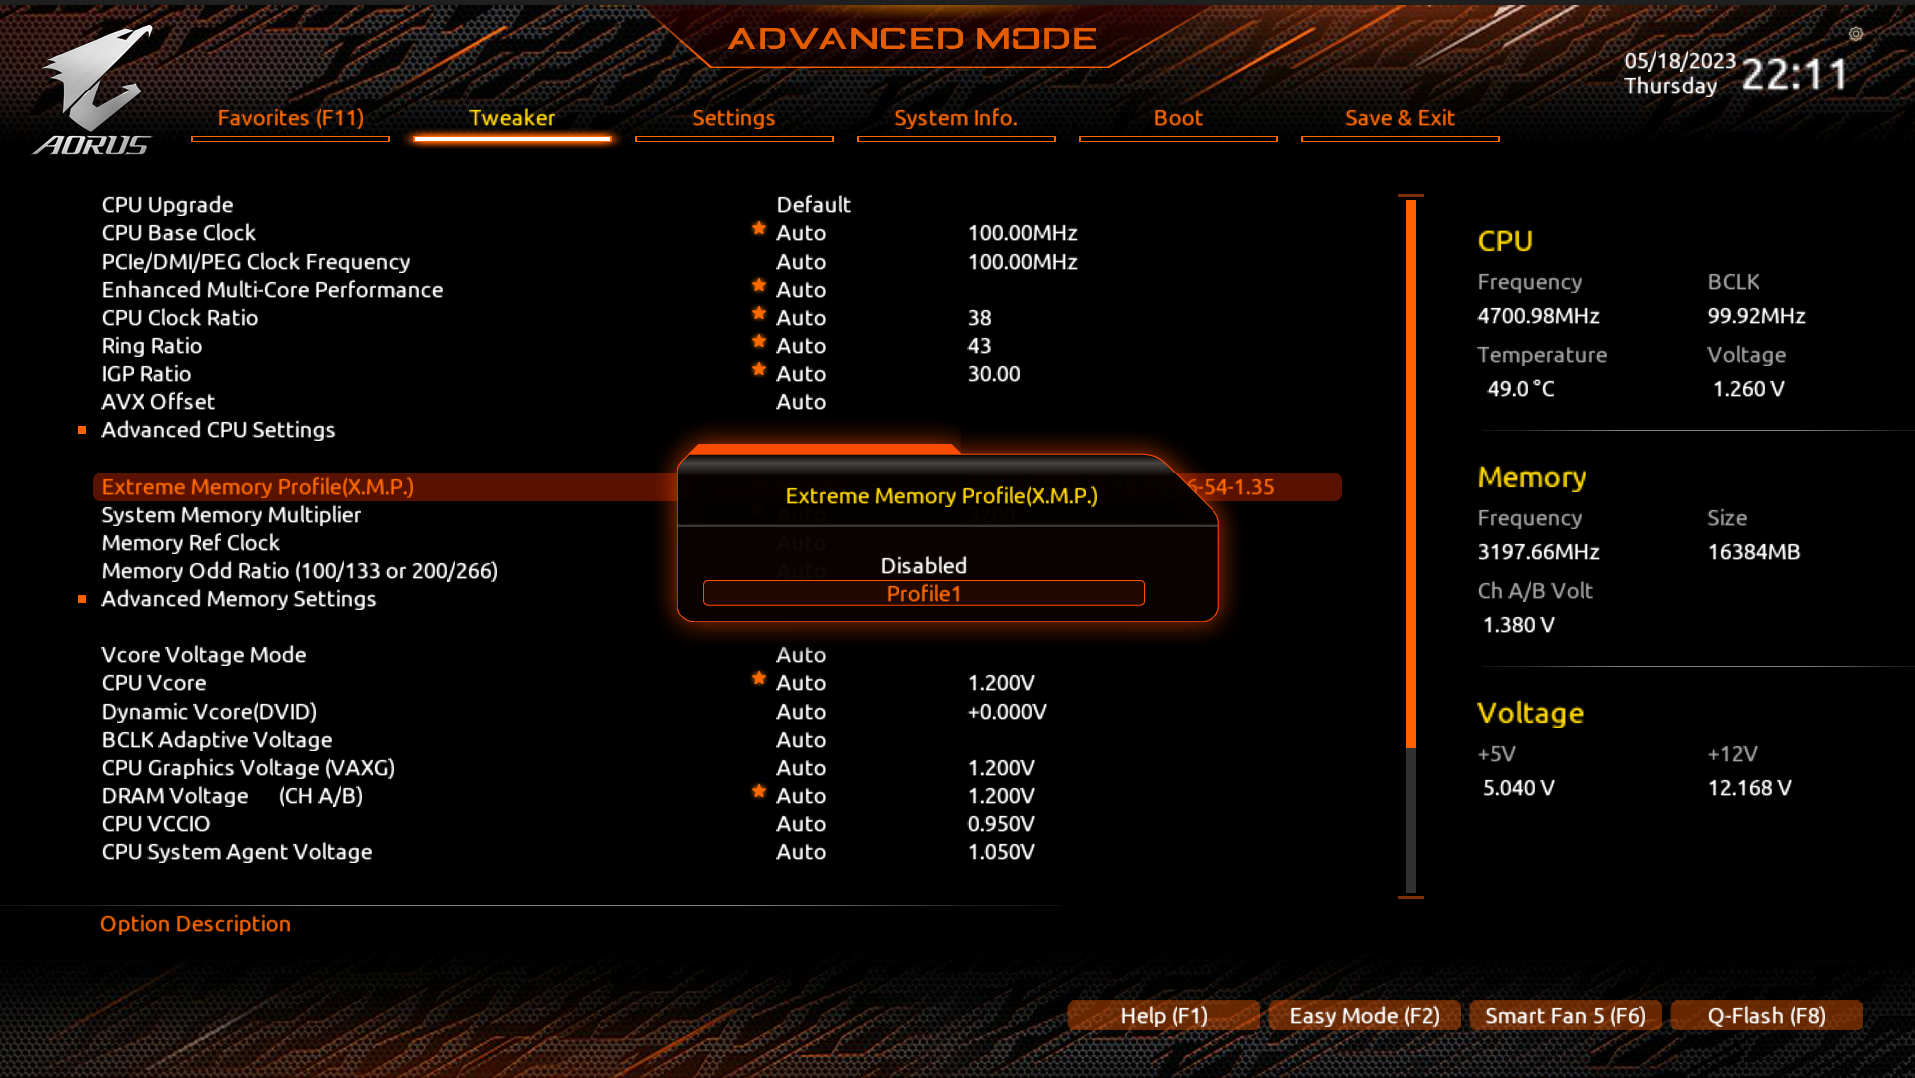
Step 3: Enable XMP or Equivalent Setting
The main setting we’re here to enable for the purposes of this guide is XMP or Xtreme Memory Profiles. XMP (as well as EOCP, DOCP, etc) exists as a pre-set Memory Profile on your RAM that your motherboard can use to get that RAM to run at its proper, advertised spec.
Without enabling XMP, you’ll be limited to whatever the entry-level RAM speed for that generation of DDR RAM is. This is serviceable enough on DDR4 and newer but is still a detriment to performance.
It’s outright bad on DDR3 and DDR2, though, which really do not have the memory throughput to spare in modern applications without being pushed to their limits.
What Now? A Brief on RAM Overclocking
Now, if you’re paying close attention, you might notice that XMP or its equivalent is not actually the only setting related to your RAM in your motherboard settings. (At least, it may not be- depends on your motherboard, I shouldn’t over-generalize here.)
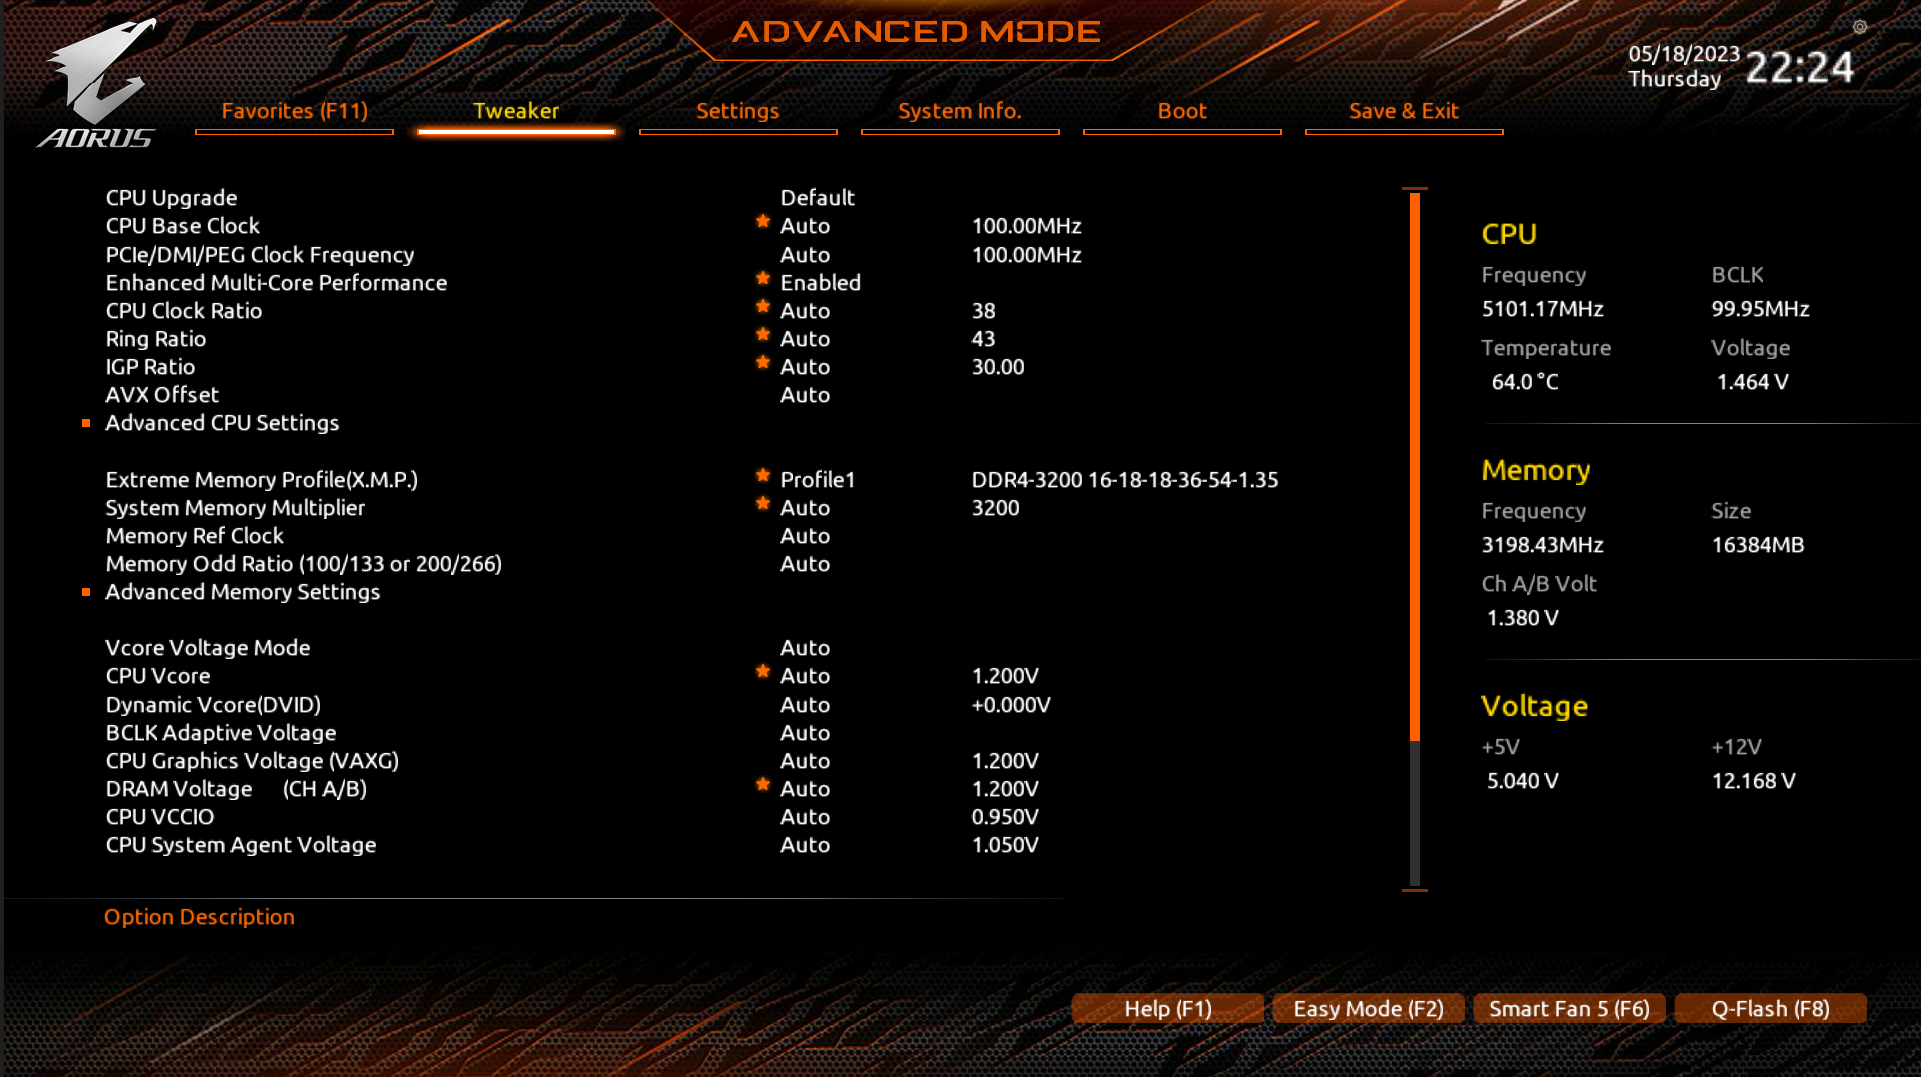
In any case, many motherboards (especially on the mid-range and high-end) support manual memory tweaking and overclocking for improved performance, as displayed in the screenshot below!
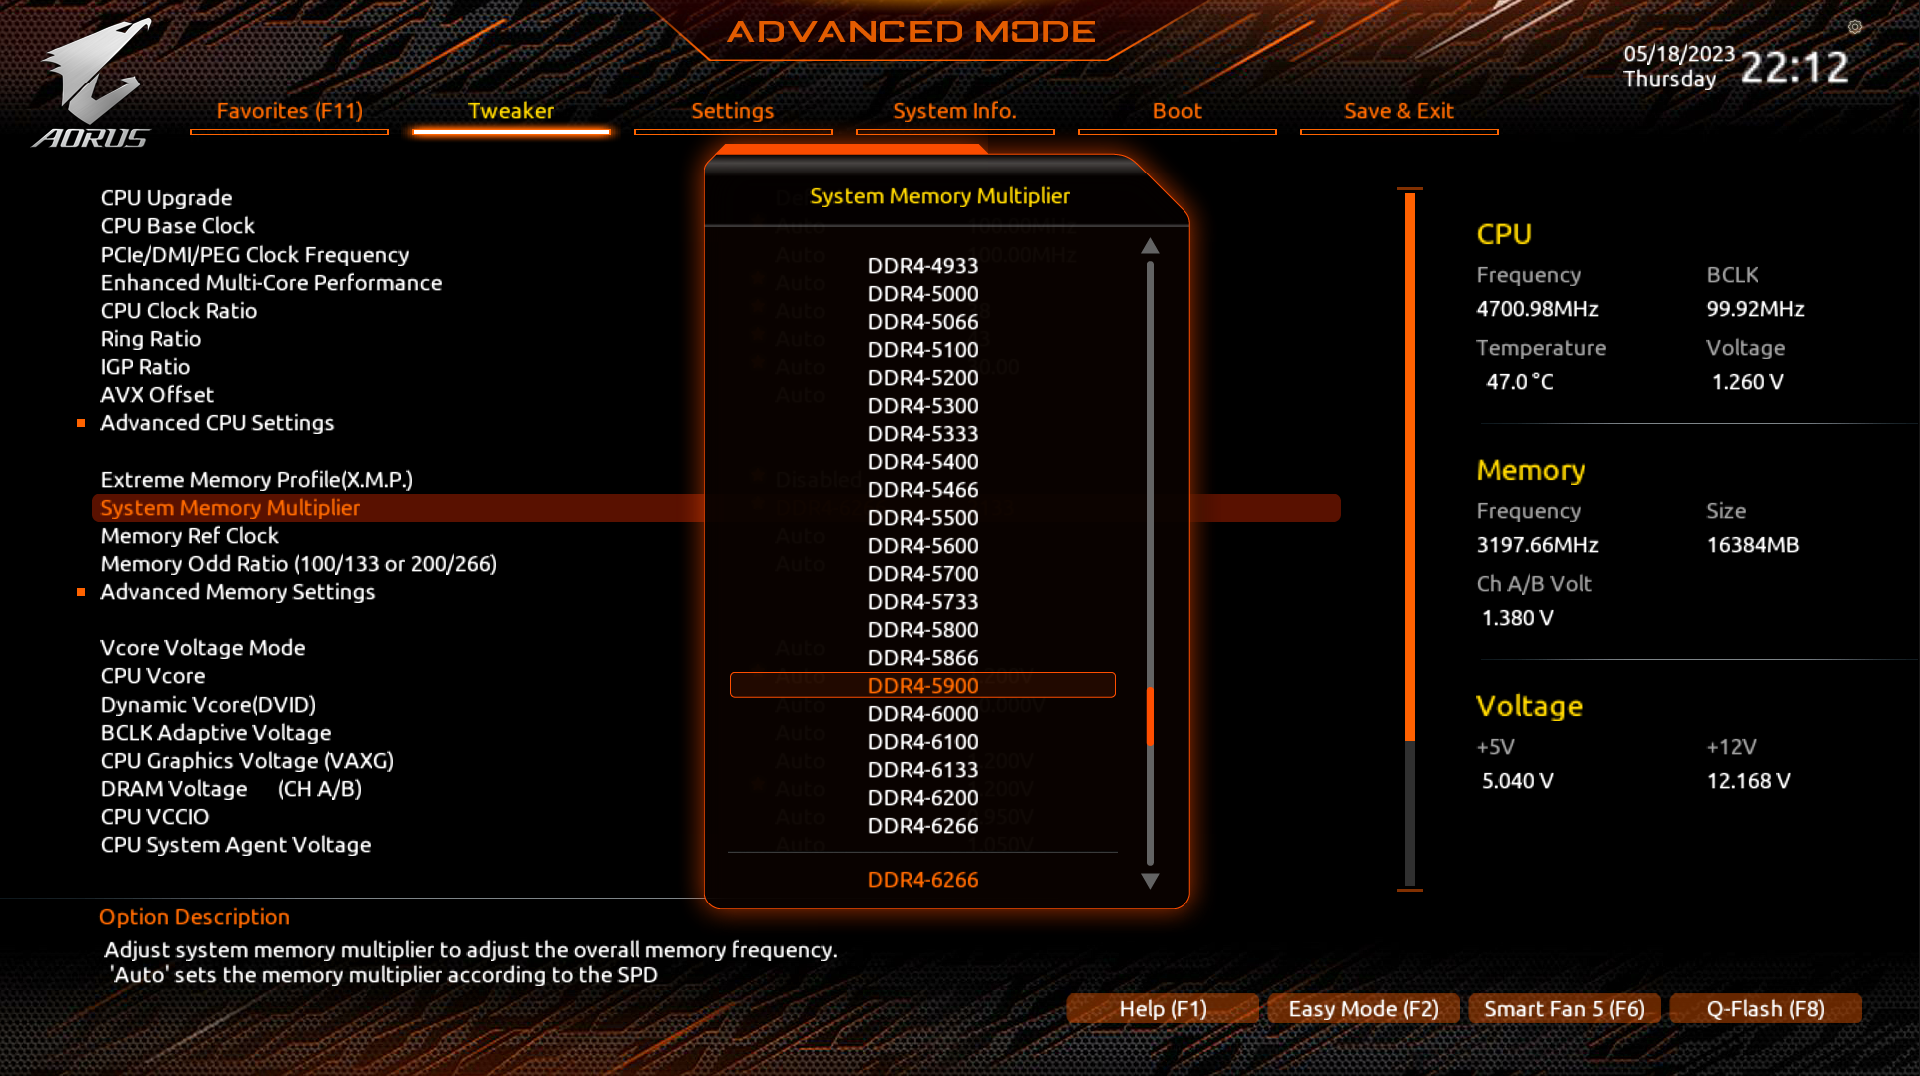
However, I have to admit that a fully-fledged Manual RAM Overclocking Guide is a little bit out of the scope of this article.
I should also warn that anyone who is interested in manually overclocking their RAM will need to restart their PC and test that RAM stability a lot. There’s a good reason this process is streamlined for you in the form of XMP!
If you’re insistent on manually tweaking your memory to its peak potential, though, I’m not going to stop you! In fact, I’ll give you two great resources to start with:
- IntegralFX’s DDR4 Overclocking Guide
- Zhiye Liu’s DDR5 Overclocking Guide
FAQ
What If I Can’t Change My RAM Speed or Reach Full Speed?
You may be running into a motherboard-related bottleneck.
Your motherboard’s chipset will determine the maximum supported RAM speed your motherboard can support, and if you didn’t check these specifications ahead of time, you may have accidentally gotten yourself stuck with RAM that is literally too fast for your motherboard with XMP enabled.
If your RAM’s XMP or equivalent profile exceeds the maximum spec of your motherboard, don’t try to enable it.
Even if it works, you’re going to introduce system instability and crashing by pushing your motherboard’s memory controller out-of-spec. Fortunately, you don’t need to replace your memory— it’ll just be relegated to default DDR generation spec as mentioned above.
What Performance Gains Are There From Speeding Up My RAM?
It depends!
But really though, it depends heavily on the application.
For most common desktop usage scenarios, you most likely aren’t going to notice a difference at all between XMP enabled or disabled unless you’re running in a single-channel (single-stick) RAM configuration.
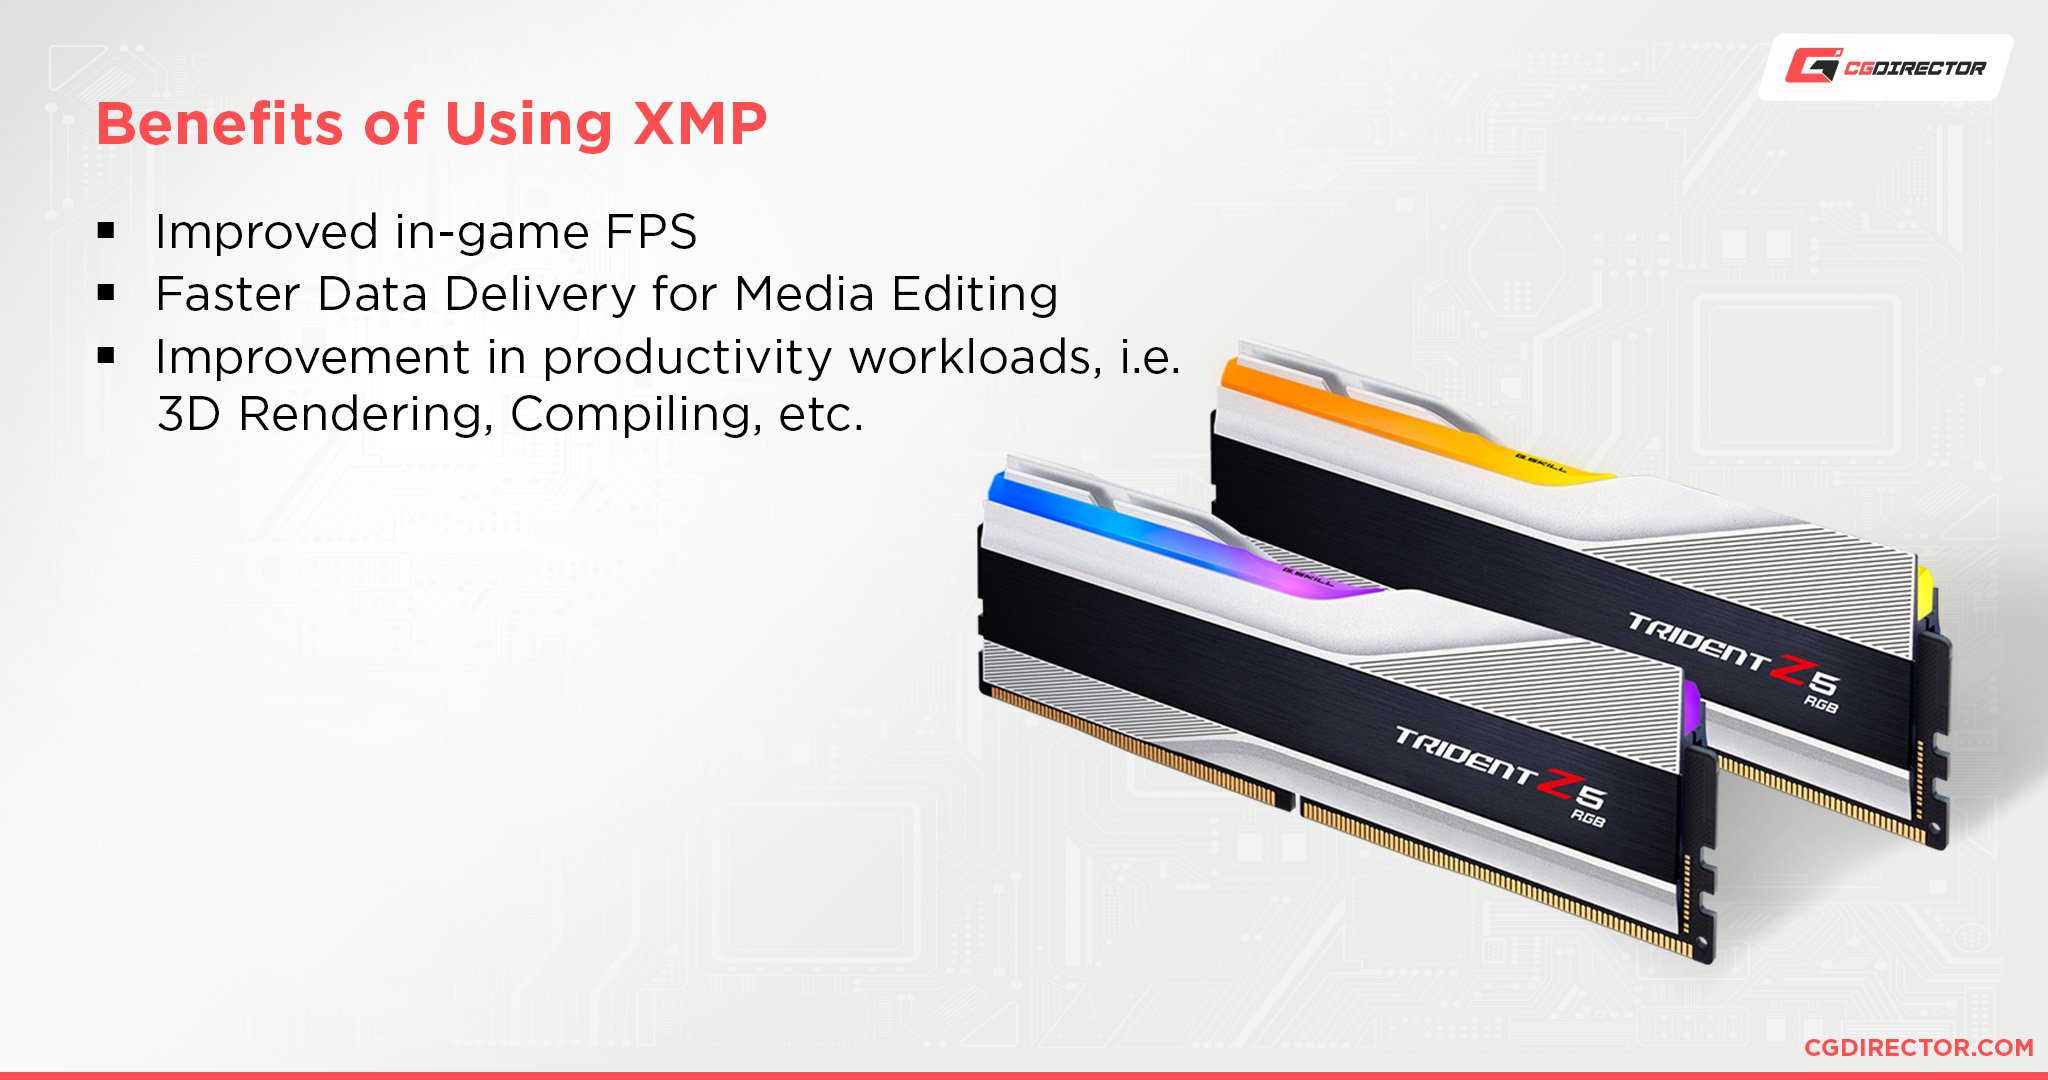
For rendering and productivity tasks, things can get a little more interesting.
Improvements to RAM speed can tangibly improve the speed of rendering in Premiere Pro, for example, but not always by a lot. RAM capacity is more important for most productivity and multitasking than RAM frequency is.
For gaming, RAM speed increases may not always have an obvious impact on in-game performance, at least not average FPS.
Where RAM does matter most in gaming is improving minimum FPS in intense scenes that spike CPU resources, especially ones with a lot of players or other CPU-calculated objects (common in MMOs especially). Gamers should definitely be enabling XMP if they can.
How Much RAM Do I Need?
Unsure of how much RAM you need? Fortunately, Alex has already written a fairly detailed guide to evaluate How Much RAM You Need, so you can check that out if you’re really unsure.
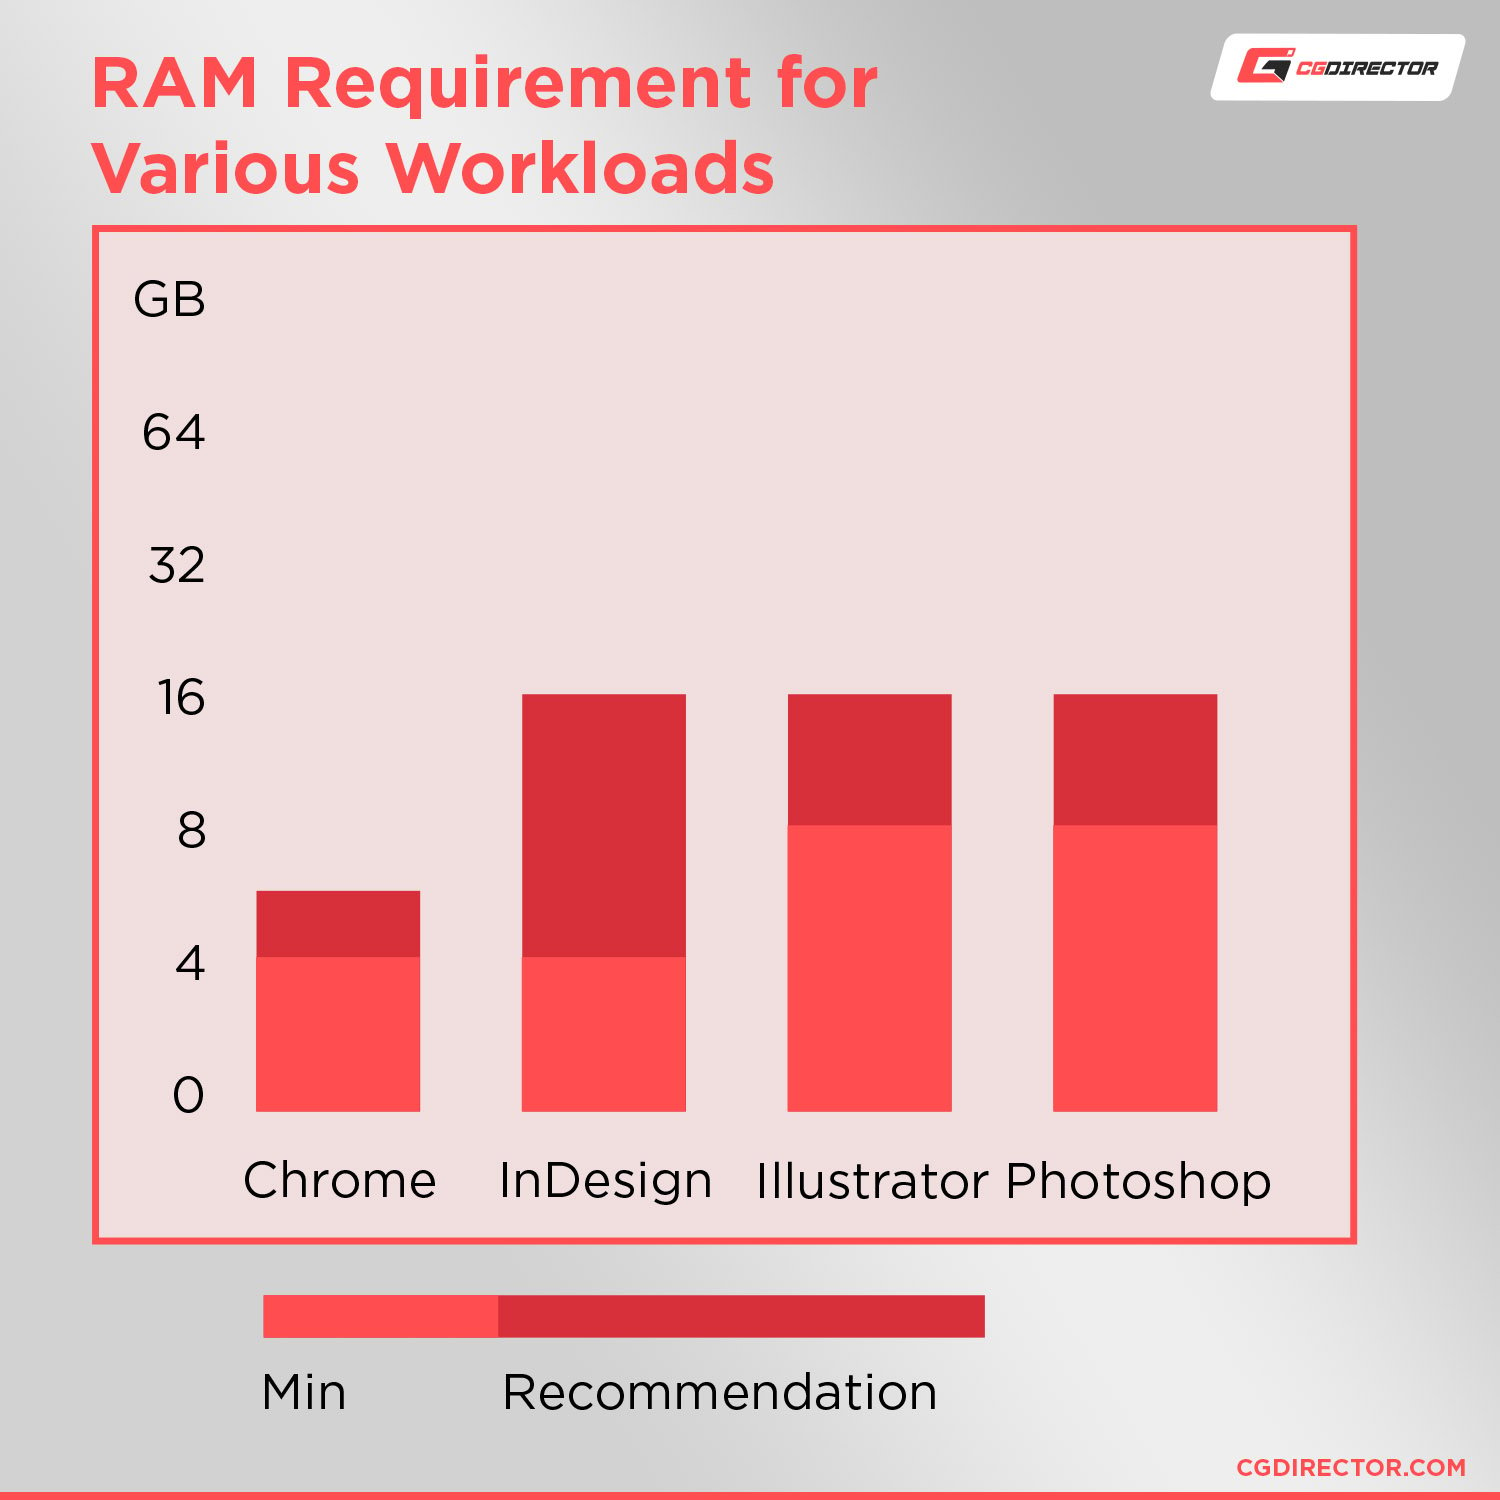
For the sake of this article, though, I’d recommend treating 8-16GB of RAM as a minimum for a modern rendering or gaming PC.
Is More RAM Harder To Overclock?
Yes! While XMP should always work fine as long as you’re within your motherboard’s specifications, manual RAM overclocking can get pretty intense on your motherboard’s memory controller, especially if you’re using 4 or more RAM sticks instead of just 2.
Over to You
And that’s all, at least for now!
I hope that this article helped teach you how to change your RAM speed in your BIOS and make the most of the memory that you already paid for.
If you have any other questions about RAM or hardware in general, feel free to ask them in the comments section below! Alternatively, you can also head over to the CGDirector Forum, which hosts an active community of experts and enthusiasts in addition to the rest of the team.
Until then or until next time, have a good one! And if you do decide to take the path of a manual RAM overclocker, be sure to make a system backup and keep your original RAM settings in mind in case you need to revert something. Better safe than sorry!


![Should You Update Your BIOS? [3 Reasons Why]](https://www.cgdirector.com/wp-content/uploads/media/2023/08/Should-You-Update-Your-BIOS-3-Reasons-Why-Twitter-594x335.jpg "Should You Update Your BIOS? [3 Reasons Why]")

0 Comments