 by
by 
TABLE OF CONTENTS
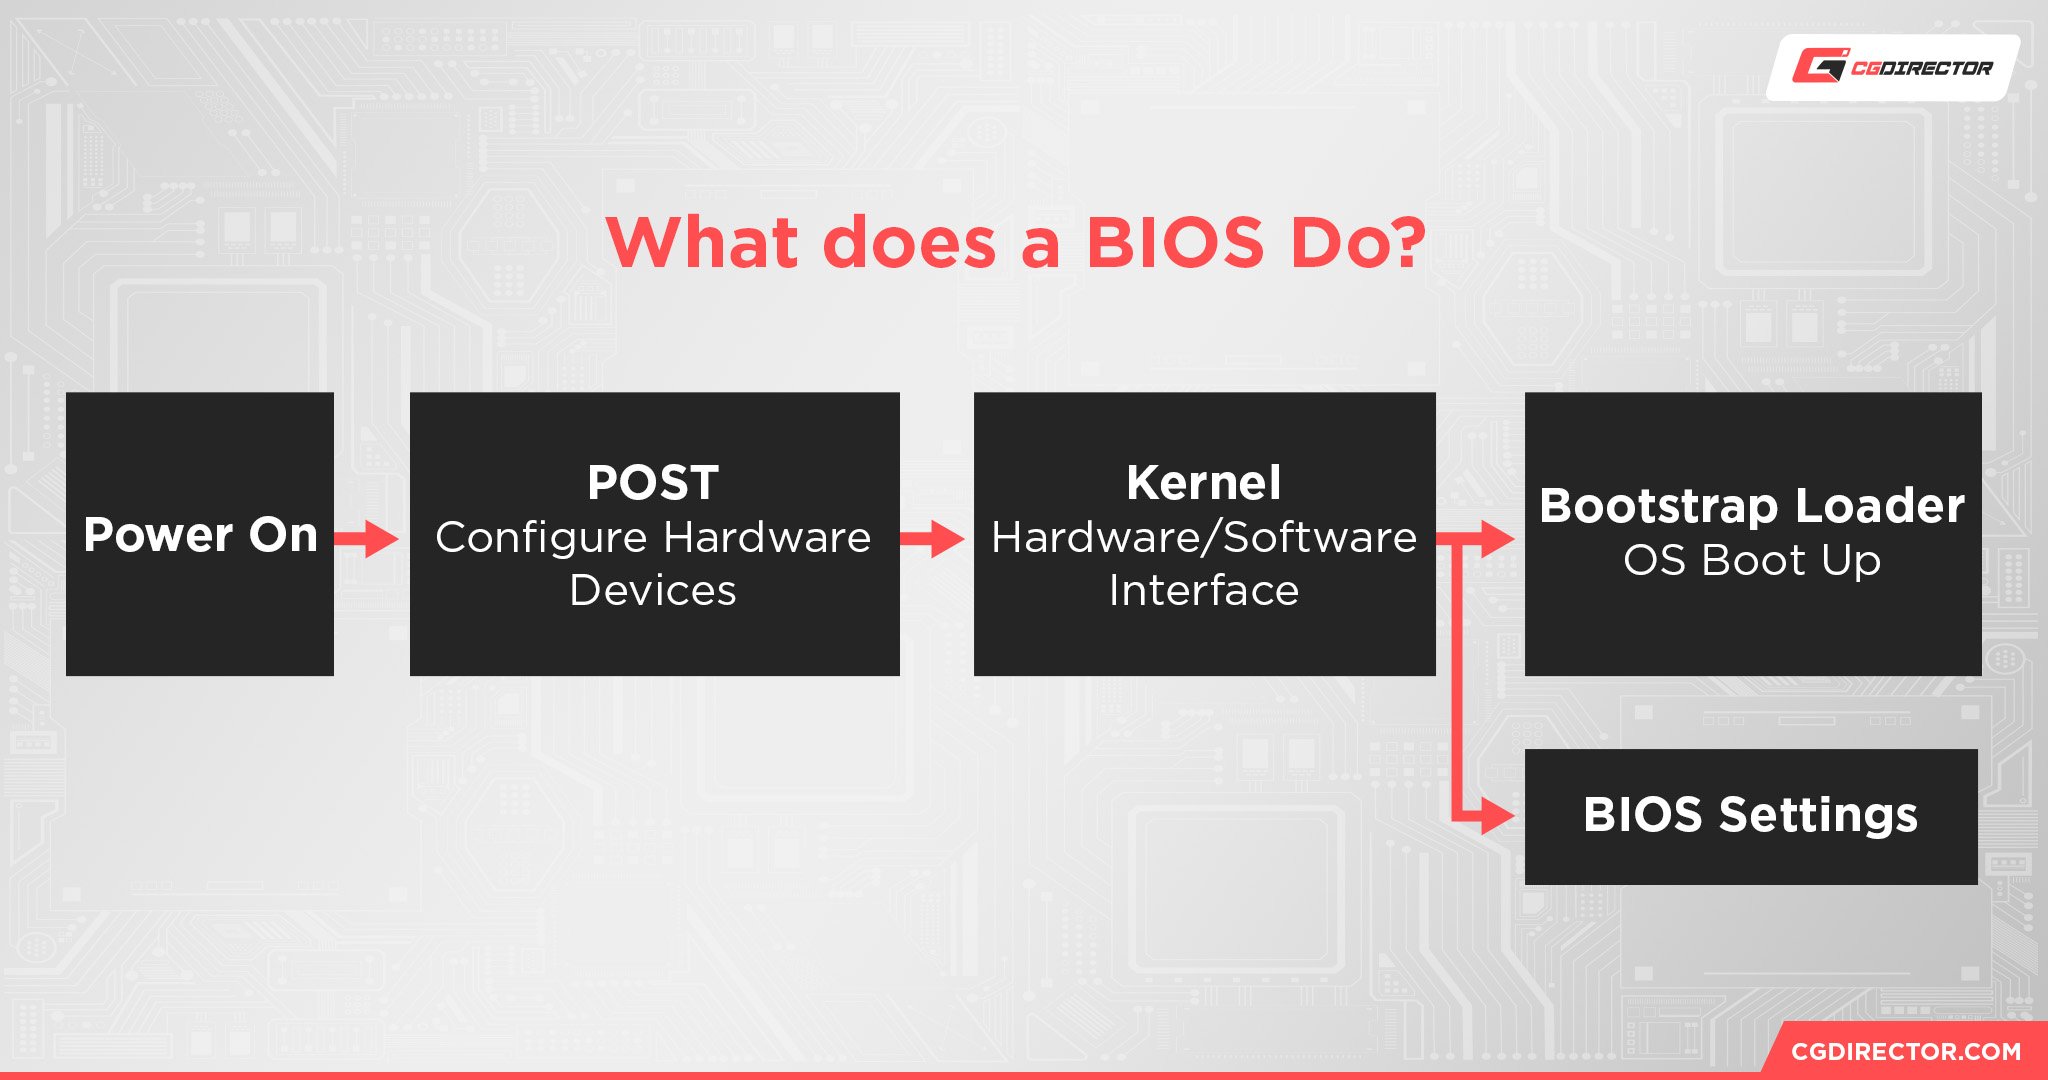
The BIOS, or Basic Input Output System, is the very first thing that comes to life once you hit that power button.
It’s responsible for initializing the boot-up (POST) process and also manages your hardware and system settings. In layman’s terms: the BIOS keeps your device afloat.
Generally speaking, you don’t need to update your ASUS BIOS on a routine basis.
In fact, many PC users can go without updating their BIOS for years. However, if you’re experiencing technical issues or compatibility problems, updating the ASUS BIOS to the latest version can help.
What Is the BIOS?
The BIOS is firmware on your motherboard which is responsible for starting POST (Power-On Self-Test), a diagnostic operation where your BIOS tests hardware elements and connected peripheral devices for potential issues.
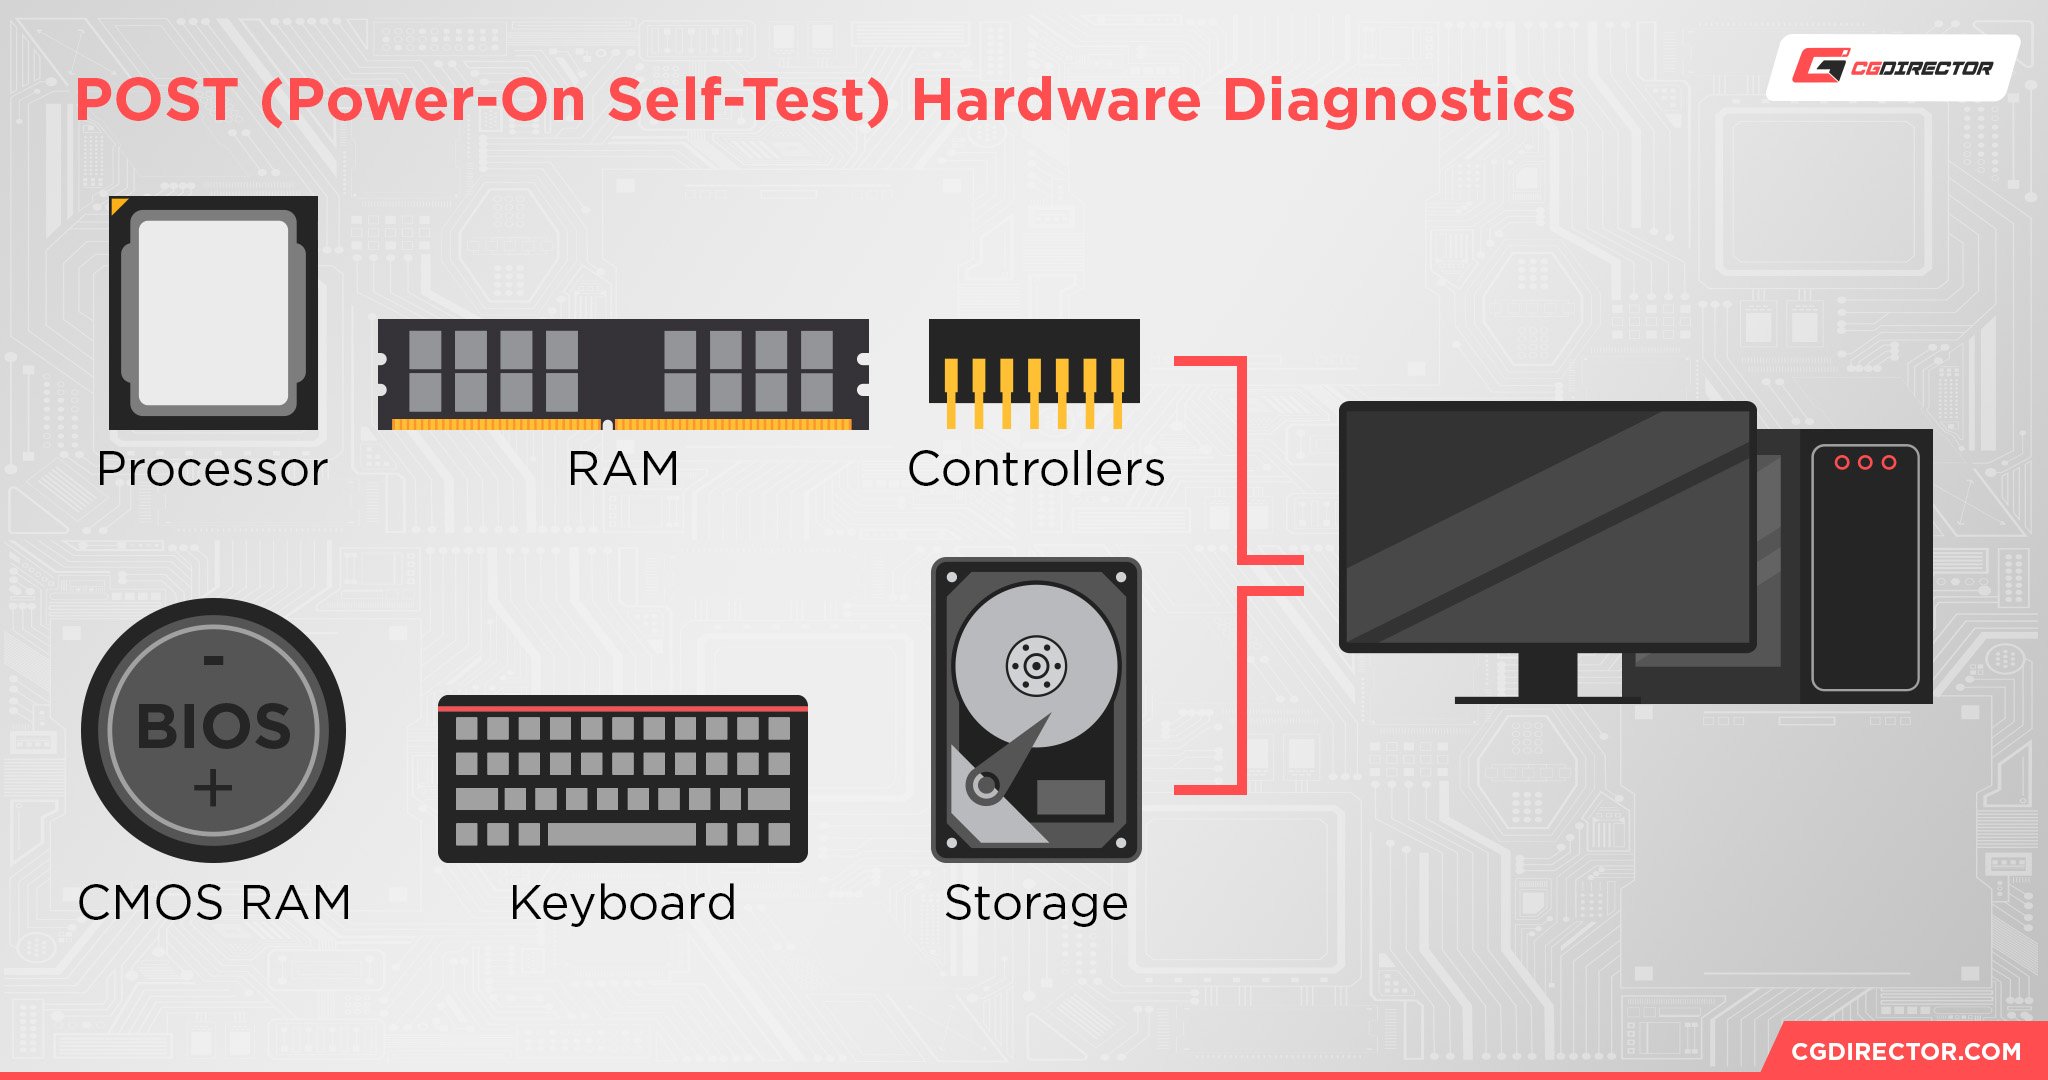
If the POST doesn’t detect any errors, your computer will boot up normally. However, if an error is detected, you’ll usually receive a POST error message or beep code of some form.
The BIOS isn’t just responsible for initializing POST though; it also handles your computer’s hardware settings, including system voltages, CPU settings, and boot device order.
Entering the BIOS menu, usually by hitting Del during boot-up on ASUS motherboards, will allow you to configure all these settings to your preferences.
Is Updating My ASUS BIOS Necessary?
In truth, you rarely ever need to update your ASUS BIOS. Most bugs, errors, or performance slowdowns can be tackled without tinkering around with the BIOS, and unlike typical software updates, BIOS updates aren’t released regularly.
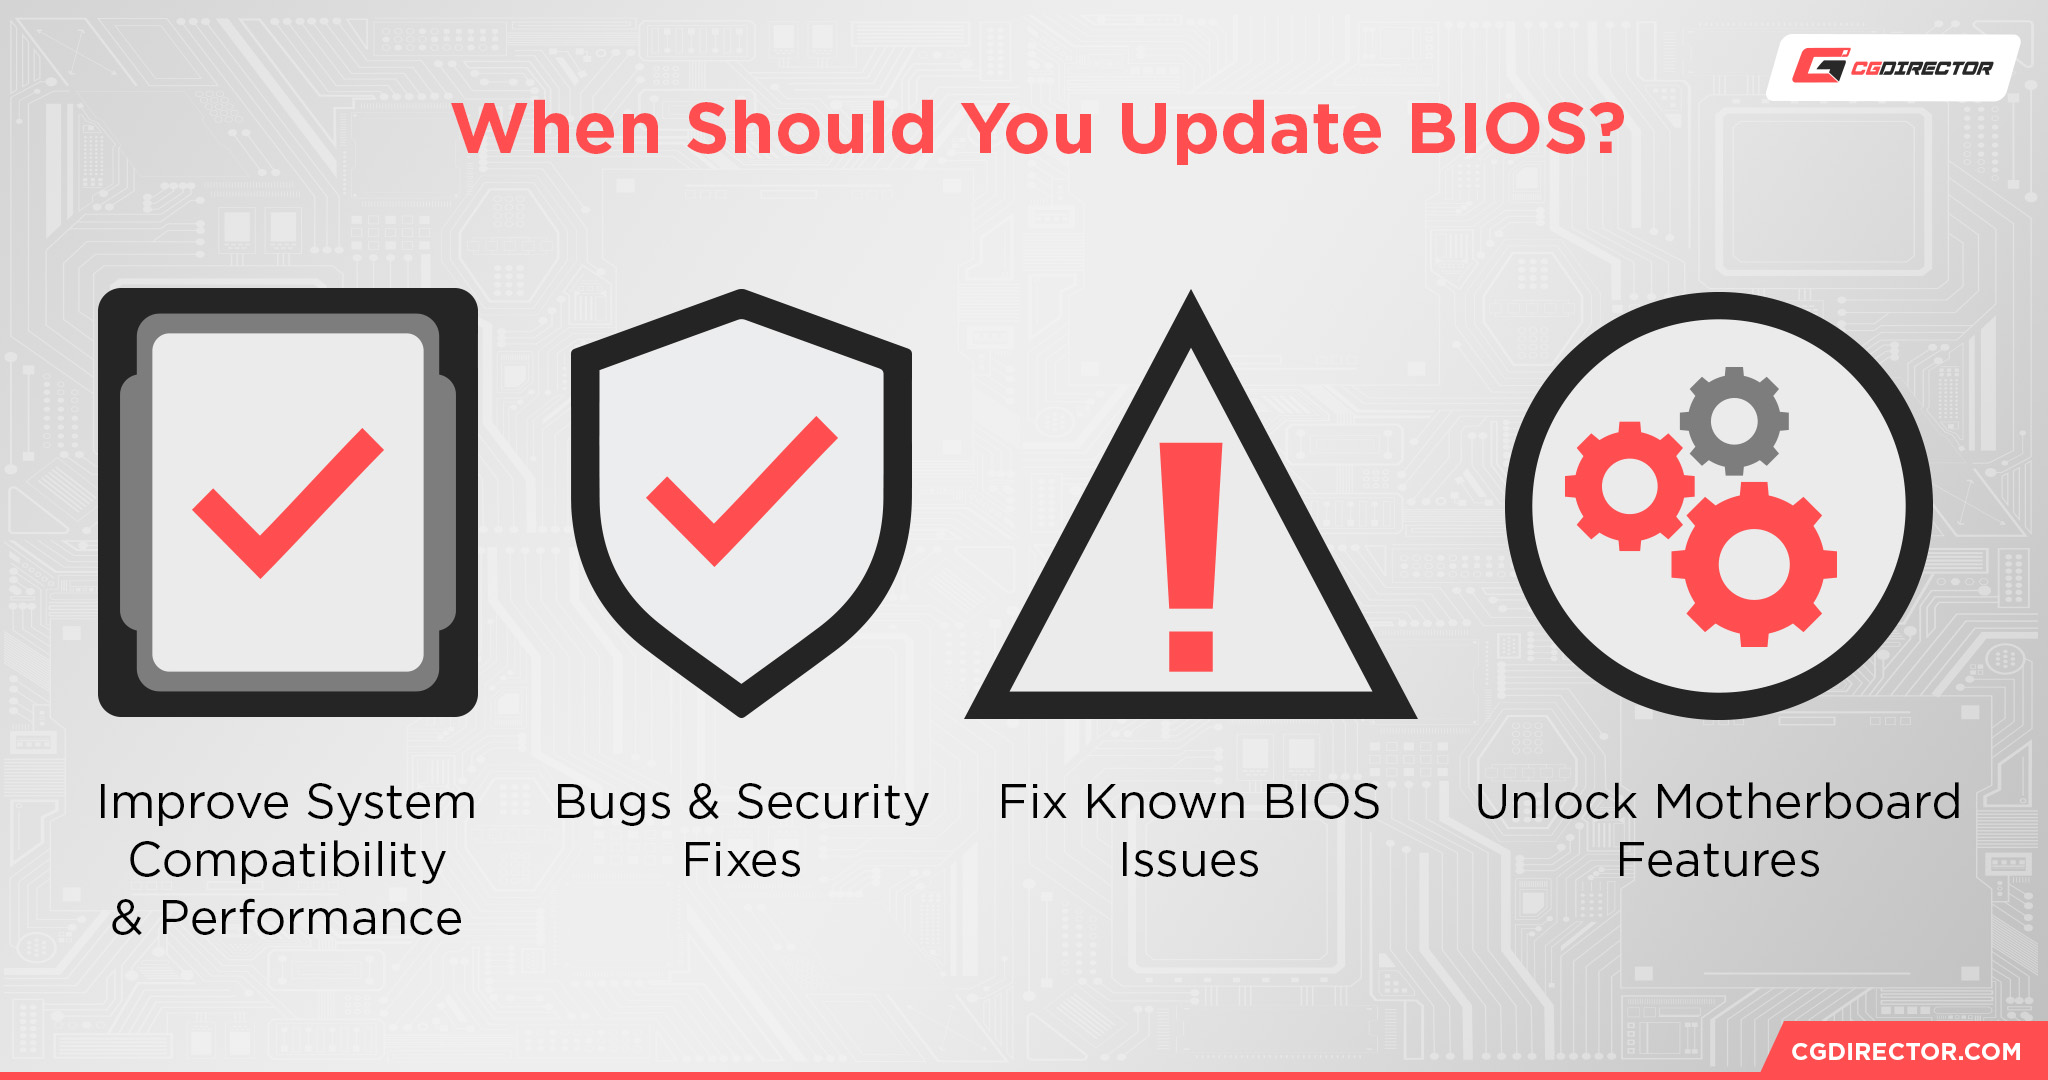
However, there are a few instances where an update may be necessary, including:
- You’ve encountered a problem where a BIOS update is a known potential solution
- The update contains critical security patches, bug fixes, or stability improvements
- Updating will give you access to new features
- Ensures your system is compatible with the latest hardware (particularly CPUs)
- The update provides optimizations that can genuinely improve hardware performance
How to Update ASUS BIOS
There are a few ways you can update a BIOS on an ASUS motherboard, each better suited to certain situations, like if you’re building your PC from scratch or don’t have a USB flash drive handy. We’ll run you through each method below.
However, we’ll first cover some vital safety precautions. And please, we know it’s tempting, but do not skip the safety section. It’s there for a reason as updating the BIOS does carry risks.
Safety Precautions Before Updating Your ASUS BIOS
Updating the BIOS is generally safe, but if you lose power during the update or unintentionally use a corrupted or incompatible BIOS file, there’s a chance it could completely fry your machine… yeah. Scary stuff.
That’s why it’s so important to follow all the necessary safety precautions:
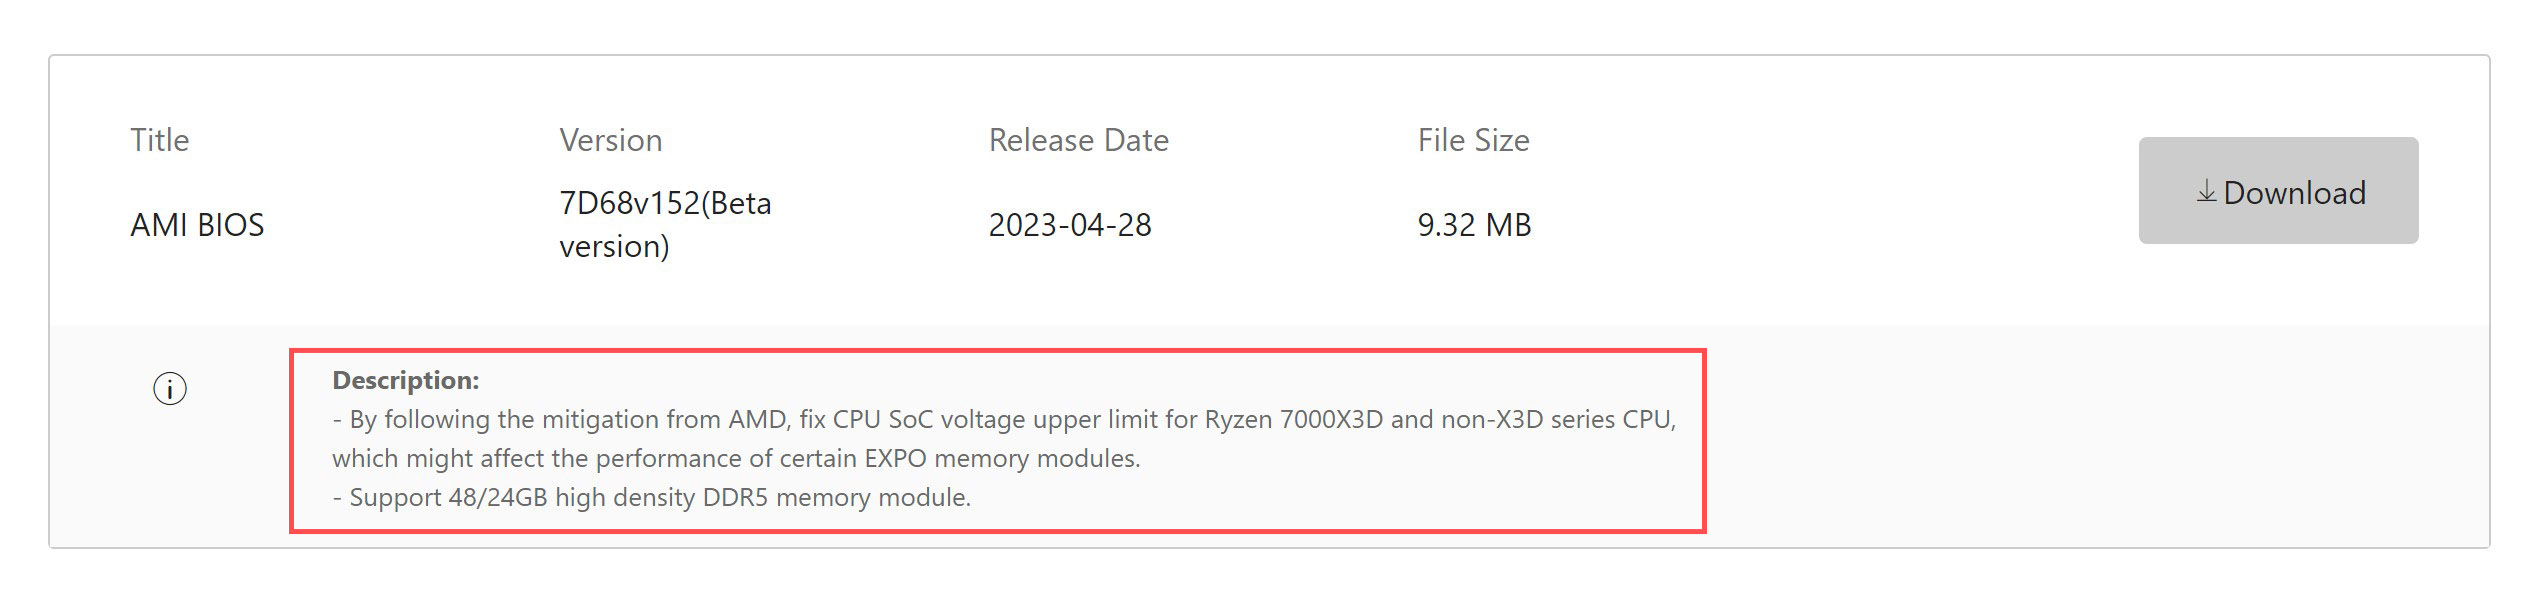
- Familiarize yourself with the BIOS changelog to determine whether an update is actually needed. You may already have the latest update or the update you’re after may not have a fix for the bug you’re experiencing.
- Check how new the BIOS update is. If it was just released and you’re not in a rush to update the BIOS, it’s best to wait for a few months. This will give other users time to test out the update and report on any potential bugs (slow and steady wins the race).
- Back up your data on an external SSD. This way, you won’t lose your programs, files, and personal documents on the rare chance the update bricks your system.
- Minimize the chances of power loss. Ensure your computer is securely plugged into a reliable mains outlet and that all power cables are properly connected, with no signs of kinks, tears, or bends. Also, check if there are planned (or reports of) power outages in your area.
- Keep a record of custom BIOS configurations, as updating the BIOS will reset it back to default settings.
- Ensure the BIOS file is correct. Double-check — actually, scrap that, triple-check that you’re installing the correct BIOS update file for your motherboard. More on this later.
- Close active applications. This applies if you’re updating the BIOS through the operating system (not via a USB flash drive).
- Do not remove the USB flash drive or turn off the power. During the BIOS update, do not turn off the power, press any other buttons, or remove the USB flash drive until the process is complete.
Preliminary Measures
Before you start the BIOS update process, you need to make sure you know your ASUS motherboard model name and its current BIOS version.
You also need to download the appropriate BIOS file and have a formatted USB flash drive ready (if you’re not using AI Suite 3).
If this seems like a lot to take in, don’t worry — we’ll guide you through each preliminary step. You can also reach out to our experts on the forum if you get stuck at any point.
Step 1. Find Your ASUS Motherboard Model Information and BIOS Version
You should be able to find this information within the motherboard’s manual or on the box it came with, but if you have misplaced the packaging, don’t sweat it.
There’s another easy way to find out:
- Hold the Windows and “R” keys simultaneously
- When the Run program pops up, enter “msinfo32” and hit the “OK” button
- It should display all your system information, including your motherboard’s name, serial number, and version. It will also tell you what BIOS version you’re currently running
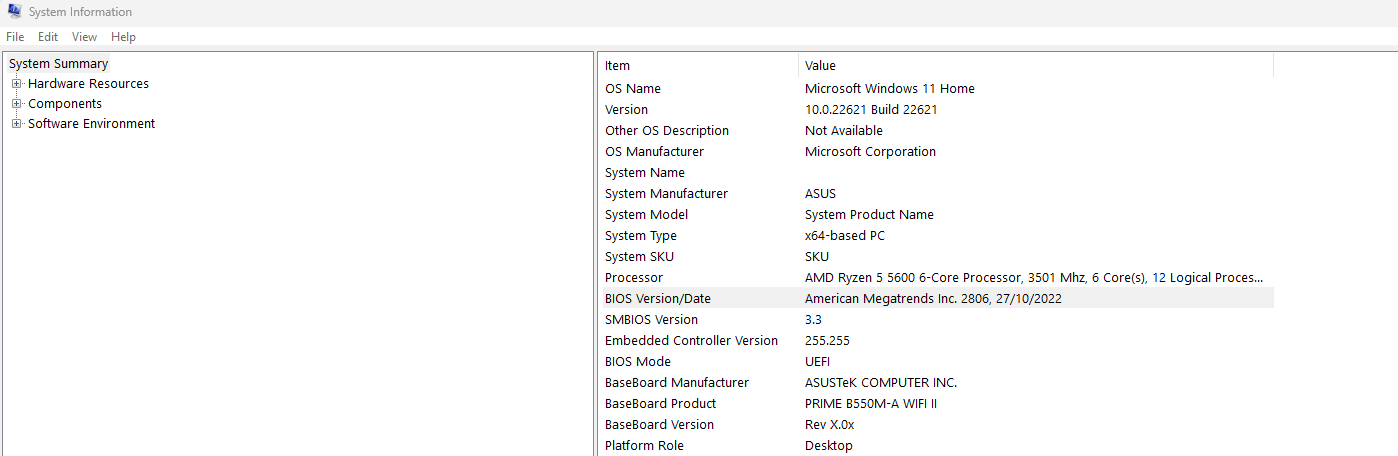
Make a note of these details, especially the motherboard product name and its current BIOS version.
Step 2. Download the ASUS BIOS File
Once you’ve found your motherboard model info, head on over to the ASUS Download Center.
You will need to use your motherboard model information to find the latest compatible update for your BIOS:
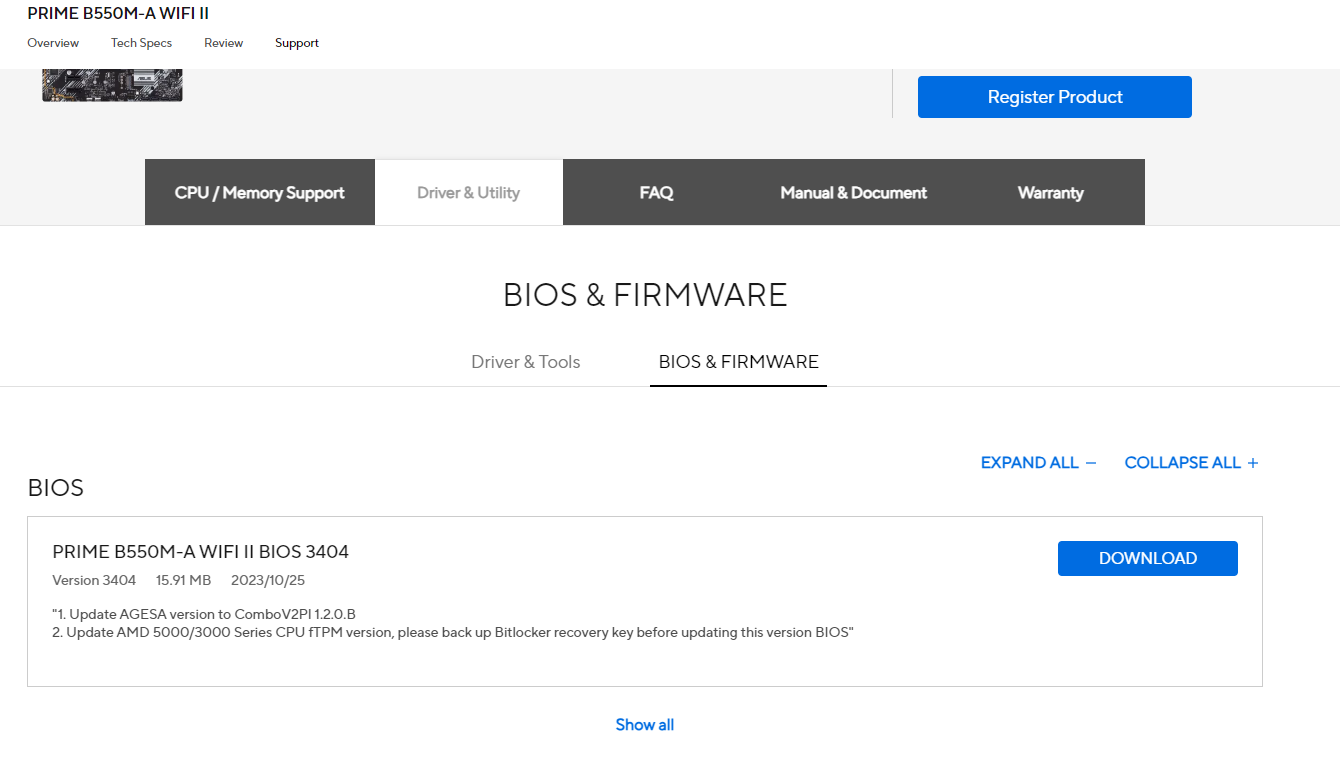
- In the ASUS Download Center’s search bar, enter your motherboard model name (for example, mine is PRIME B550M-A WIFI II)
- Navigate to the “Driver & Utility” tab
- Click the “BIOS & Firmware” option
- Download the latest BIOS version available for your motherboard. Make sure to check that the up-to-date version is actually different from your current version and isn’t newly released or in beta stage
- Save and extract the file once it has finished downloading
Step 3. Formatting Your USB Flash Drive
This preliminary measure is only relevant if your method involves the use of a USB flash drive. The ASUS AI Suite 3 method won’t require one, so you can go ahead and skip this section.
If a USB is required, you will need to ensure it has a capacity of at least 1GB and is in the FAT32 format. If it isn’t formatted, your BIOS won’t be able to read it.
Here’s how to format your drive (and set it up for your BIOS update):
- Connect your USB flash drive to your PC
- Back up any current data on the drive (the formatting process will erase it)
- Right-click on your USB flash drive
- Select “Format” and choose FAT32
Once the USB flash drive is in the correct format, move the BIOS file you downloaded earlier into its root directory. You can now either update your BIOS using EZ Flash, ASUS AI Suite 3, or the FlashBack button.
Method 1. Update BIOS with EZ Flash Utility
You should use the EZ Flash Utility method if you’re experiencing instability issues and want to update your BIOS without entering the actual Windows operating system.
Do note though that not all motherboards support EZ Flash. You can find out if your motherboard supports it by checking the model specs on the ASUS support website:
- Go to the official ASUS website and type your model information in the search bar
- Click “Learn More” when your motherboard model pops up
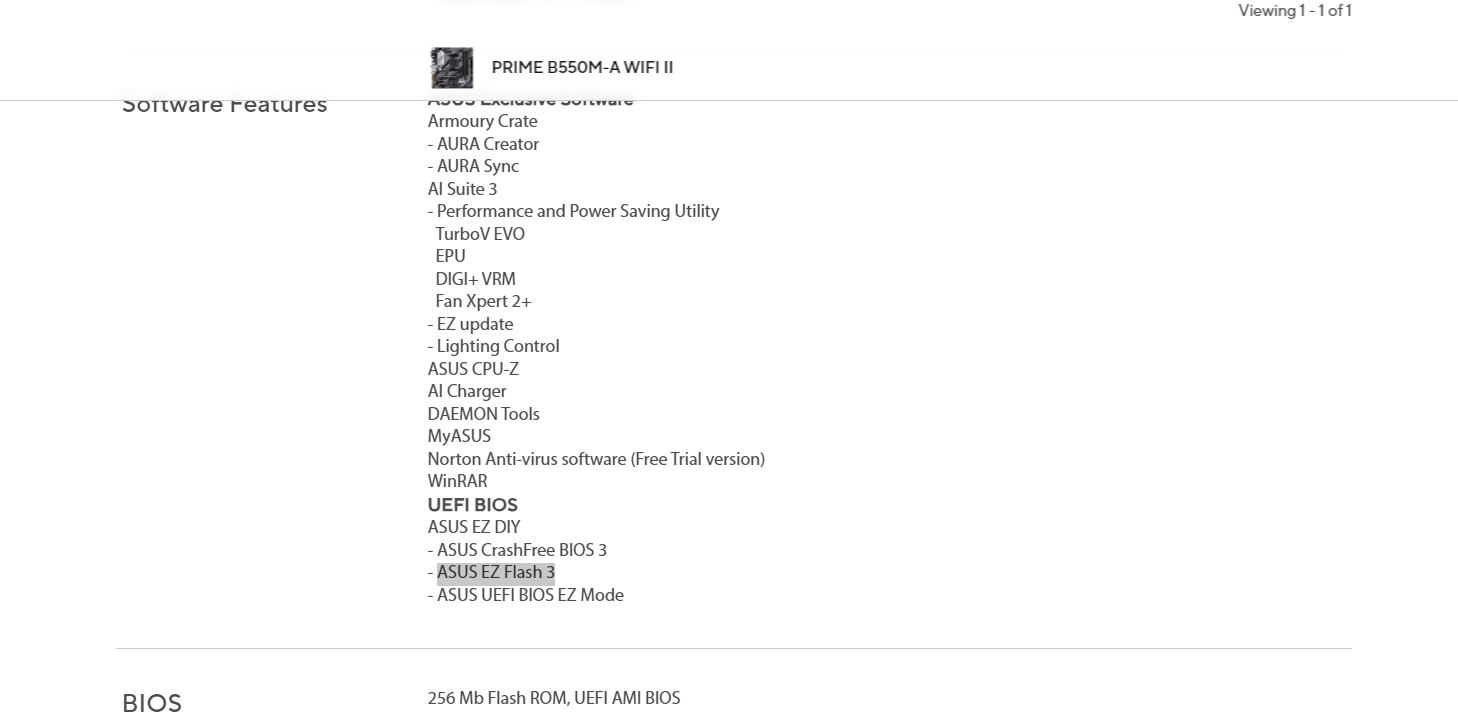
- Click on “Tech Specs” and scroll down until you see “Software Features”
- If your motherboard supports it, EZ Flash will be listed here
Once you’ve confirmed your motherboard supports this feature, you can begin the BIOS update:
- Insert the drive containing the BIOS file into the motherboard’s USB port
- Boot your PC and press the “Del” key until you enter the BIOS menu
- Press F7 or select the “Advanced Mode” option
- Navigate to “Tool,” then click “ASUS EZ Flash 3 Utility”
- Click your USB flash drive and select the BIOS file
- Select “Yes” to “Do you want to read this file” and “Do you want to update the BIOS”
- Allow the BIOS update to occur. Do not shut down the system or remove the USB flash drive during this time
Once the BIOS update is complete, your PC will automatically restart. You can check if your BIOS version is now updated by either going back into the BIOS menu or using the “msinfo32” Run prompt we mentioned earlier.
Method 2. Update BIOS with Asus AI Suite 3
Don’t have a USB flash drive on hand but need to update your BIOS urgently? Then using ASUS AI Suite 3 is your best bet.
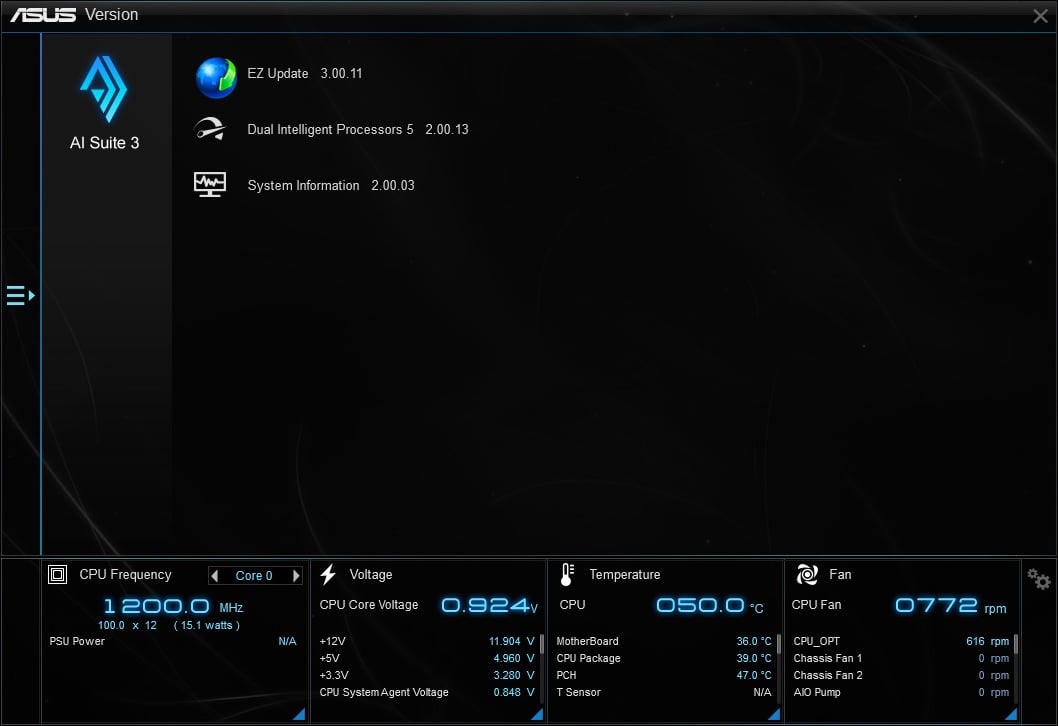
For those not familiar, AI Suite 3 is essentially an all-in-one software where you can monitor system stats and configure settings like fan speeds, CPU frequency, and voltage — things you would typically need to enter the BIOS menu for.
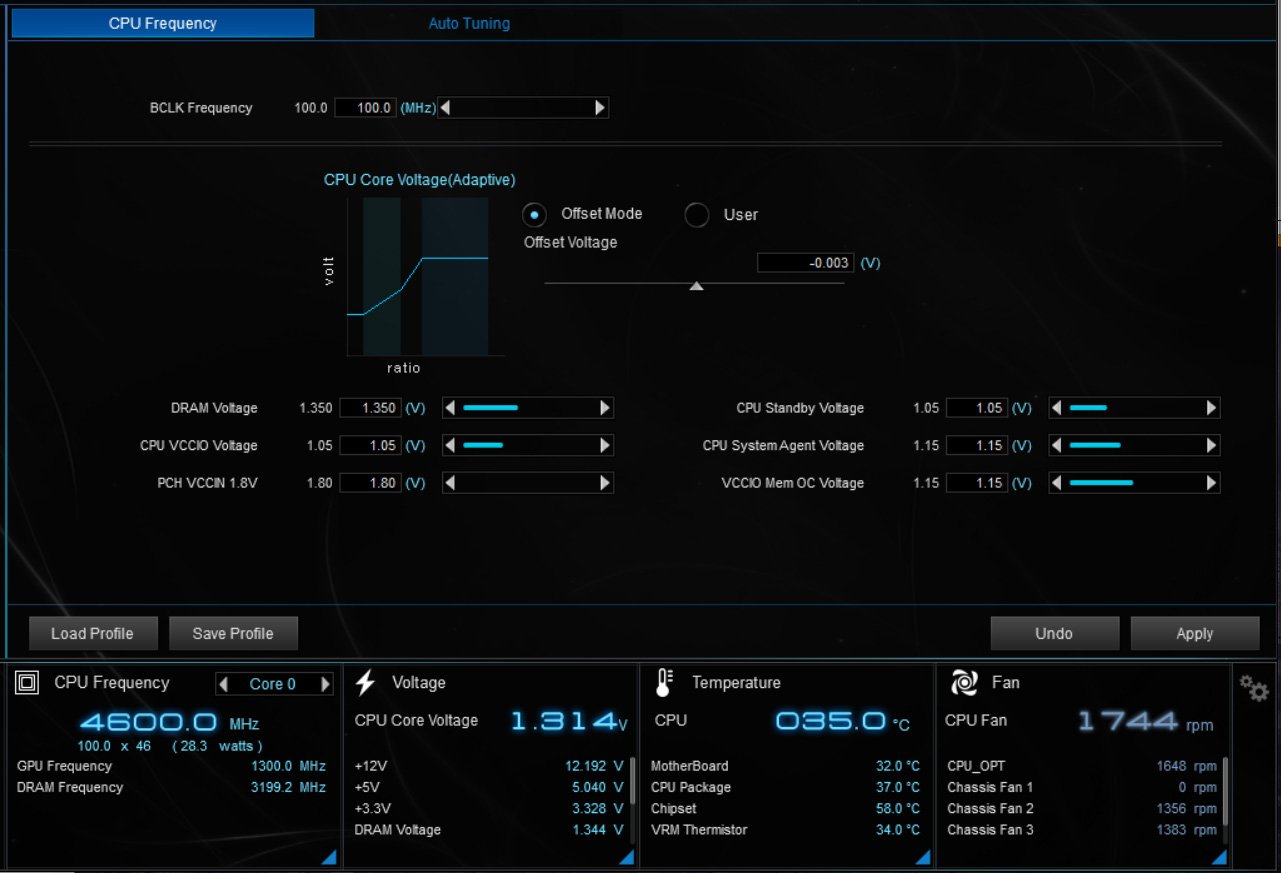
But what’s most relevant to you today is that it allows you to update the BIOS without a USB flash drive.
You’ll need to download the ASUS AI Suite 3 program if you don’t already have it installed:
- Go to the ASUS Download Center
- Type your motherboard model name into the search bar
- Select your motherboard model when it appears, then navigate to “Driver & Utility”
- In “Driver & Tools,” select your operating system (Windows 10 or Windows 11)
- Go to “Software and Utility,” then download the ASUS AI Suite 3 file
- Extract the folder, open it, and then double-click “Setup.exe”
- Select “Install” to begin the process — make sure the “Ez Update” application is selected
If you can’t find the ASUS AI Suite 3 file, it means your motherboard doesn’t support this feature. You’ll need to use the FlashBack button to update your ASUS BIOS (more on this later).
Once you’ve downloaded ASUS AI Suite 3, you can begin your BIOS update — just note that a reliable internet connection is vital for this:
- In the Windows Start search bar, type “AI Suite 3” and open the software once it appears
- Click on the side list icon, then select the “EZ Update” option
- Look for the “Manually Update Boot Logo or BIOS” section
- Click on the upload file option (the ellipses button) and select your downloaded BIOS file
- Hit the “Update” button, then select “Flash”
- Once the EZ Update notification pops up, click “OK” to begin the process
- The BIOS update will usually take around 3 to 5 minutes. Your PC will automatically reboot once complete
Re-enter the AI Suite 3 software and open up EZ Update again. Check that the “Current BIOS” information is now the latest version.
Method 3. Update BIOS with FlashBack
Building a PC from scratch? Then you may need to update your motherboard’s BIOS to fix a hardware incompatibility issue. This is especially common if you’re using parts that are newer than the motherboard itself.
Now, the two methods above aren’t exactly…. going to work. After all, your PC isn’t even up and running yet and doesn’t have all its parts installed.
But you can still update your ASUS BIOS using the dedicated FlashBack button on the motherboard. It essentially allows you to update the BIOS without needing to enter the BIOS menu or Windows operating system.
While not all motherboards come with a dedicated button, ASUS is pretty good in that department and most of their models do.
Here’s how to update the BIOS using the flash button:
- Use a working PC to download the necessary ASUS BIOS file and prepare a formatted USB flash drive (see preliminary measures described above)
- Rename the BIOS file by double-clicking the ‘Biosrenamer.exe’ tool contained within the folder. If a warning notification pops up, confirm that you would still like to make the name change
- Transfer the BIOS file to your formatted USB drive (remember: keep it stored in the root directory)
- Safely eject the USB drive once the file transfer is complete
You can now use it to update your actual PC’s BIOS:
- Ensure the PSU and motherboard are mounted inside the PC’s chassis
- Connect the motherboard to the power supply, making sure both the 24-pin main power cable and 8-pin CPU power cable are properly connected
- Connect the PSU to a wall outlet (and move the PSU switch to ON)
- Look for the dedicated USB FlashBack port on the motherboard. It’s usually located at the back or next to the FlashBack button, but check your model manual for guidance if necessary
- Insert your USB flash drive into the dedicated port
- Hold the FlashBack button until the LED light on (or near) the button flashes. This is usually around 3 seconds
- The BIOS update will now begin. It’ll usually take around 3 to 8 minutes, depending on the BIOS file size. Do not remove the USB drive or unplug the power supply during this time
The LED light will turn off once the update is complete. However, if the BIOS update doesn’t start, or you run into any other issues, make sure to check out our troubleshooting steps.
FAQ
Is it safe to update my ASUS BIOS?
Yes, it is safe to update your ASUS BIOS as long as you take the necessary safety measures to ensure your computer doesn’t lose power during the update.
You will also need to make sure that you use the appropriate BIOS file from ASUS — an incompatible or corrupt file can cause system complications.
How do I enter the BIOS menu on ASUS?
It’s easy to access the BIOS menu on ASUS motherboards — you simply need to press the “Del” key while switching on your device.
In the BIOS menu, you will be able to customize hardware settings such as boot order, memory settings, and fan speeds, as well as apply any overclocking or undervolting.
If the “Del” key doesn’t work, try pressing “F2.” If not, refer to your motherboard’s manual.
Can I update my ASUS BIOS without a USB drive?
Yes, you can use ASUS’s dedicated software tool, AI Suite 3, to update your BIOS without a USB flash drive.
We cover the step-by-step process for this method above, but keep in mind that it requires a stable internet connection. Also, older ASUS motherboard models may not be compatible with AI Suite 3.
Over to You
Updating your ASUS BIOS can give you access to new features, improve hardware compatibility, and even solve bugs or security vulnerabilities.
While the process can seem daunting — and does come with risks — as long as you’re mindful of the safety precautions you shouldn’t run into any trouble. That said, always reach out to a professional for assistance if you aren’t comfortable around hardware.
If you have any other questions or concerns about updating an ASUS BIOS, leave us a comment down below or reach out to one of our experts on the forum.

 In BIOS")


0 Comments