 by
by 
TABLE OF CONTENTS
If you’ve ever plugged in anything audio-related to your motherboard, I’m sure you’ve seen the abundance of audio ports scattered on the side of your motherboard.
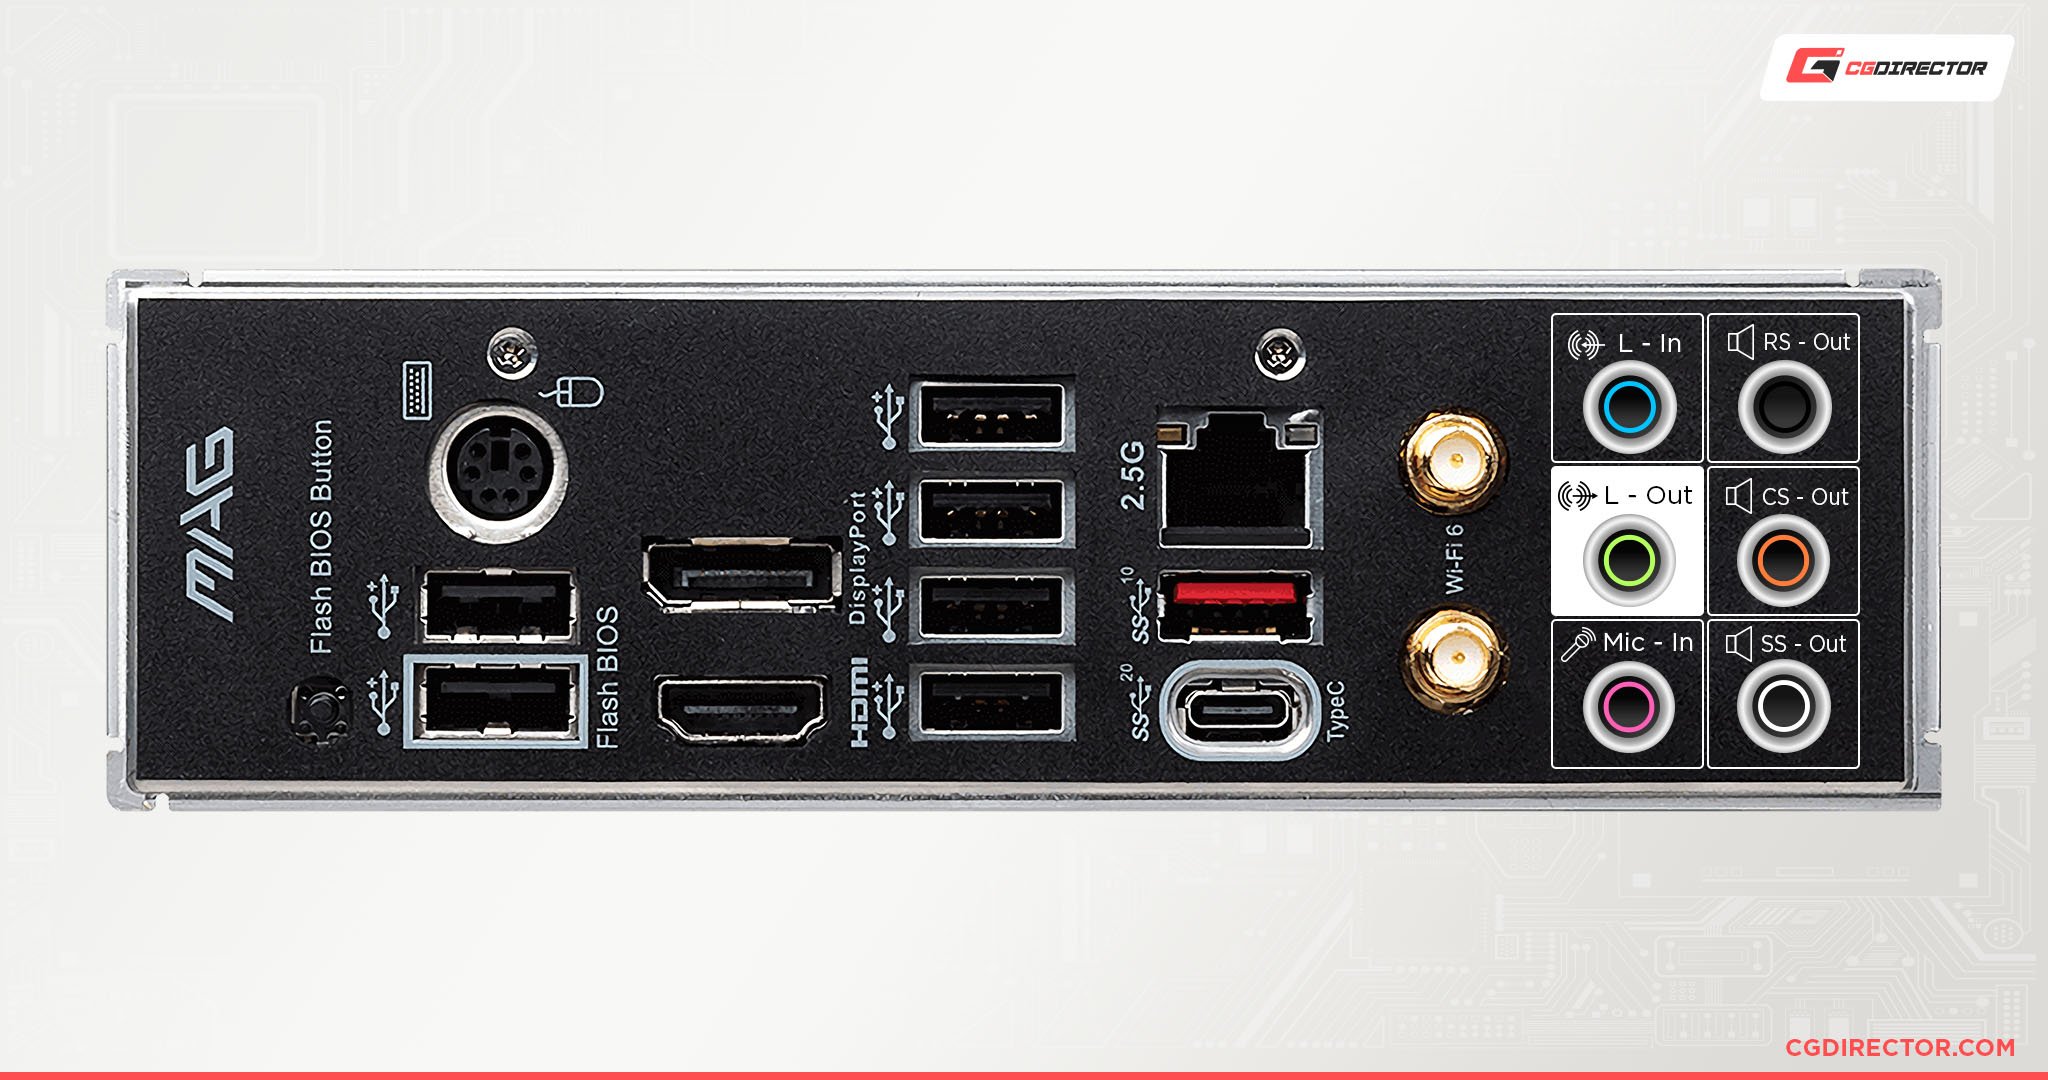
What are they for, anyway? And why do you need so darn many?
And that’s precisely what I’ll explain in this article.
Main Motherboard Audio Ports
These are the main three audio ports you’ll find on pretty much every motherboard. They provide all the essential audio functionality.
Light Blue – Line-in
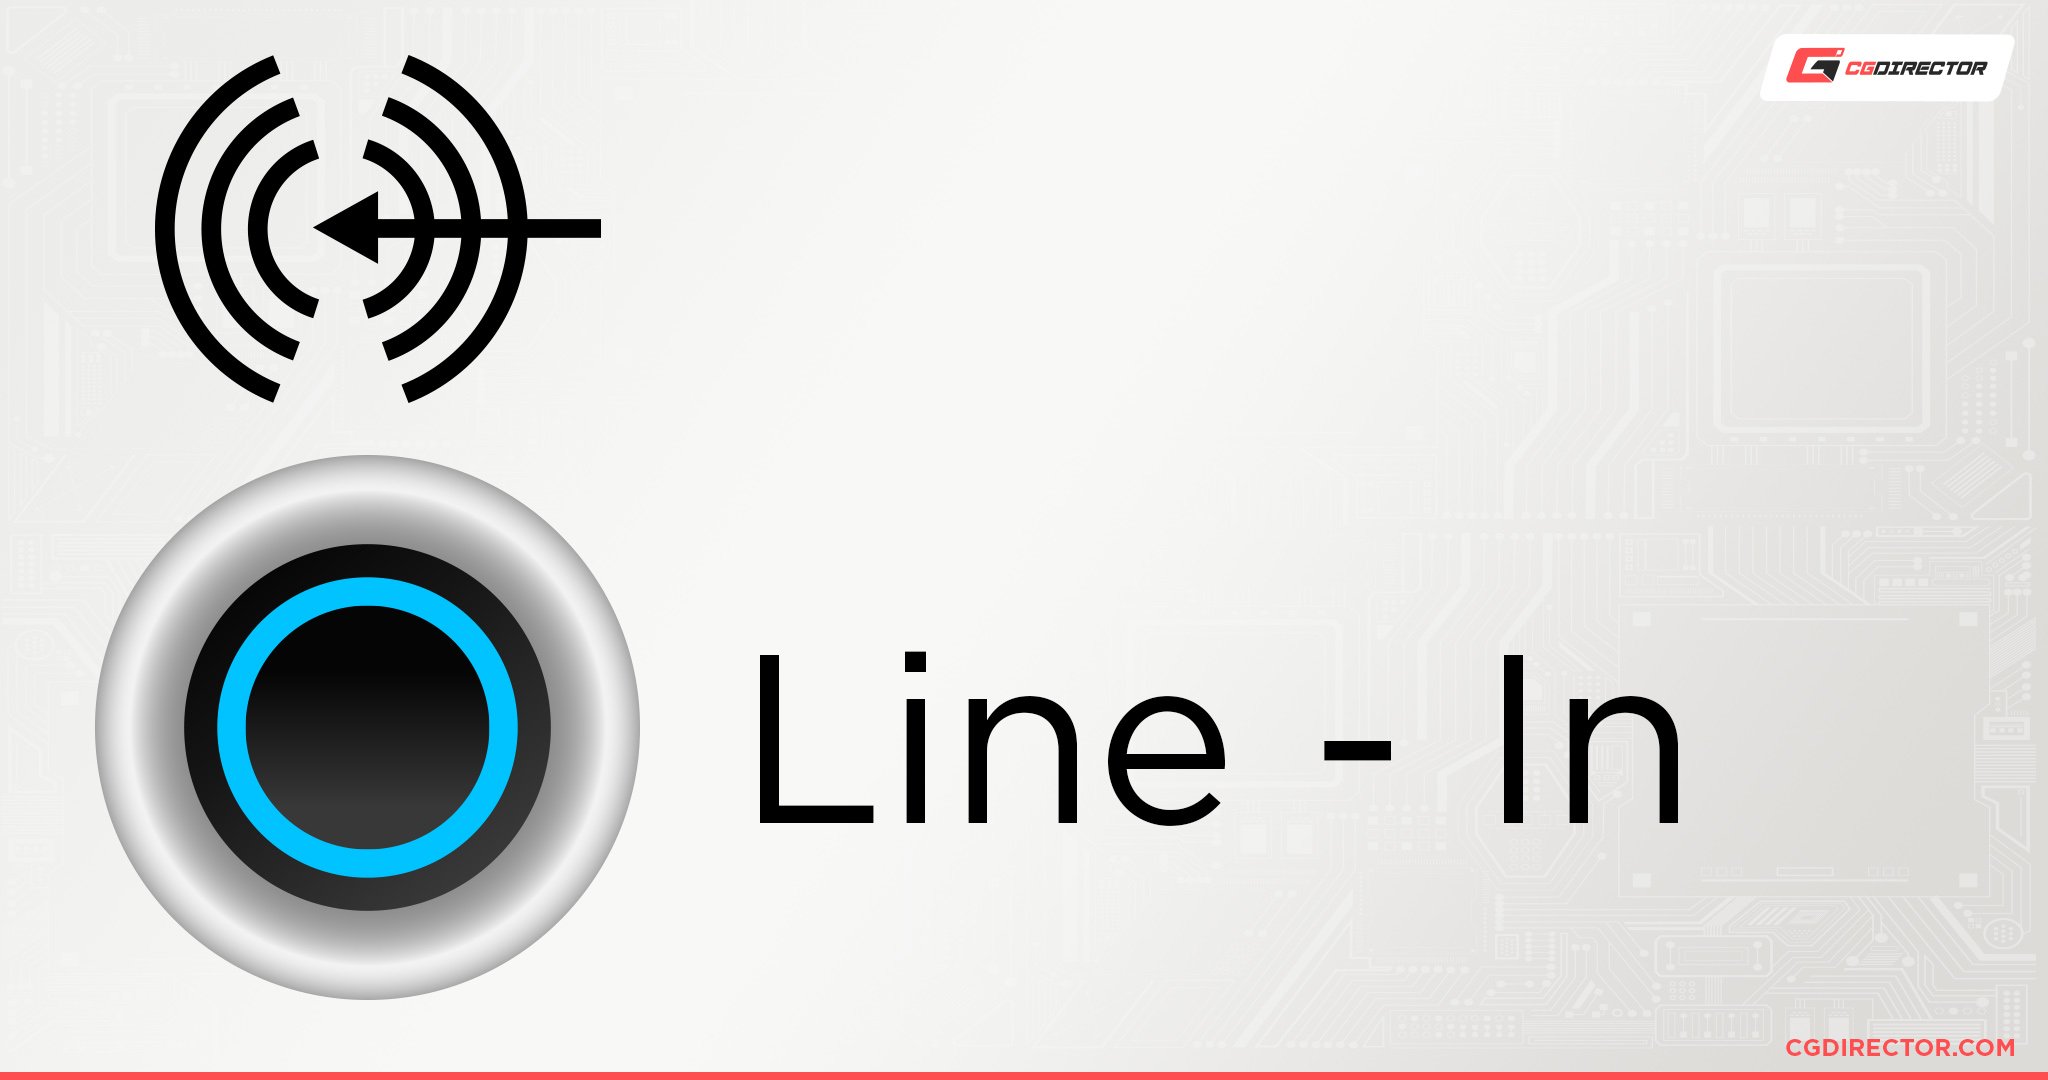
The light blue port, or the “Line-In” port as it’s technically known, is the port you use when you want to connect some sort of audio to the PC.
This means that everything from CD/DVD players, amplifiers, mixers, certain instruments, microphones, and pretty much anything that can output audio can be connected to the line-in port.
However, just because you can, doesn’t mean you should.
For example, you could connect a microphone to your line-in and it’ll most likely work, but your line-in port probably won’t have the same level of amplification as your actual mic-in port.
So you will most likely get very quiet audio from using the line-in port compared to using the mic-in port.
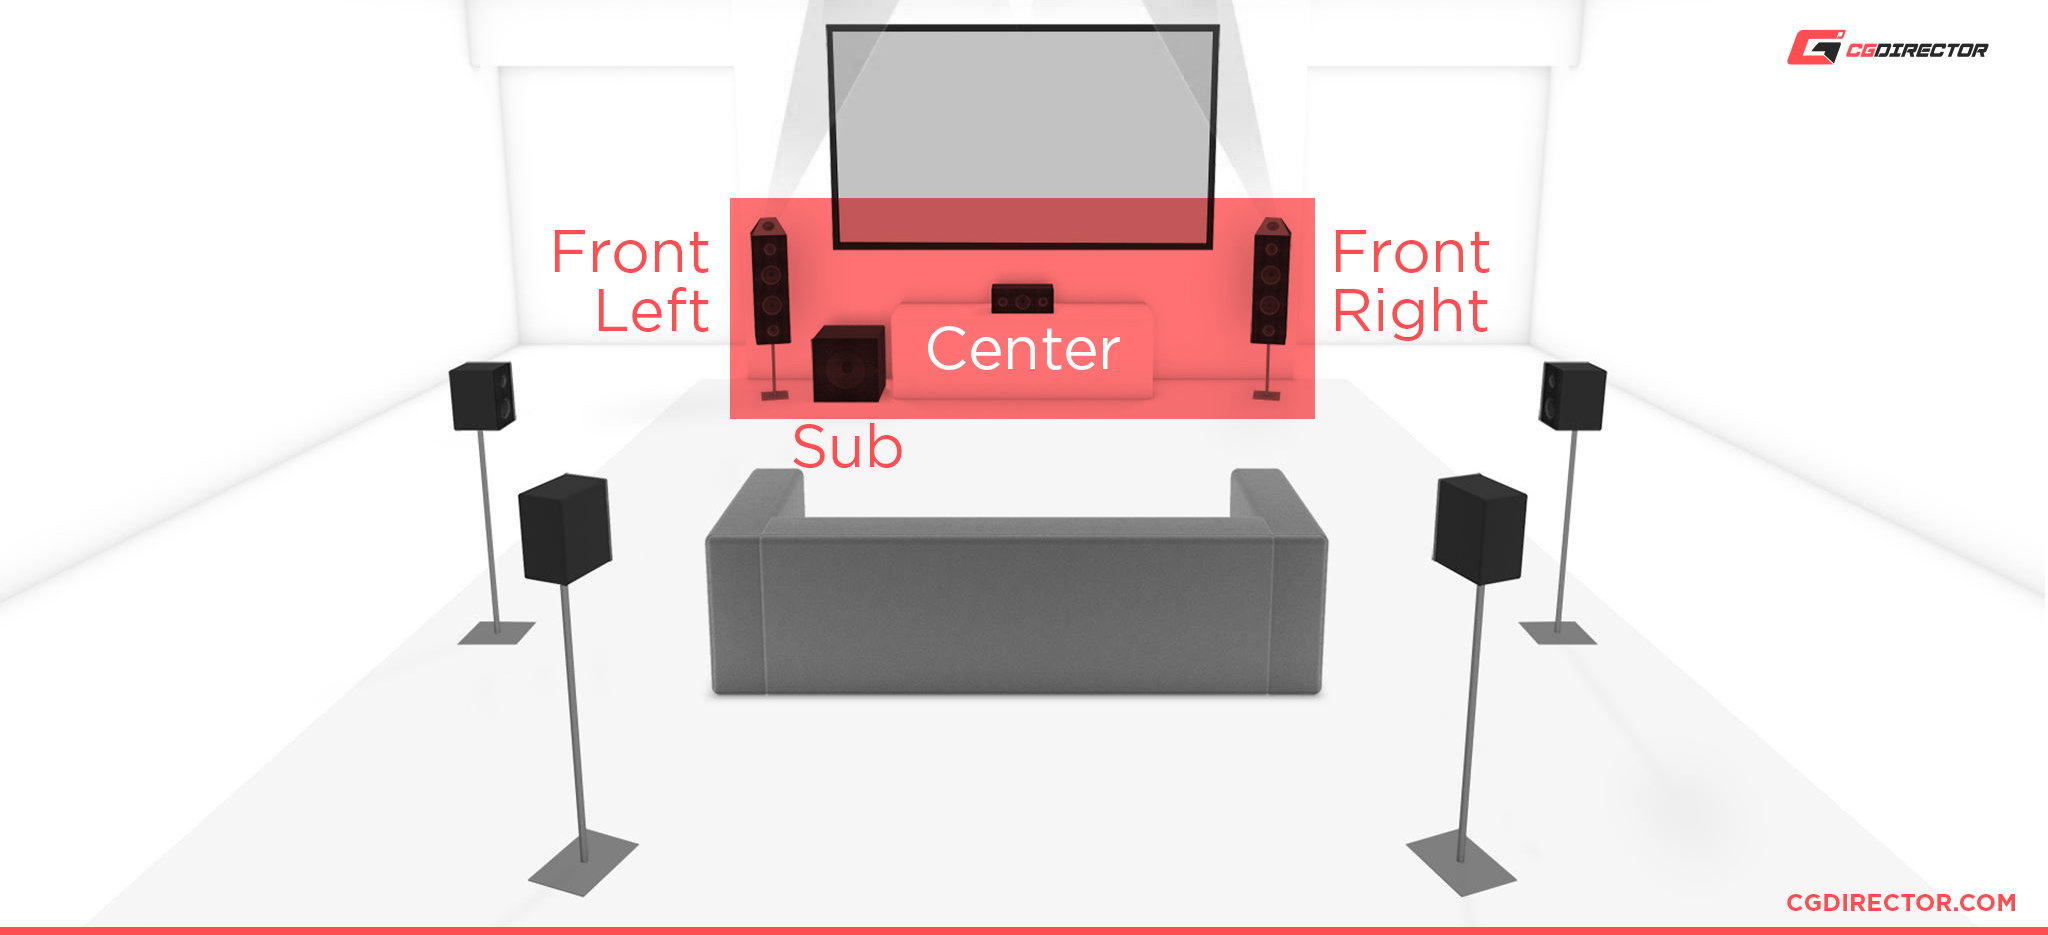
Lime Green – Line-Out/Front Speaker/Headphones
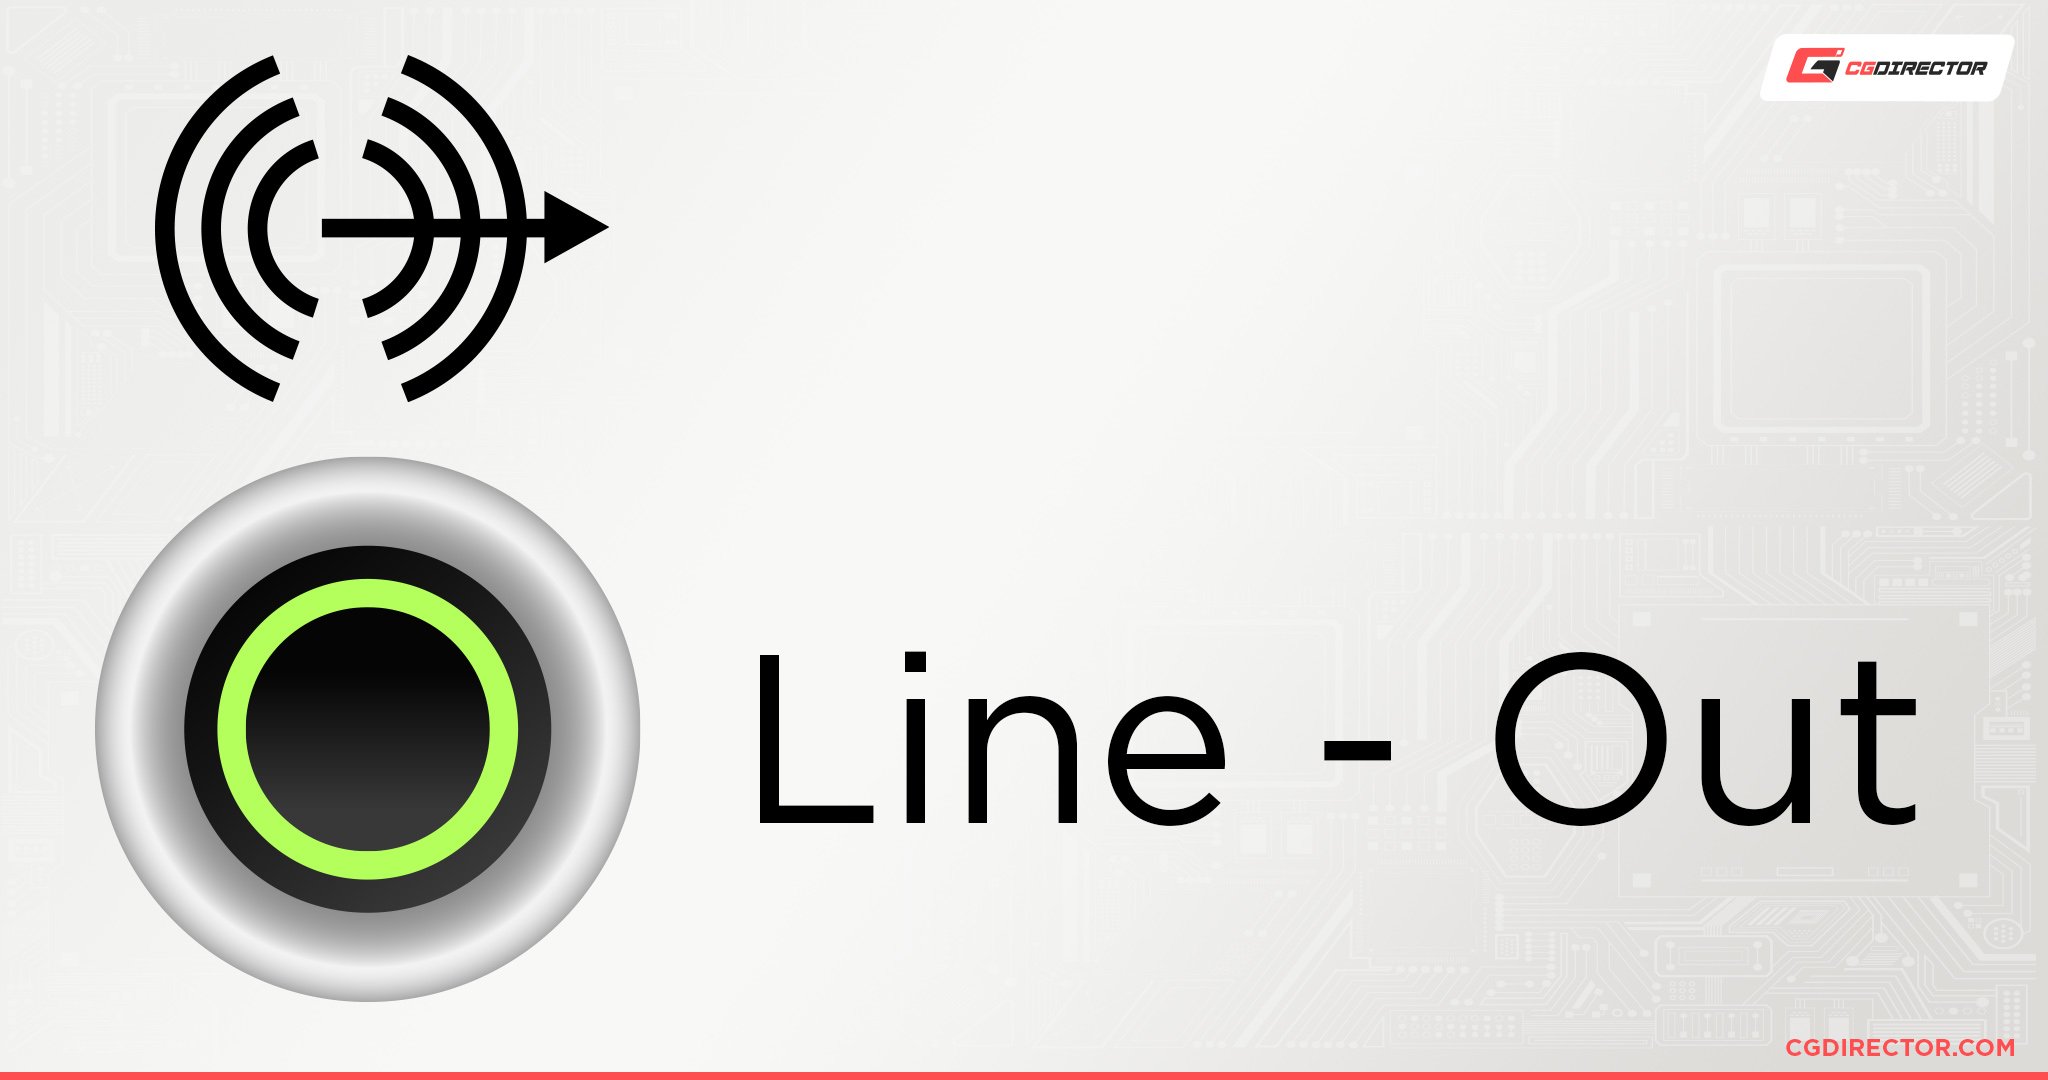
The lime green port, or the “Line-Out” port as it’s technically known, is the port you use when you want to get some sort of audio out of the PC.
So everything from headphones, speakers, and anything else that can play audio can be connected to the line-out port.
In a surround sound setup, the line-out port is also where you should plug in your front-side speakers.
Pink – Mic-in
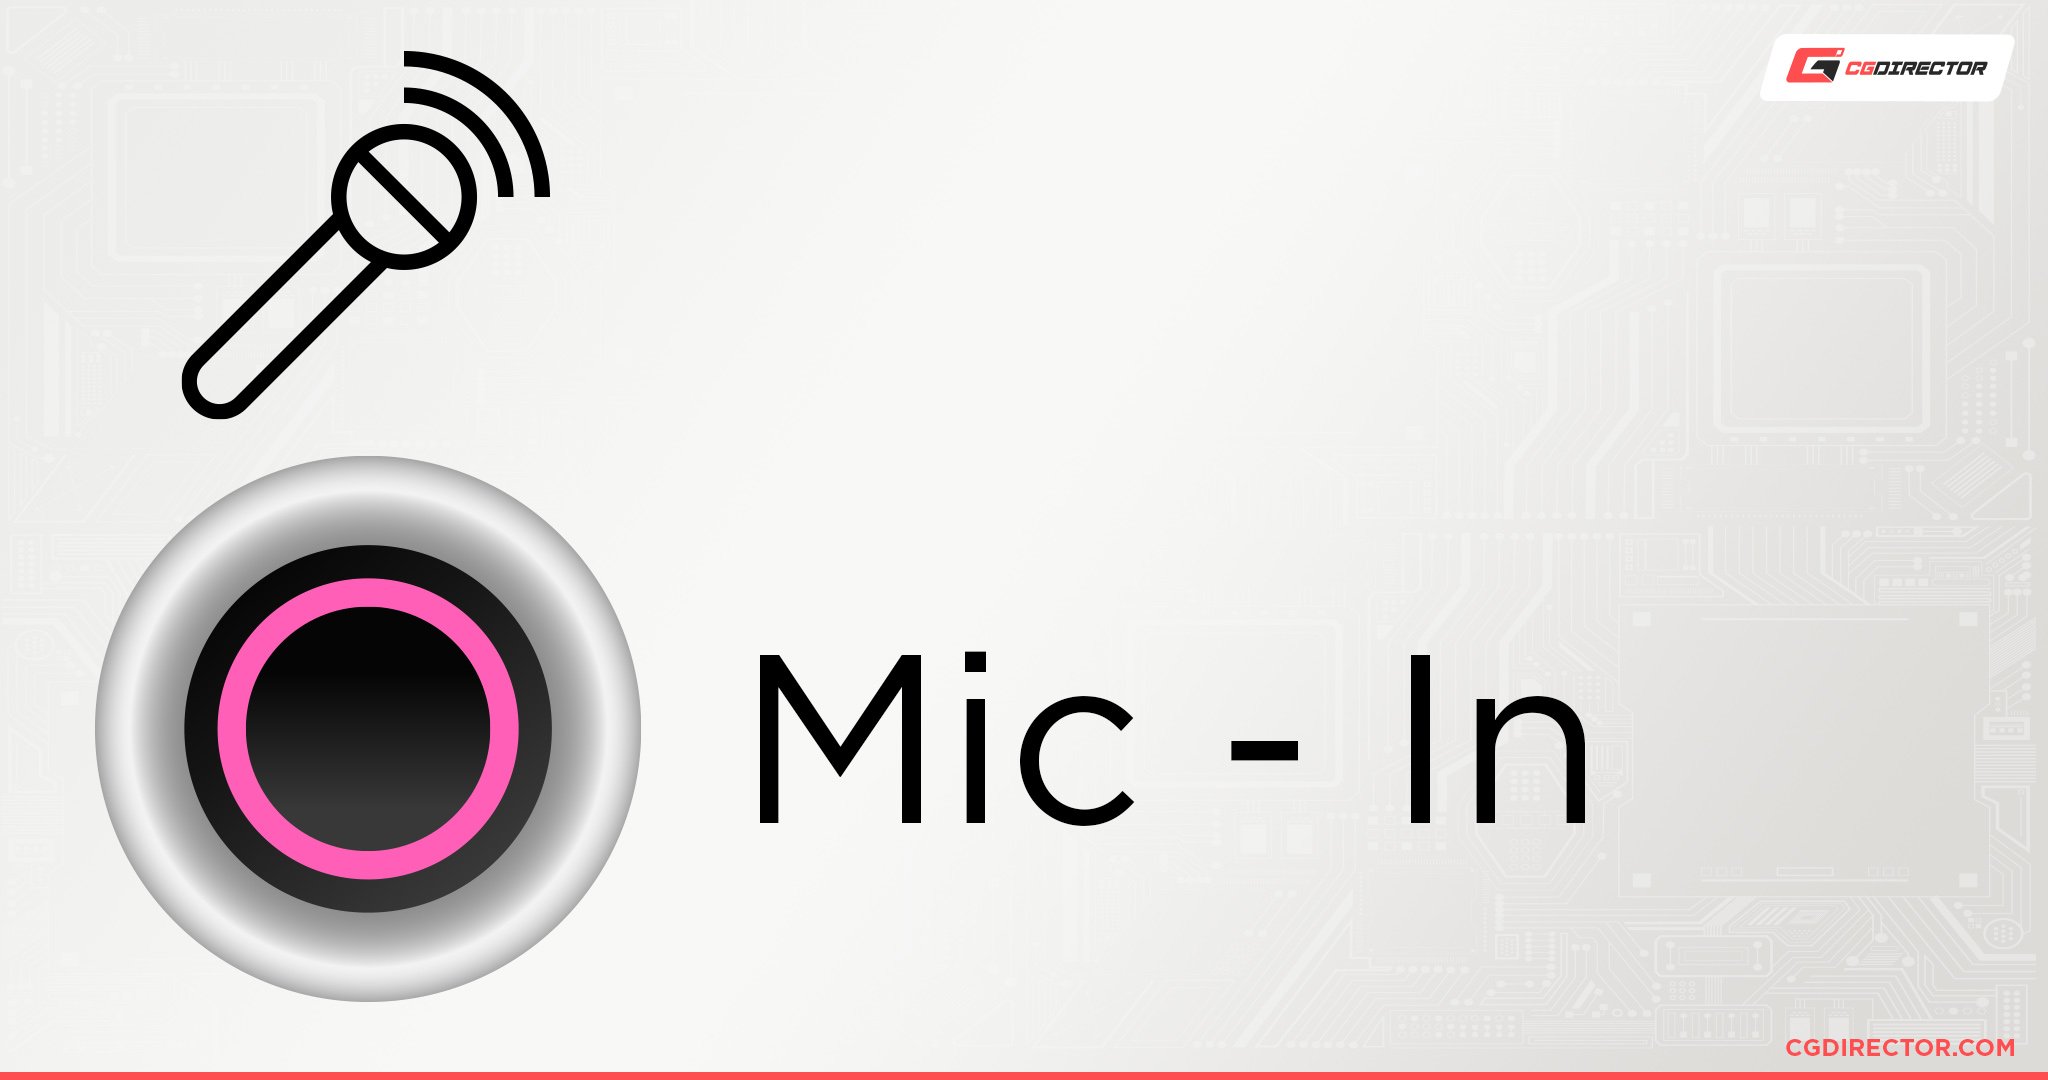
And rounding off the main trifecta is the pink port or the “mic-in” port as it’s technically known.
As the name implies, it’s the port you use when you want to connect some sort of microphone to the PC.
It’s as simple as that.
Surround Sound Motherboard Audio Ports
These are audio ports that most motherboards have, but some motherboards choose to omit.
They provide you with surround sound capabilities, allowing you to split audio between the front, rear, and side for a more immersive experience.
Orange – CS-Out/Center/Subwoofer
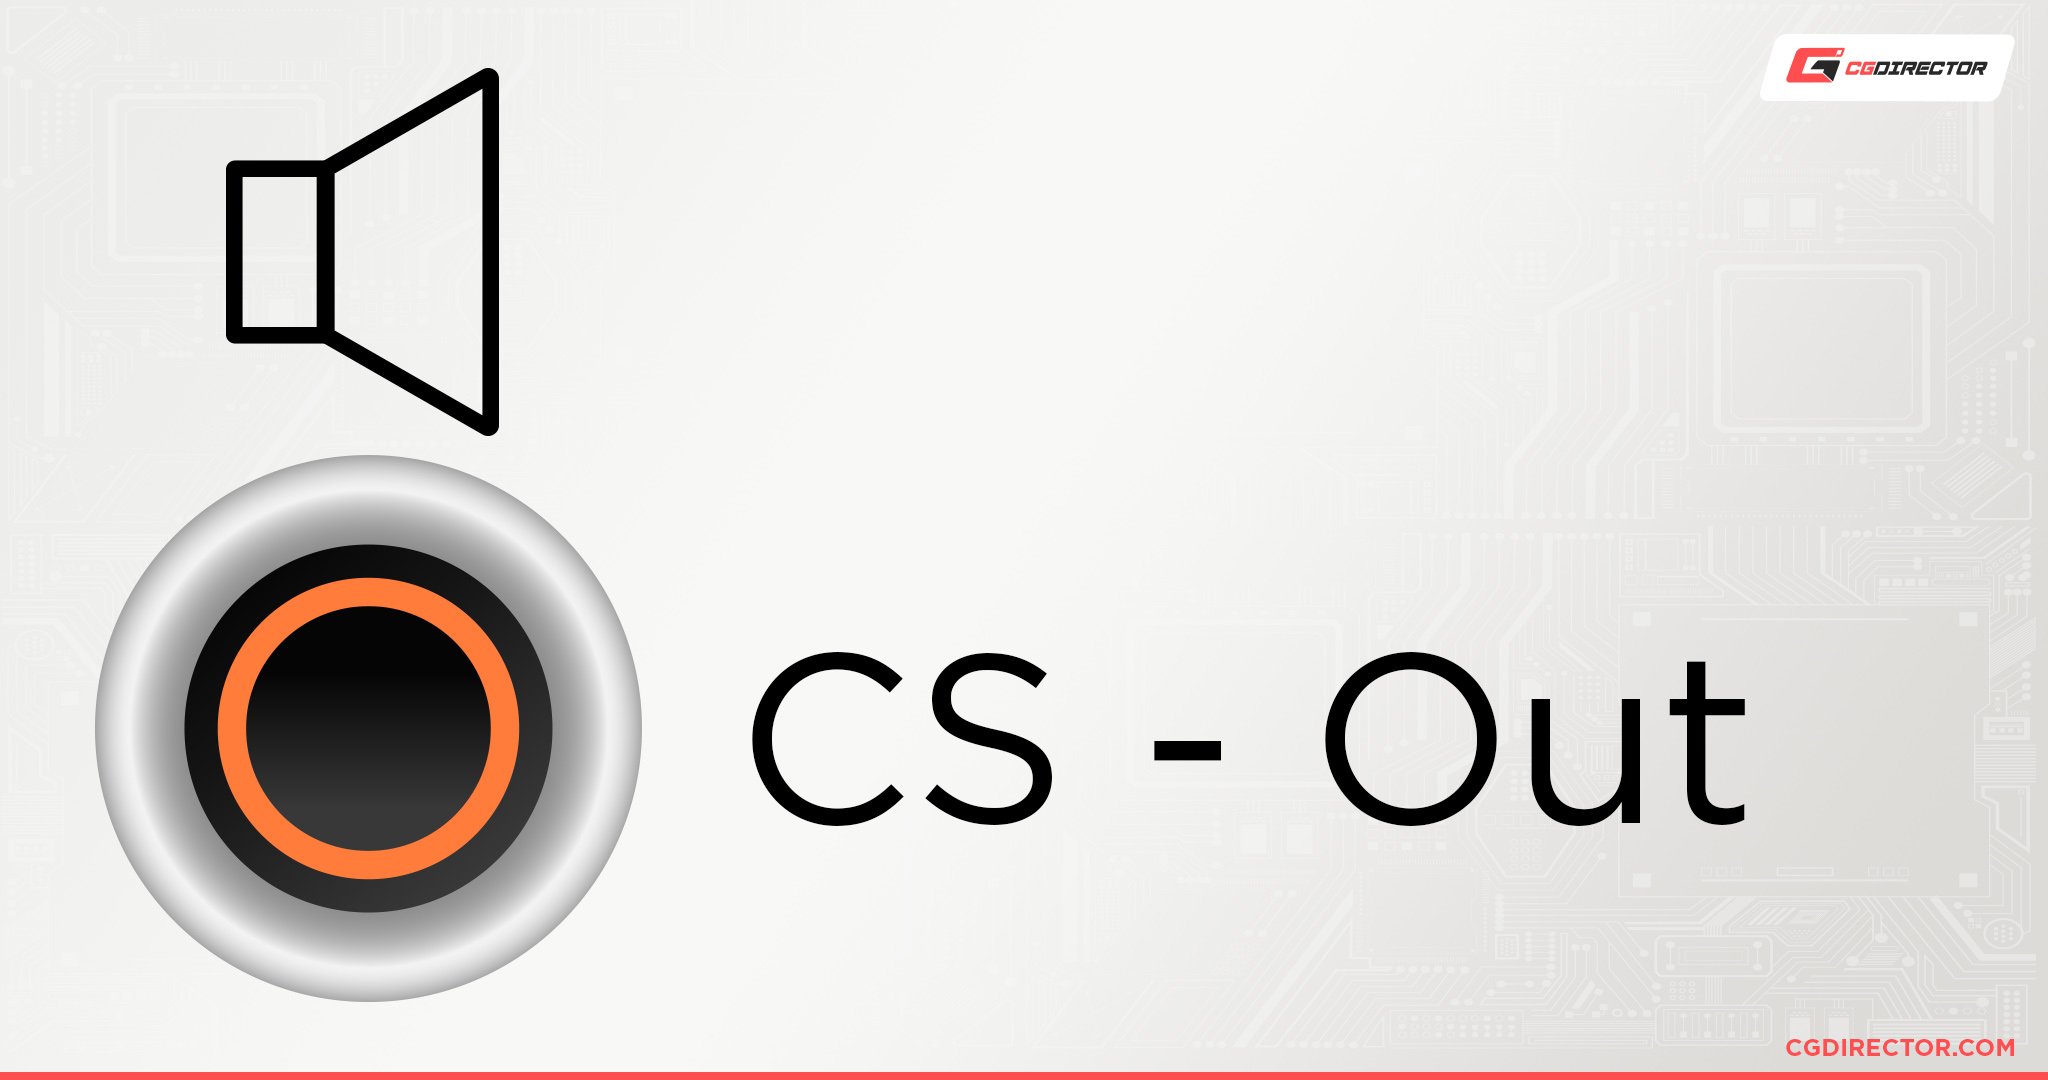
The orange port, or the “CS-Out” port, is the port you use when you have a dedicated subwoofer or a center speaker in your audio setup and want to send it the isolated, center/bass channel signal you get in surround sound supporting media.
If you have any sort of front speakers or a soundbar, or a dedicated subwoofer, this is the port you should plug them into.
Black – RS-Out/Rear Speakers
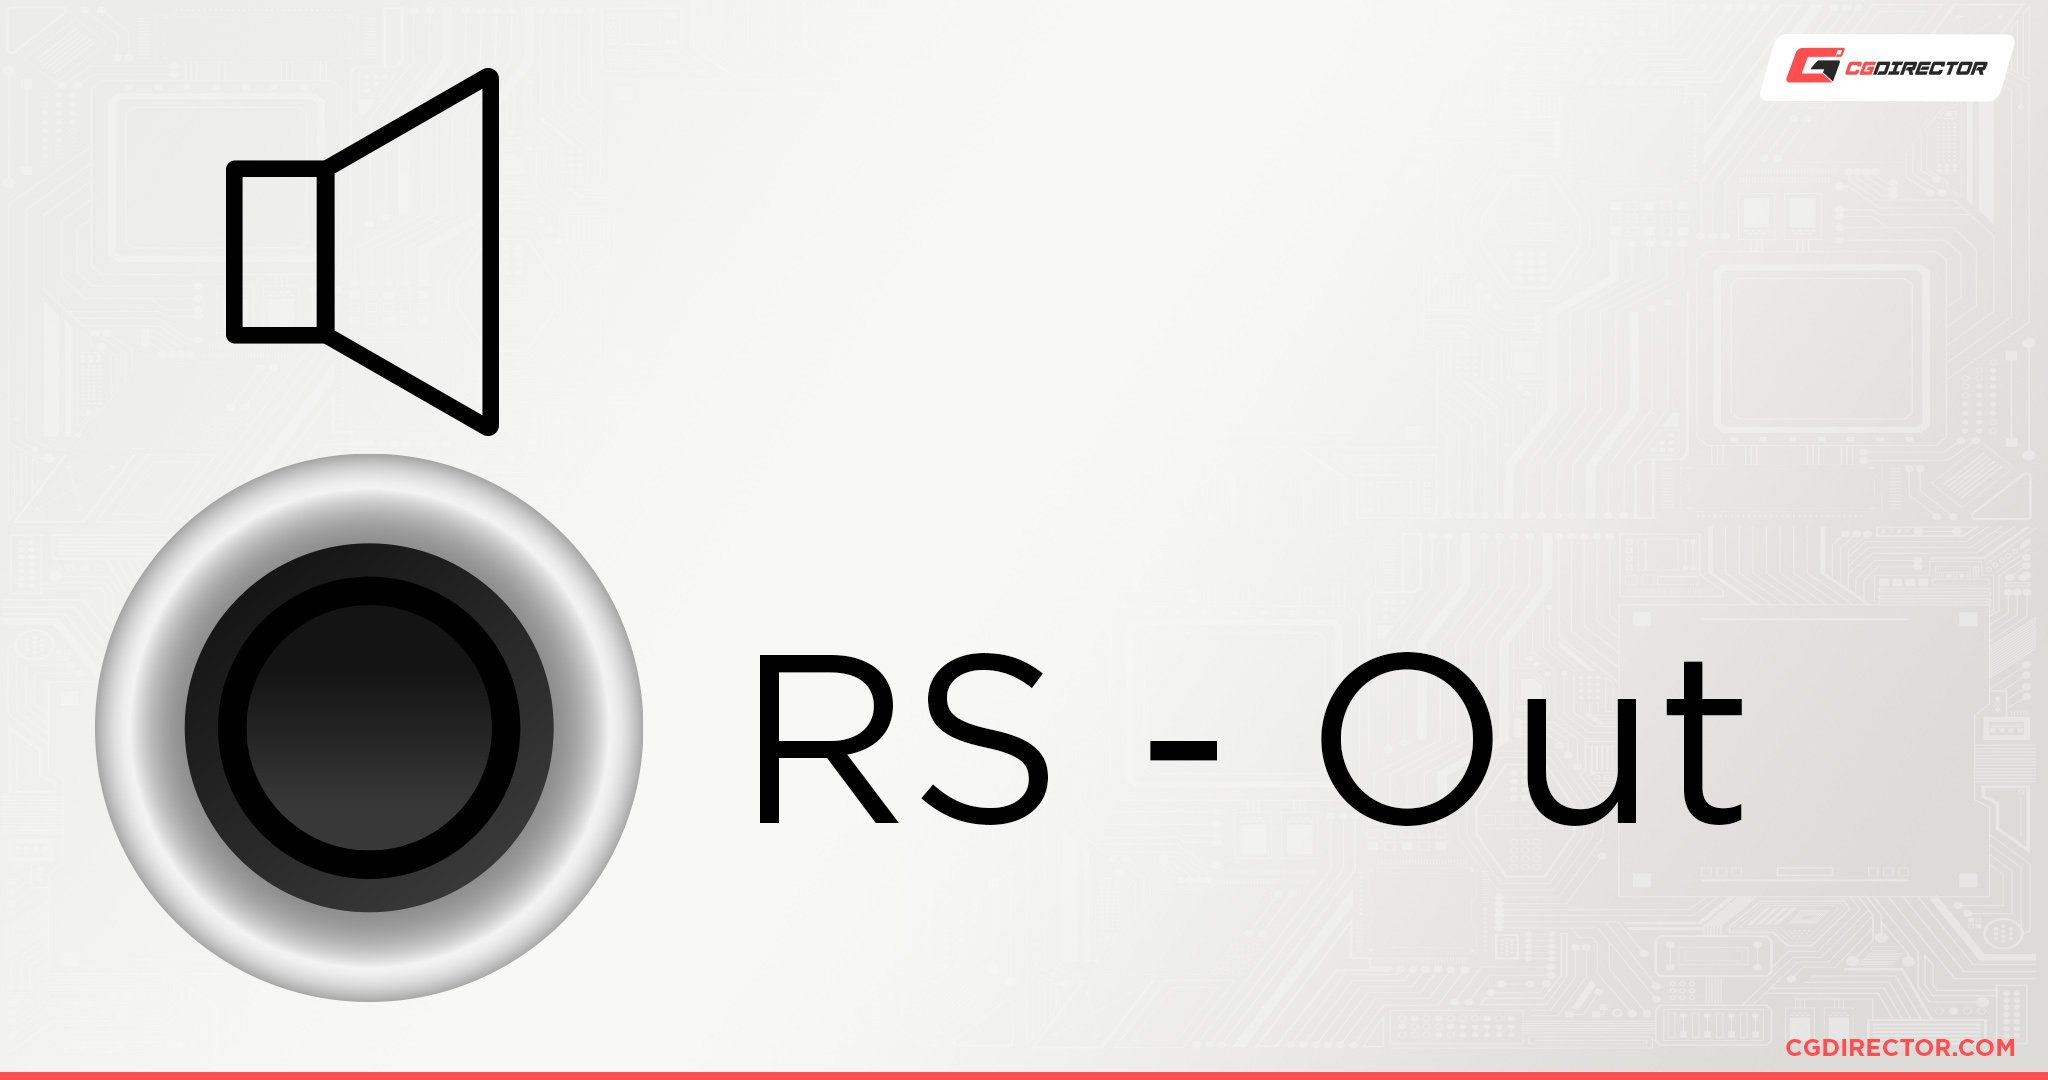
The black port, or the “RS-Out” port, is the port you use when you have rear speakers in your audio setup and want to send it the isolated, rear channel signals you get in surround sound supporting media.
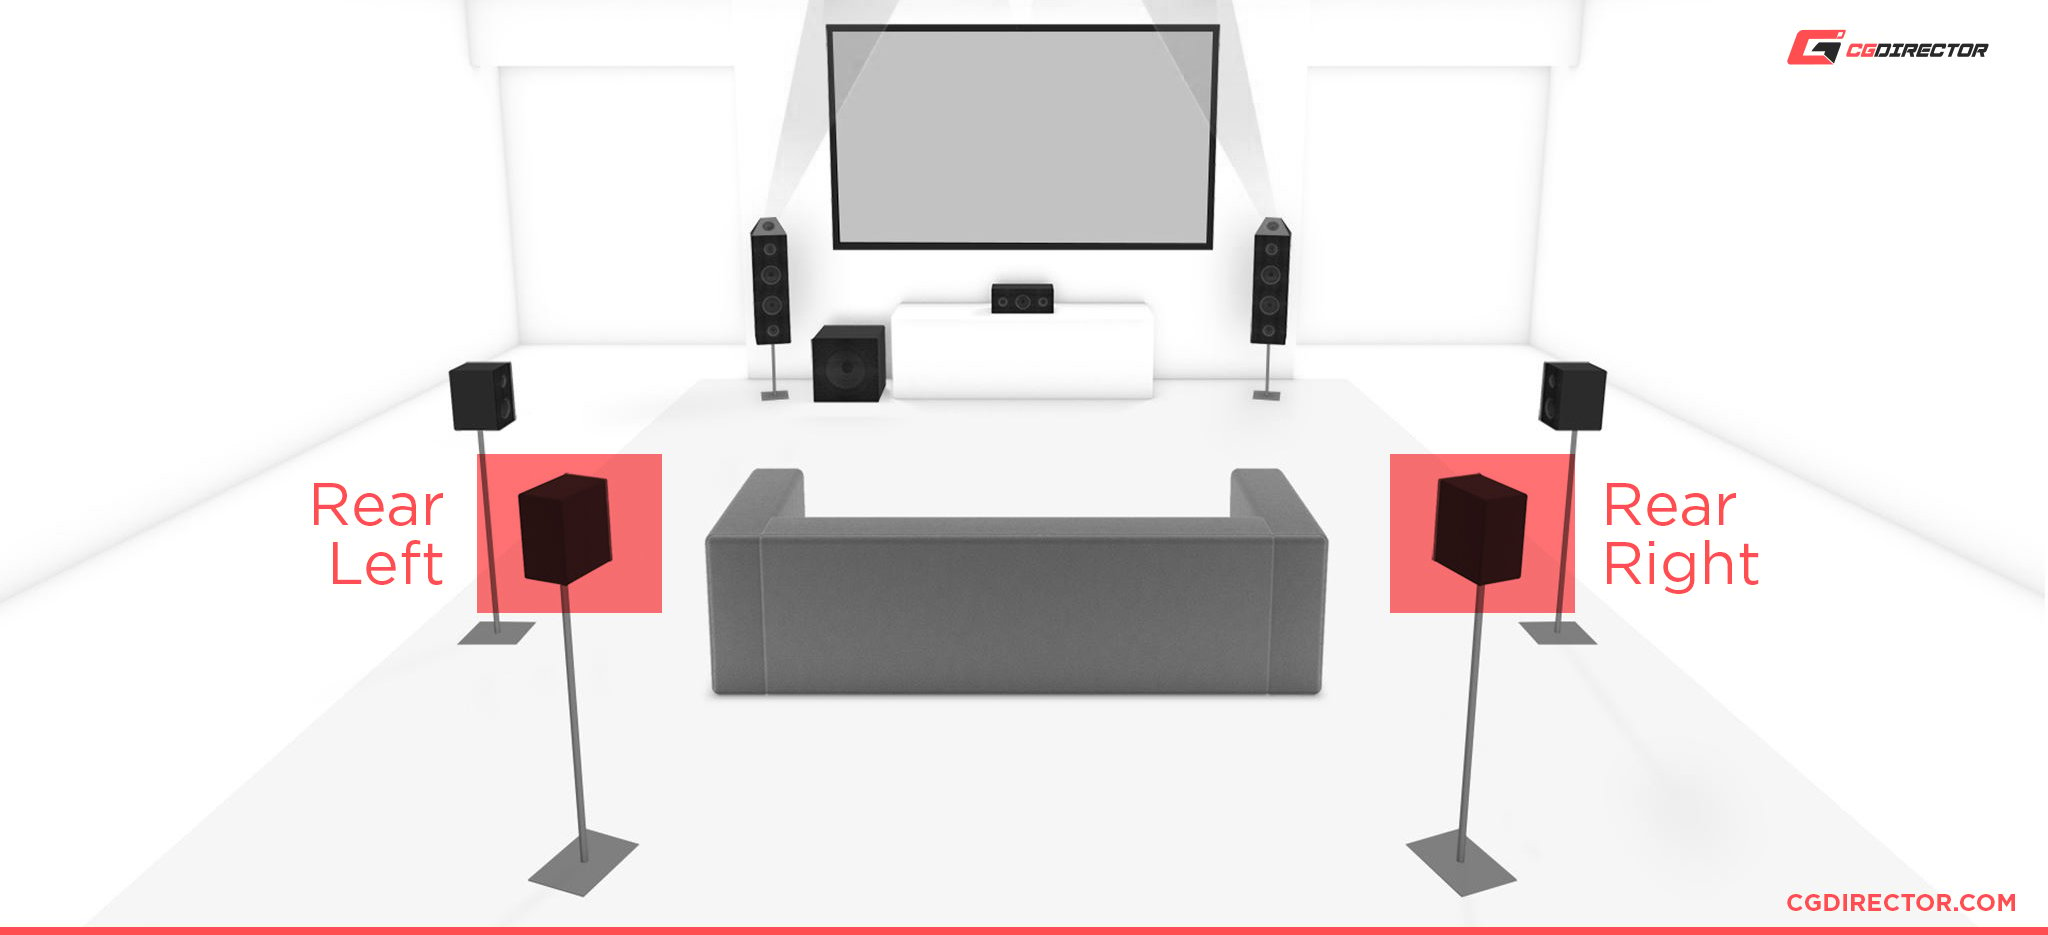
If you have any sort of rear speakers, this is the port you should plug them into.
Gray/White – SS-Out/Side Speakers
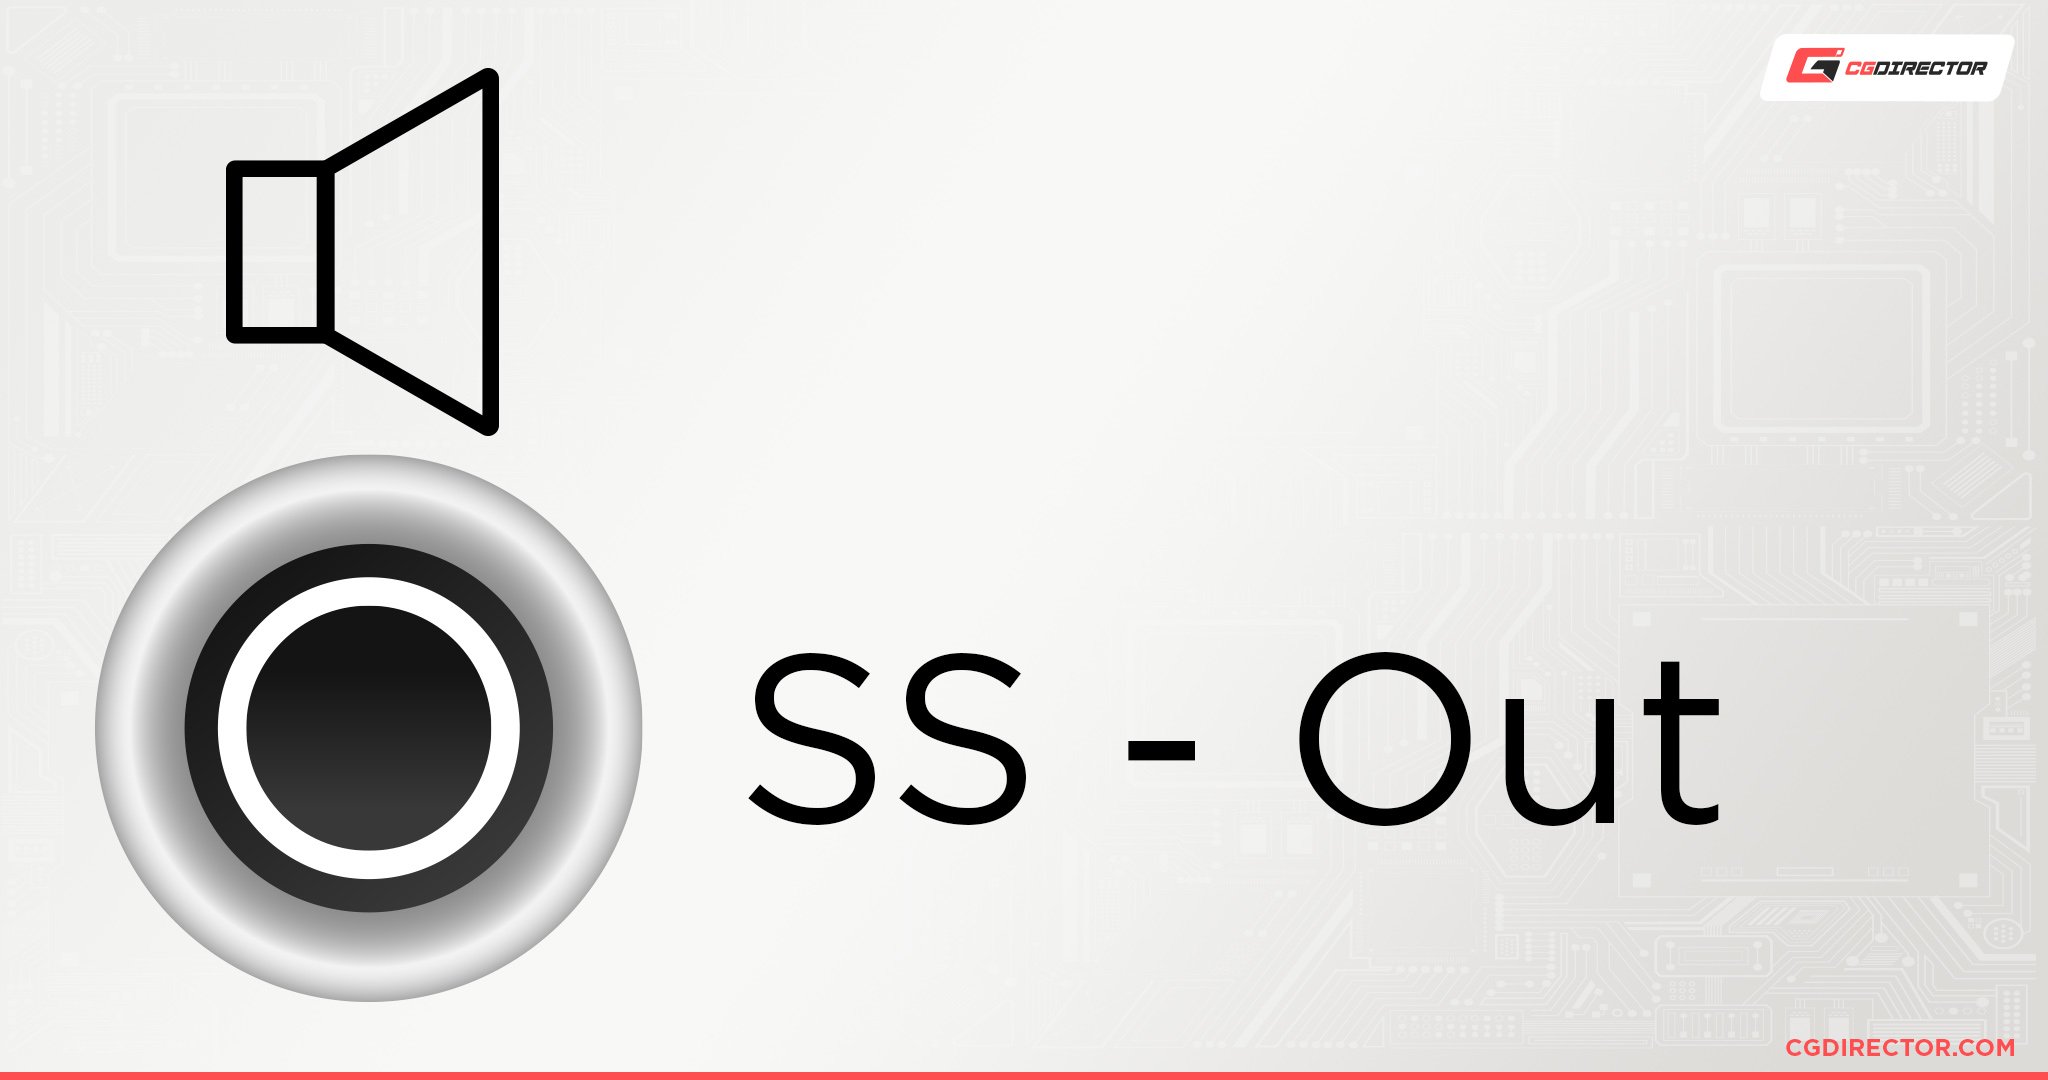
The Gray/White port, or the “SS-Out” port, is the port you use when you have side speakers in your audio setup and want to send it the isolated, side-channel signals you get in surround sound supporting media.
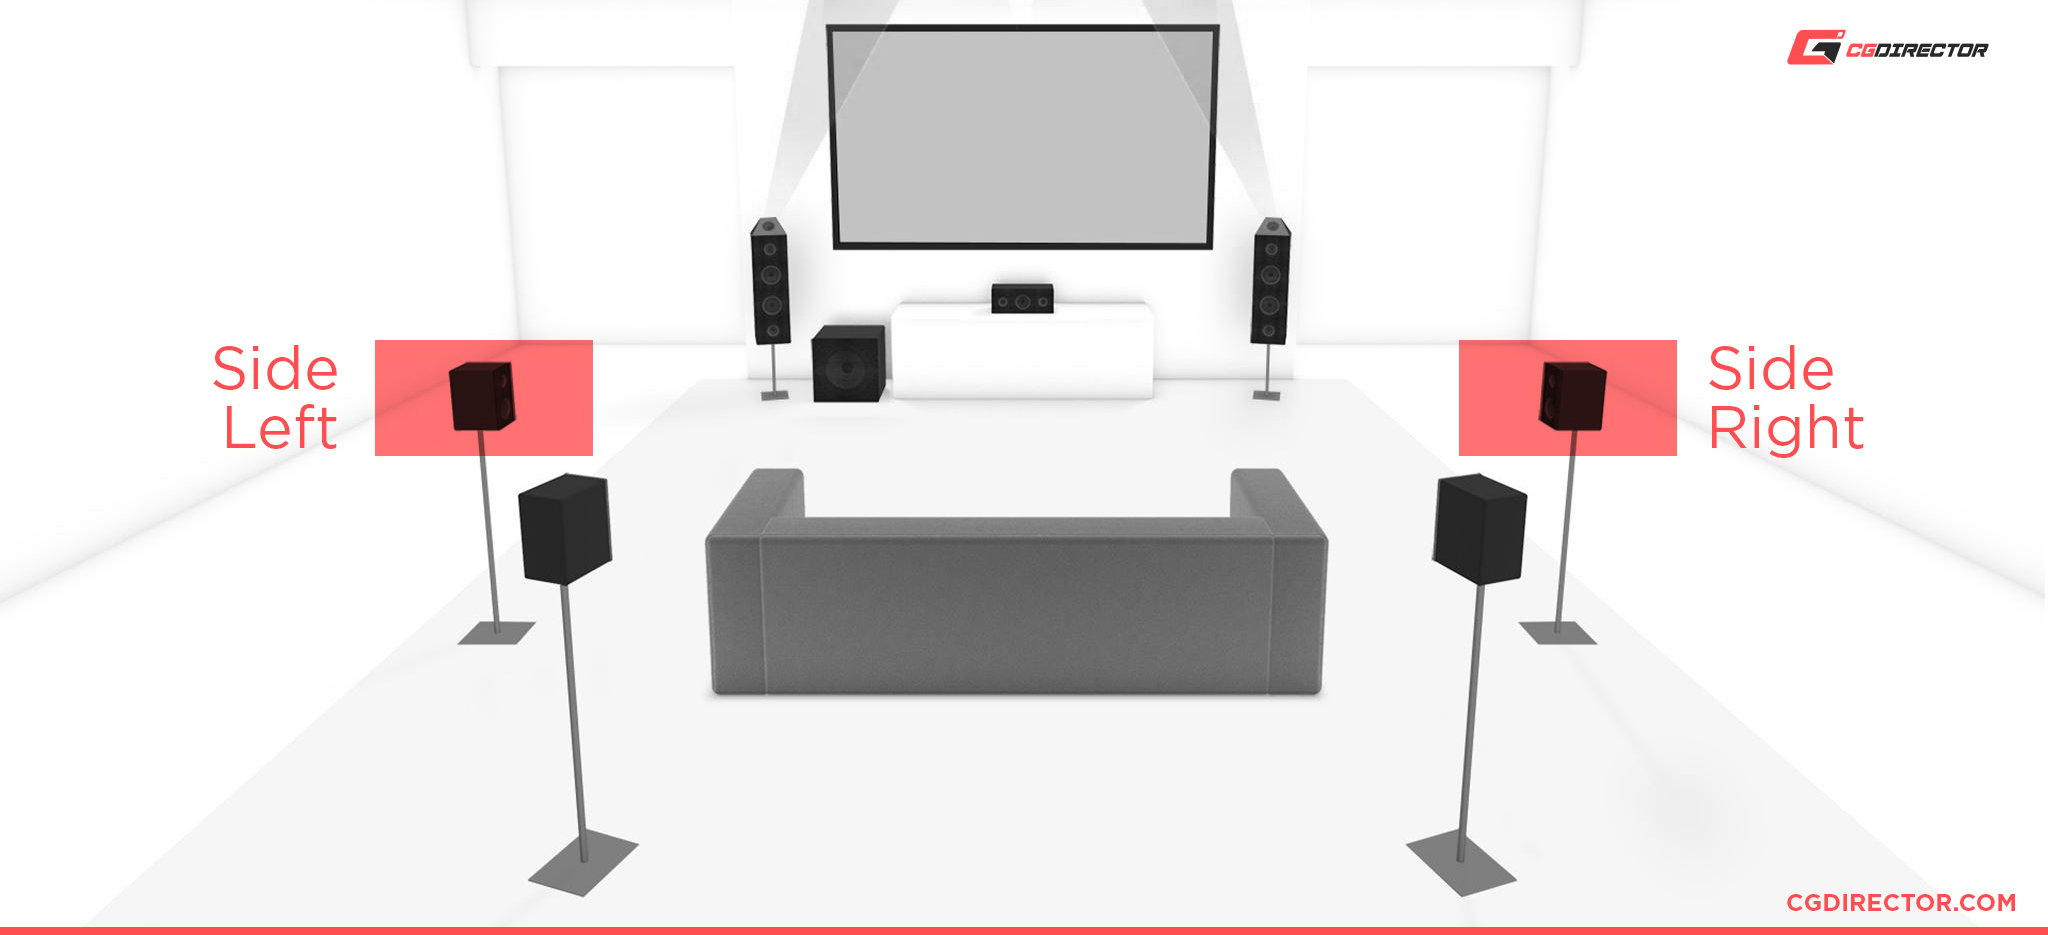
If you have any sort of side speakers (to your direct left and right, not in front) this is the port you should plug them into.
Other Motherboard Audio Ports
These are more exotic audio ports where it’s basically a toss-up on whether a motherboard might have them or not because not a lot of people use these ports.
6.35mm High Power Out
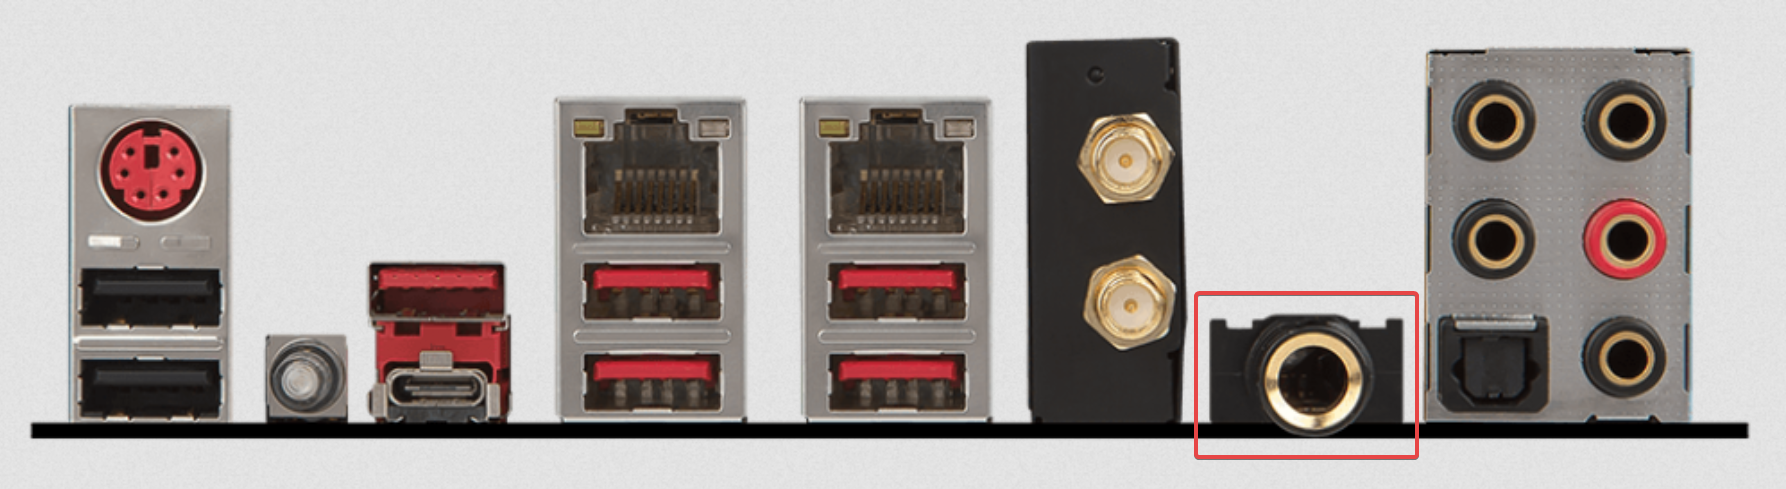
Image Credit: MSI
This is an audio port that is found on just a handful of high-end motherboards. It’s basically a line-out port but can output a lot more power to drive high-end headphones.
Most people with such high-end headphones typically choose to get dedicated DACs and amps, so a port like this is mostly useless, but it’s still pretty cool to see.
S/PDIF Out
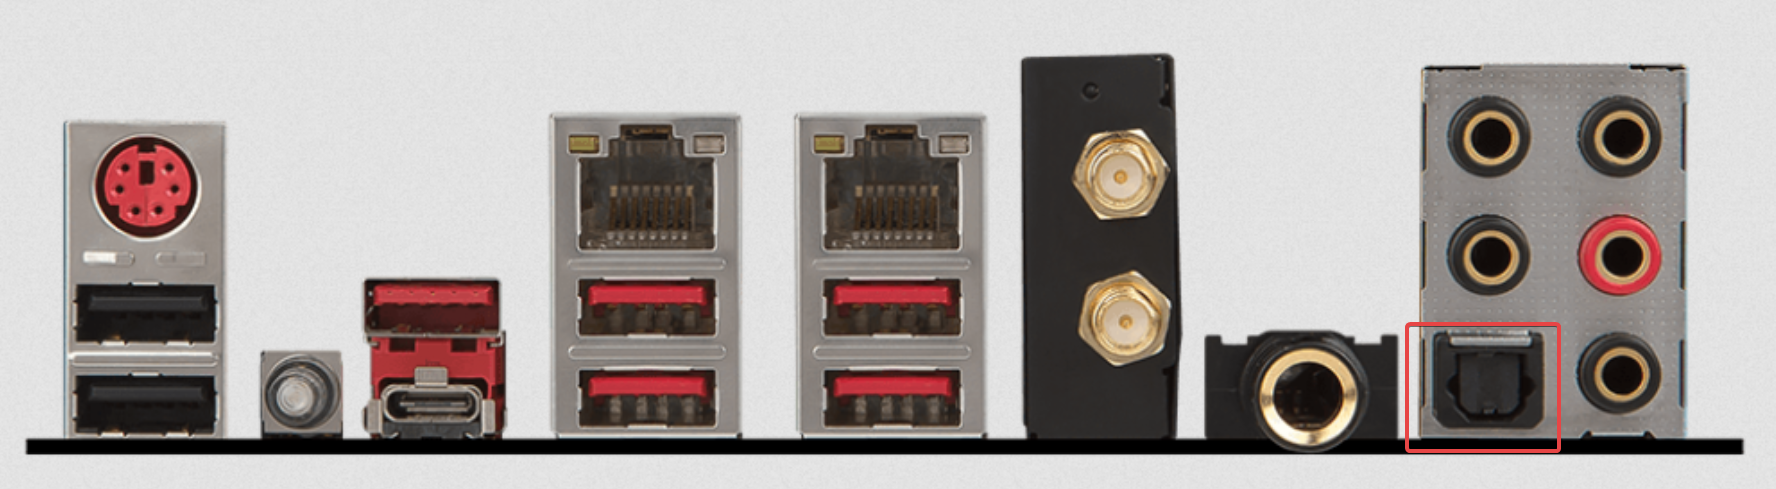
Image Credit: MSI
S/PDIF or “Sony/Philips Digital Interconnect Format” is another type of audio port that you might find in your motherboard.
It’s similar to your line-out port, but instead of outputting analog signals, it outputs digital signals straight from your PC without converting them.
It’s mostly used for home theater applications and other audio applications where high-quality audio transmission is needed.
An S/PDIF port can come in handy if you have a surround home theater setup with an S/PDIF port.
In that situation, you can simply connect the two with just one cable instead of having to individually connect all your different speakers into the analog ports.
Coaxial Out
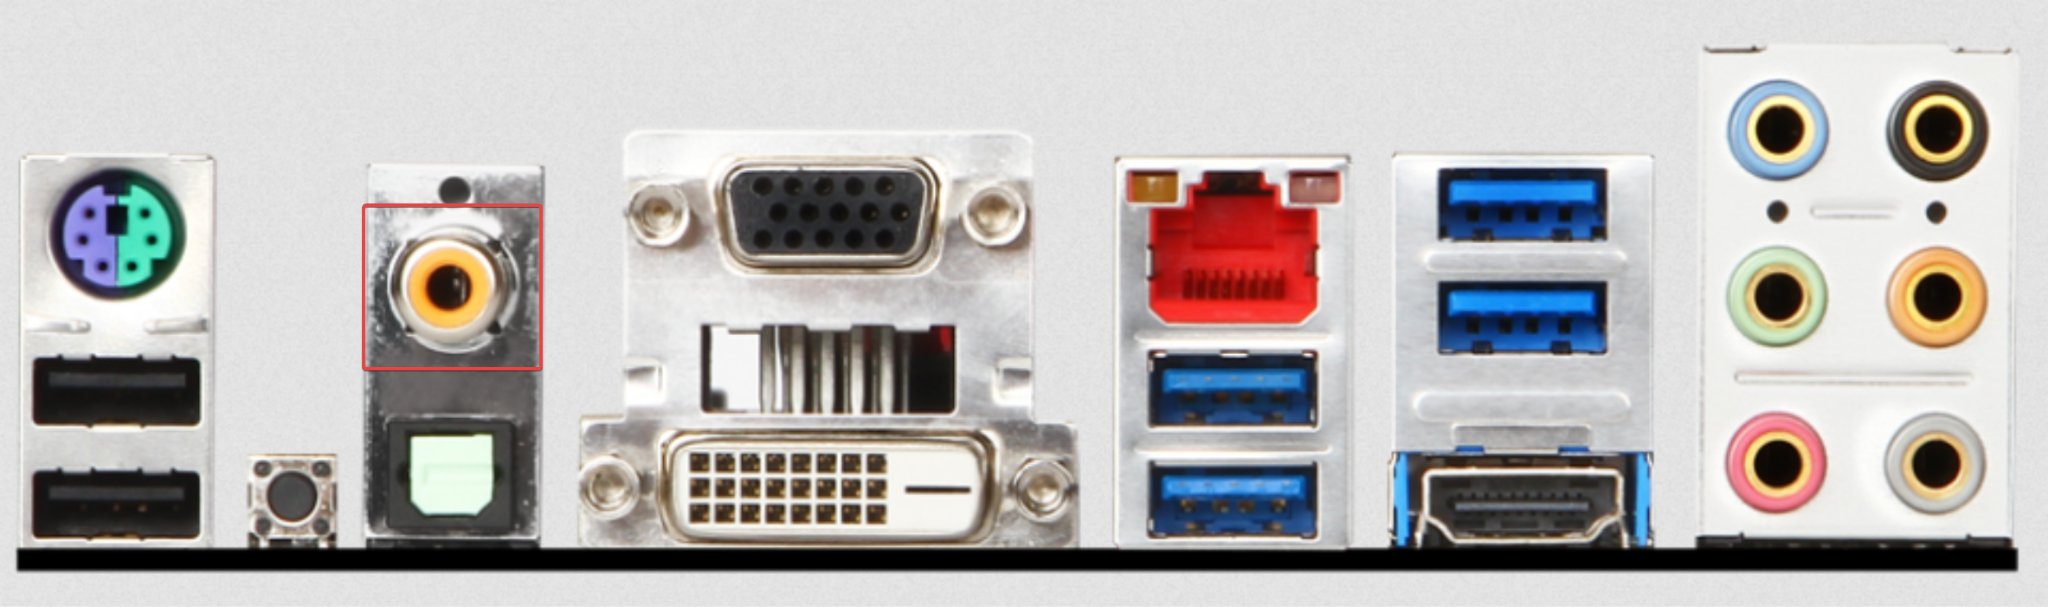
Image Credit: MSI
The coaxial out port is the same thing as the S/PDIF port, just with a different connector.
What if Your Motherboard Doesn’t Have Any Color-Coded Audio Ports or Only Has One?
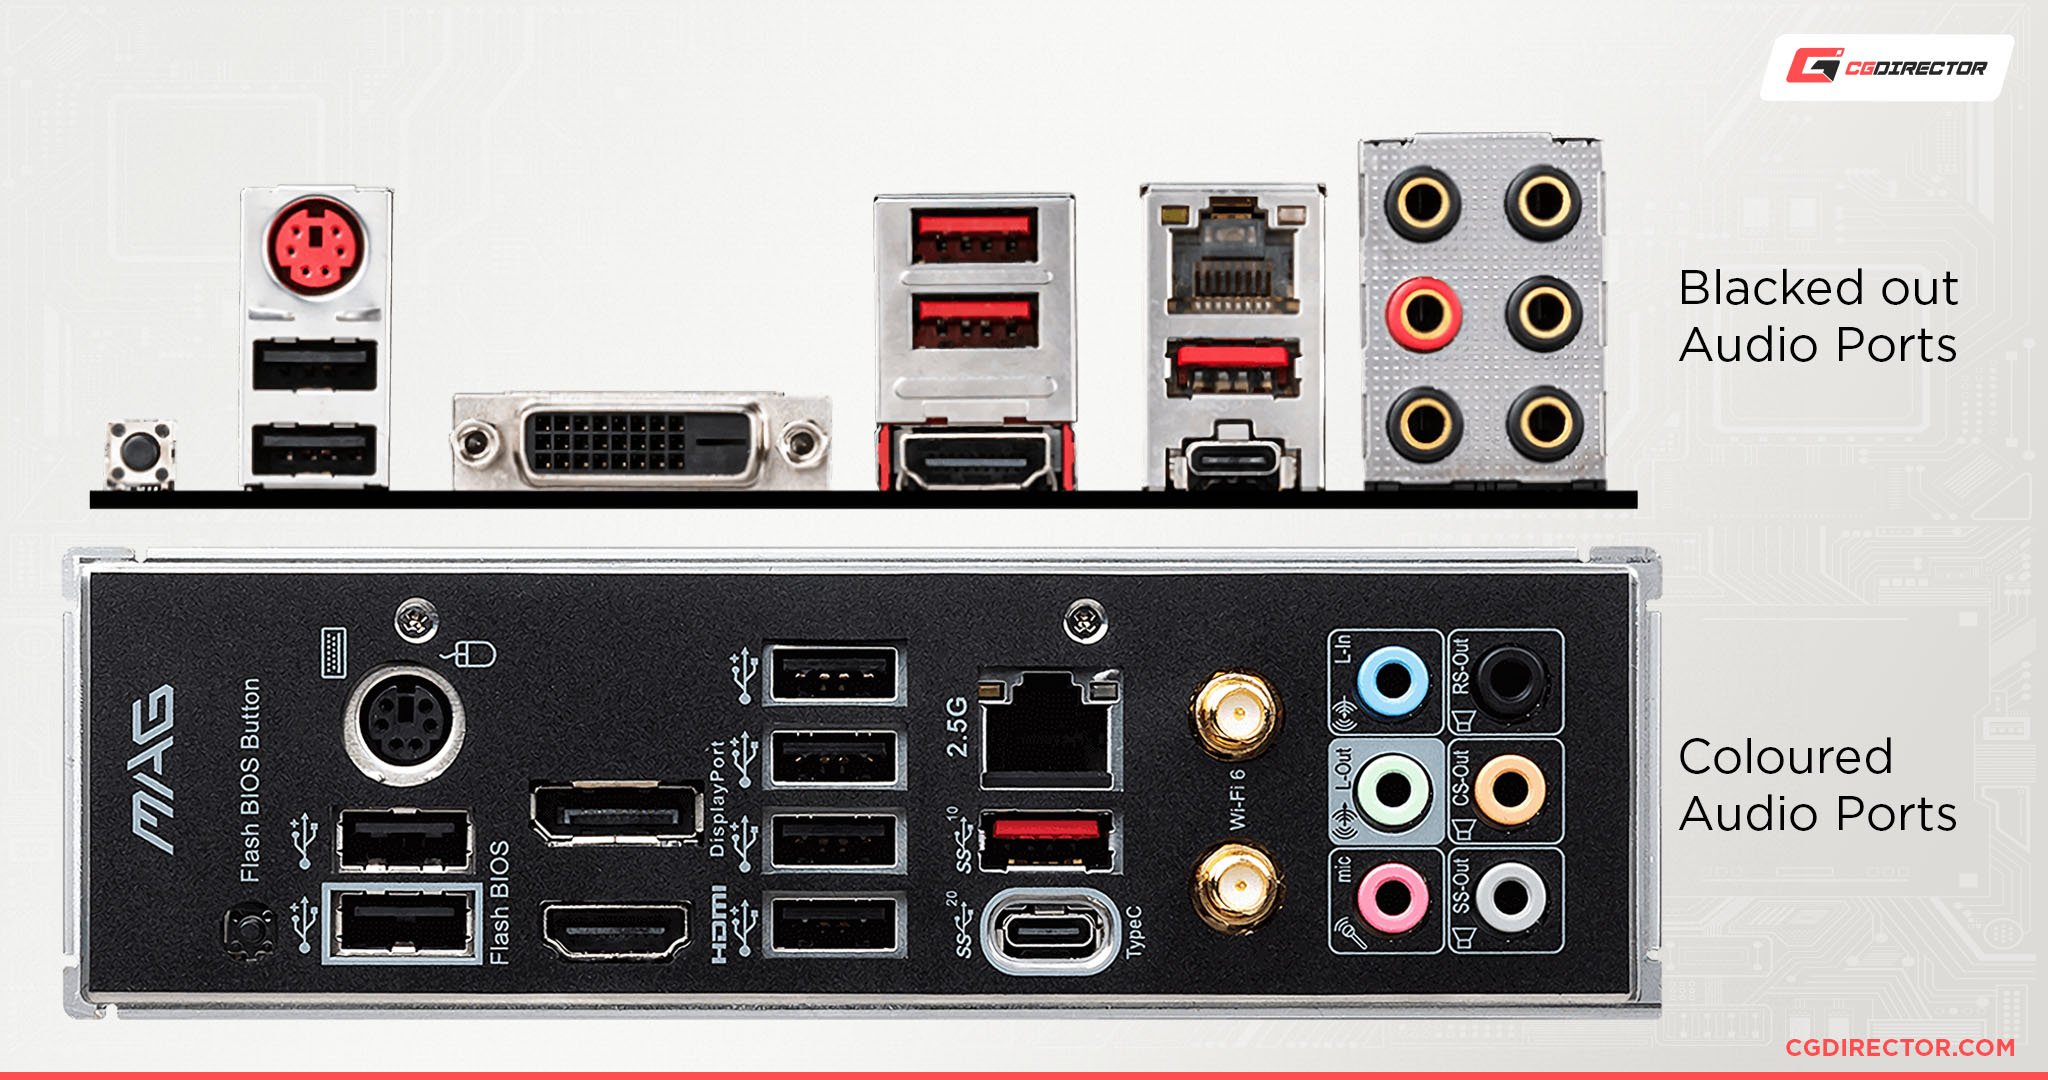
If your motherboard has no color coding and no symbols showing you what port is what, the best thing you can do is to look into your motherboard manual.
If you don’t have the physical manual available, simply Google the model of the motherboard, and you will find a download for the manual on the manufacturer’s website.
And if your motherboard only has one port colored in, it is most likely the line-out port.
That should give you a good frame of reference to figure out where the rest of the ports are, but it’s still best to look in your manual to find exactly which port is what.
FAQ
What Port(s) Should You Connect to if You Have a Two-Speaker Setup?
If you have a two-speaker setup with two RCA cables or bare copper cables for each speaker, you need an amplifier first.
Connect the speakers to the amp and then connect the amp to your line-out port.
If you have active speakers that connect to each other with a 3.5mm male jack, simply connect it to your line-out port.
What Port(s) Should You Connect to if You Have a 3.1 Setup?
Connect the speakers to your amp and then connect the appropriate input (rear, side, or front sides) to your RS-Out/SS-Out/Line-Out ports.
Afterward, connect your center/subwoofer to your CS-out port.
What Port(s) Should You Connect to if You Have a 5.1 Setup?
It’s the same as if you had a 3.1 setup. Just make sure that you connect the right set of speakers to the right port.
E.g. rear to rear, side to side.
What Port(s) Should You Connect to if You Have a 7.1 Setup?
Connect the speakers to your amp and then connect the rear speakers to the RS-Out port, the side speakers to the SS-Out port, the center/subwoofer to the CS-out port, and the front side speakers to the Line-Out port.
What Port(s) Should You Connect Your Headphones To?
You should connect your headphones to the line-out port.
If you have a 6.35mm jack and your motherboard also has a 6.35mm port, I would suggest you connect to that instead.
Are All Audio Ports the Same Between Motherboards?
Motherboard audio port layout and amount aren’t really standardized, but most motherboard manufacturers follow the PC System Design Guide created by Microsoft and Intel in the 90s.
So, most motherboards come with around 6 – 5 audio ports generally in the same location (on one side of the back I/O), with the same port layout.
But there are some outlier motherboards that can have more or fewer ports and weird layouts.
But that shouldn’t be a concern for you unless you’re buying an extremely exotic motherboard.
Over to You
Hopefully, that explains everything you need to know about every possible audio port you might find on your motherboard!
Have any other questions about PC components? Feel free to ask us in the comments or our forum!
![Where Do You Connect PC Fan PWM Cables To? [Beginner’s Guide]](https://www.cgdirector.com/wp-content/uploads/media/2023/12/Where-Do-PWM-Cables-Go-Beginners-Guide-Twitter-1-594x335.jpg "Where Do You Connect PC Fan PWM Cables To? [Beginner’s Guide]")
![How To Connect Front Panel Cables To Your Motherboard [Guide]](https://www.cgdirector.com/wp-content/uploads/media/2024/01/How-To-Connect-Front-Panel-Cables-To-Your-Motherboard-Twitter-copy-1-594x335.jpg "How To Connect Front Panel Cables To Your Motherboard [Guide]")


2 Comments
14 October, 2023
Thanks. Nice succinct explanation.
23 August, 2023
First time I’ve managed to get someone to show how to connect from a pc tower using the blue and green connections. Now i have two small powered speakers which i linked to my Tascam DP24 daw then linked across. Then from the green line out into my inputs…i now have feed back when i increase the volume and my replay of a song sounds Jeff..what have i don’t wrong ? Thanks