 by
by 
TABLE OF CONTENTS
In this article, I will be explaining to you in great detail all of the possible ways you can undo, redo, repeat, and modify an operation in Blender.
As this is a long article with many sections, be sure to utilize the Table of Contents above to skip to a specific section you’re interested in.
Often underappreciated, undo and redo are functions that are critical to any computing environment.
We can thank the good folks at Brown University and Mr. Warren Teitelman for pioneering the concepts of undoing and redoing all the way back in the 60s.
If it weren’t for their valuable contributions, the world as we know it today would certainly be a much more inefficient place.
But first of all, let’s get some of the technical details out of the way.
I will be using Blender version 2.92 stable release to demonstrate everything I will be doing in this article.
If you’re still on Blender 2.7x, you should still be able to do most of these—except for some.
But the interface and general approach to how things work are completely different pre and post version 2.8x, so I would advise you to upgrade if you haven’t already.
I will also be using a completely default, straight out-of-the-box Blender environment.
The only additional component that I have is an addon called Screencast Keys that I will be using on the video demonstrations, so you can see what keys I’m pressing.
Now, let’s get into it.
Keyboard Shortcut Summary:
| Undo | Ctrl + Z |
|---|---|
| Redo | Shift + Ctrl + Z |
| Repeat | Shift + R |
| Undo History | (Custom) Shift + Ctrl + H |
| Repeat History | (Custom) Shift + Ctrl + R |
| Adjust Last Operation | F9 |
Everything about The Undo Function in Blender
You are sitting in front of your high-end Blender PC, ten hours into an extremely detailed sculpture when all of sudden you put a little too much pressure on your pen and deform your amazing sculpt, destroying it.
What do you do?
This section is all about undoing your mistakes.
Undoing something using the menu
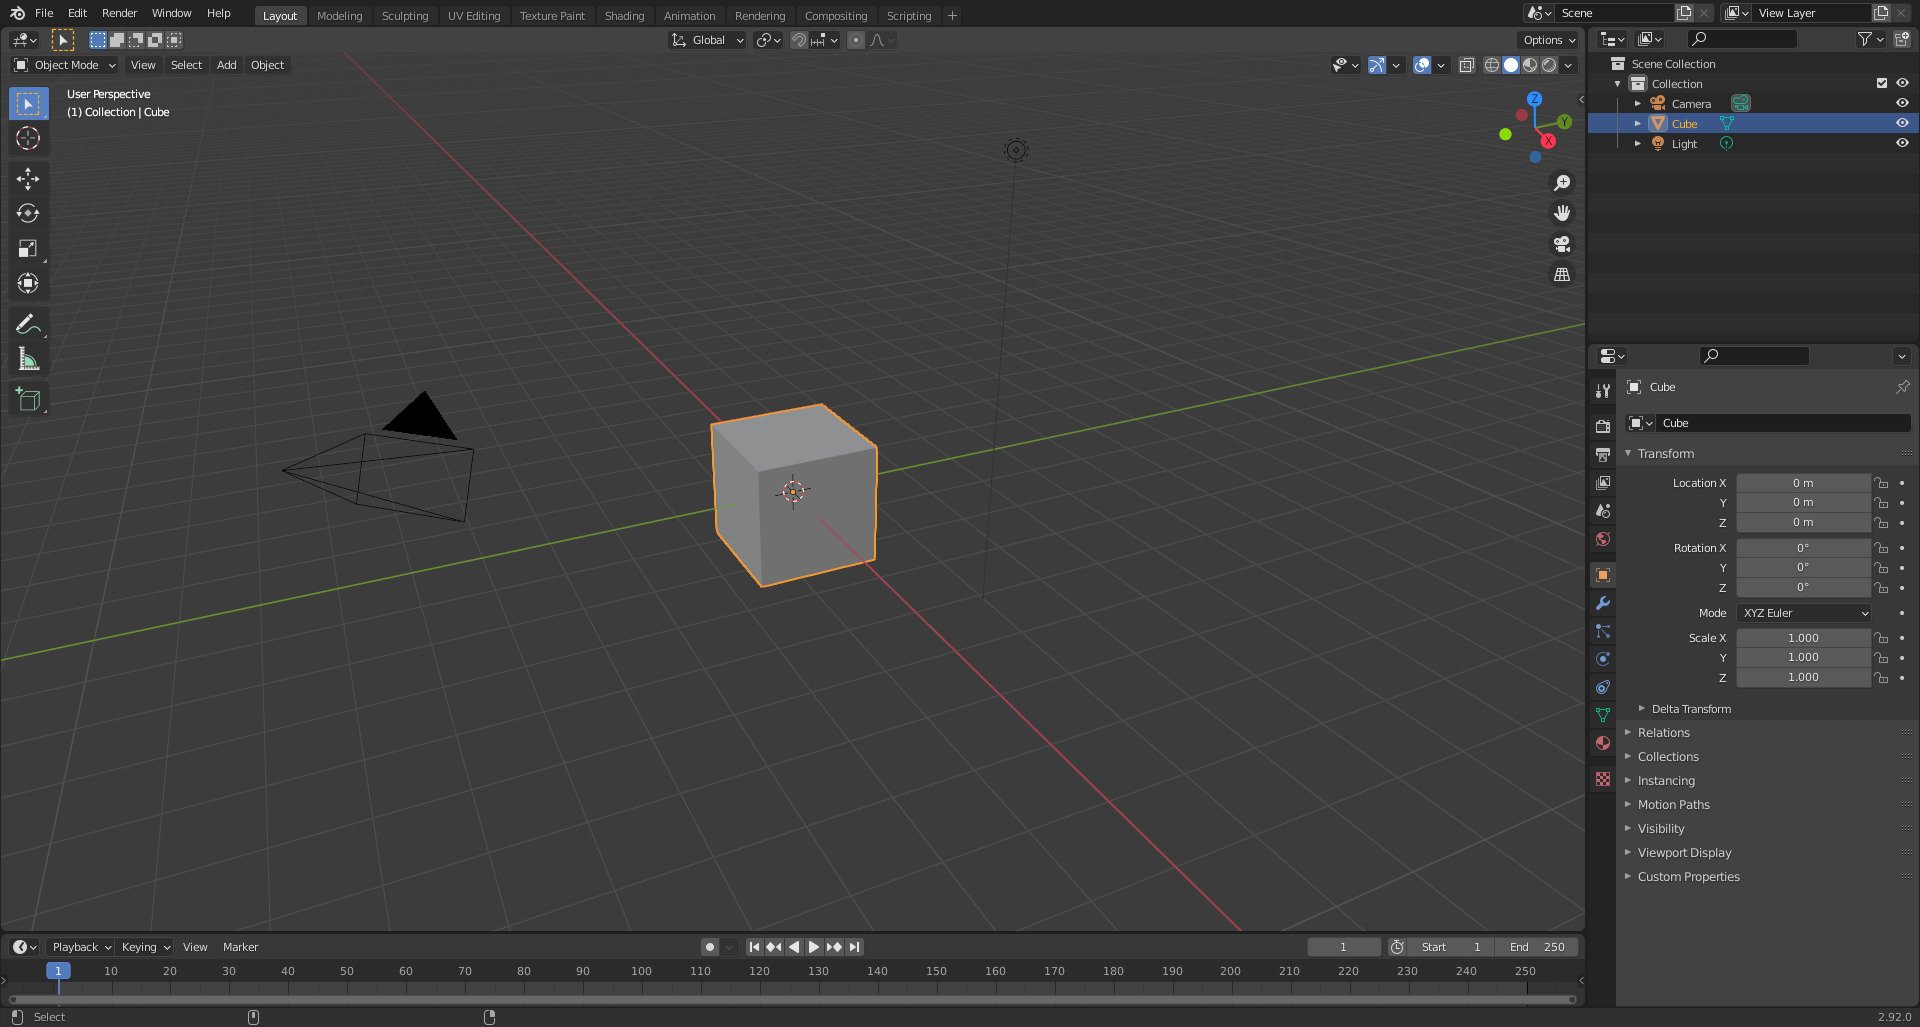
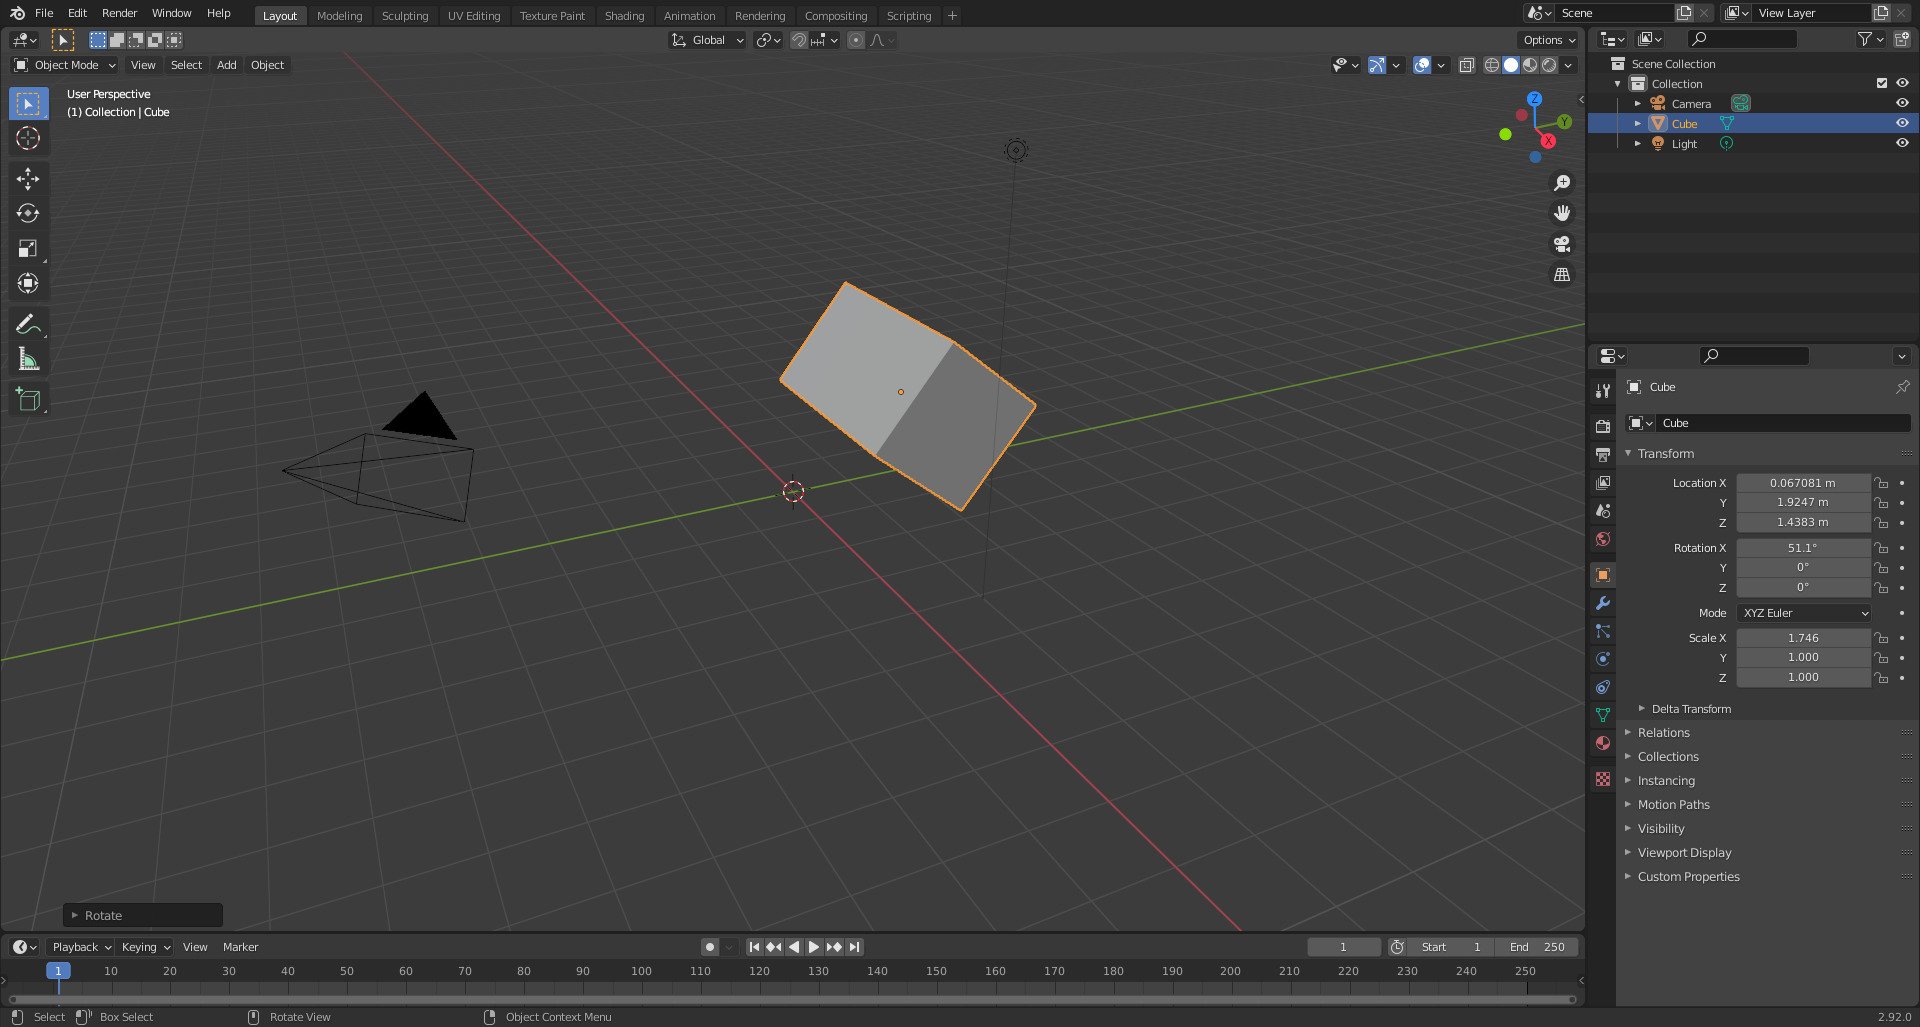
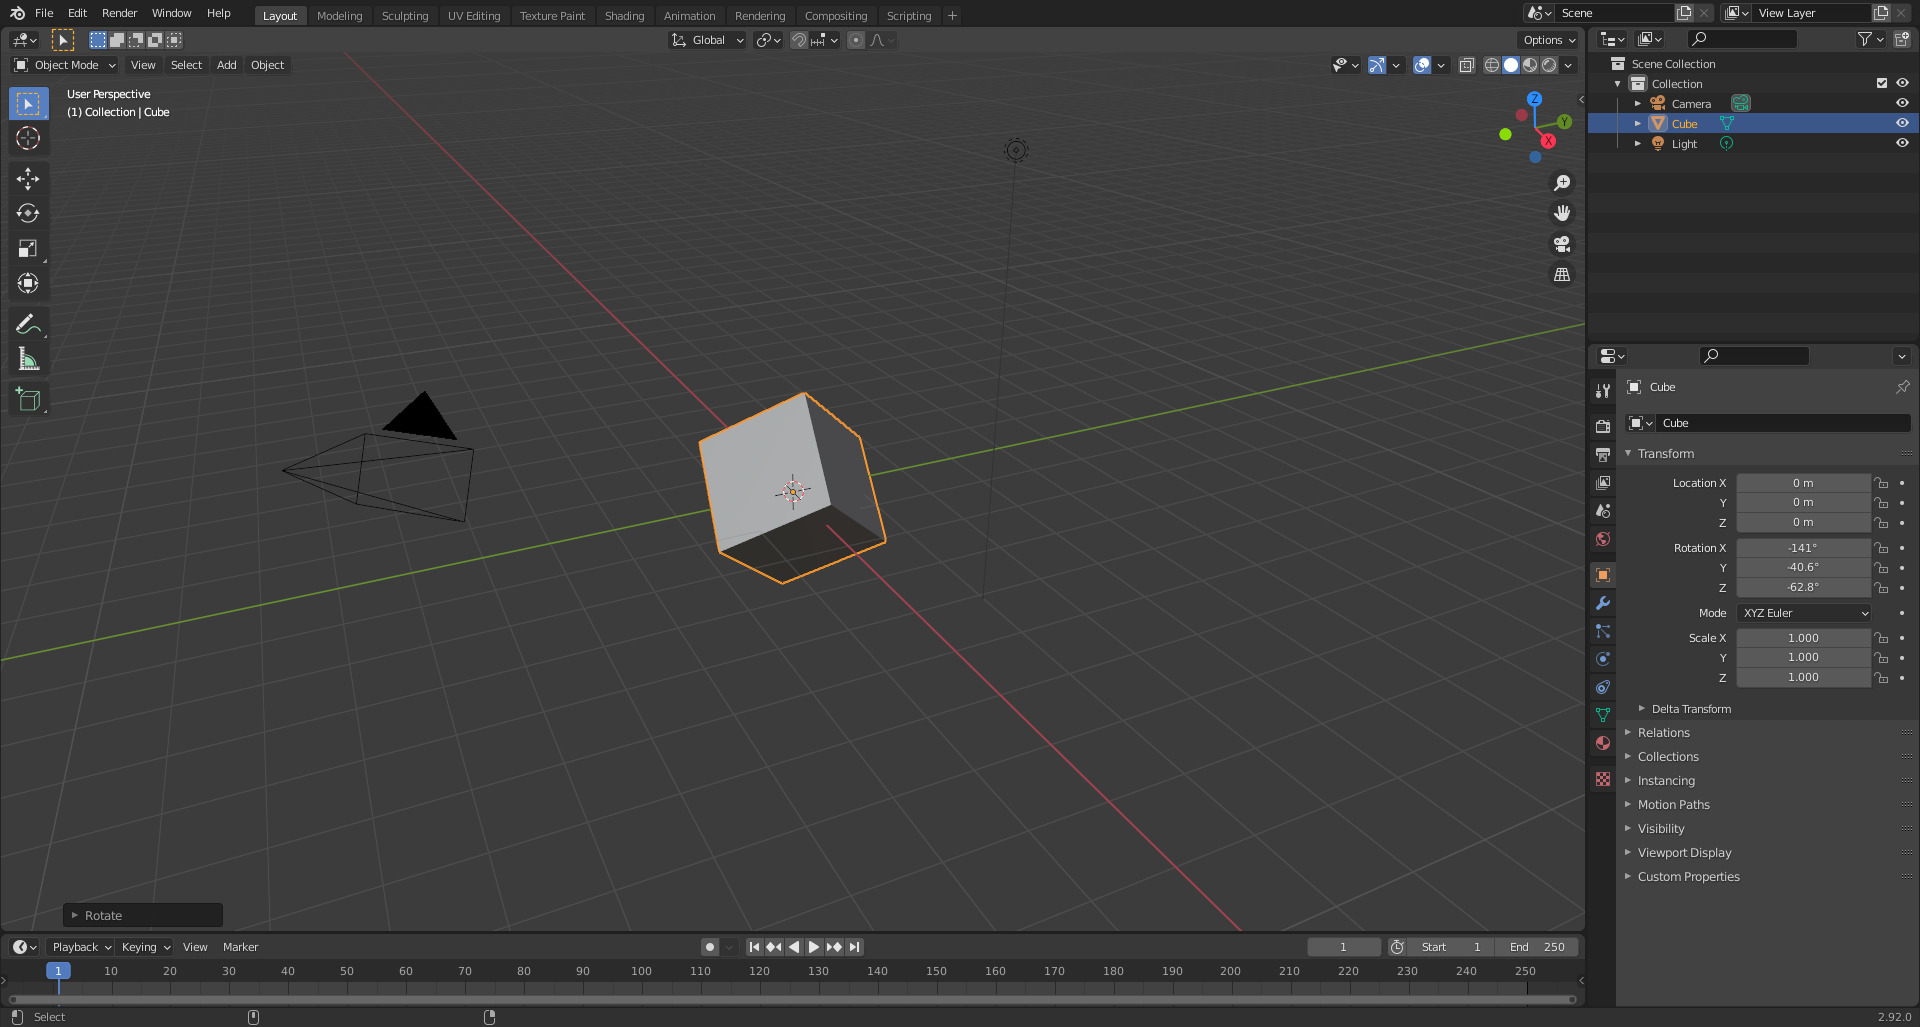
When you first start Blender, it will most likely look something like this. These are your default settings.

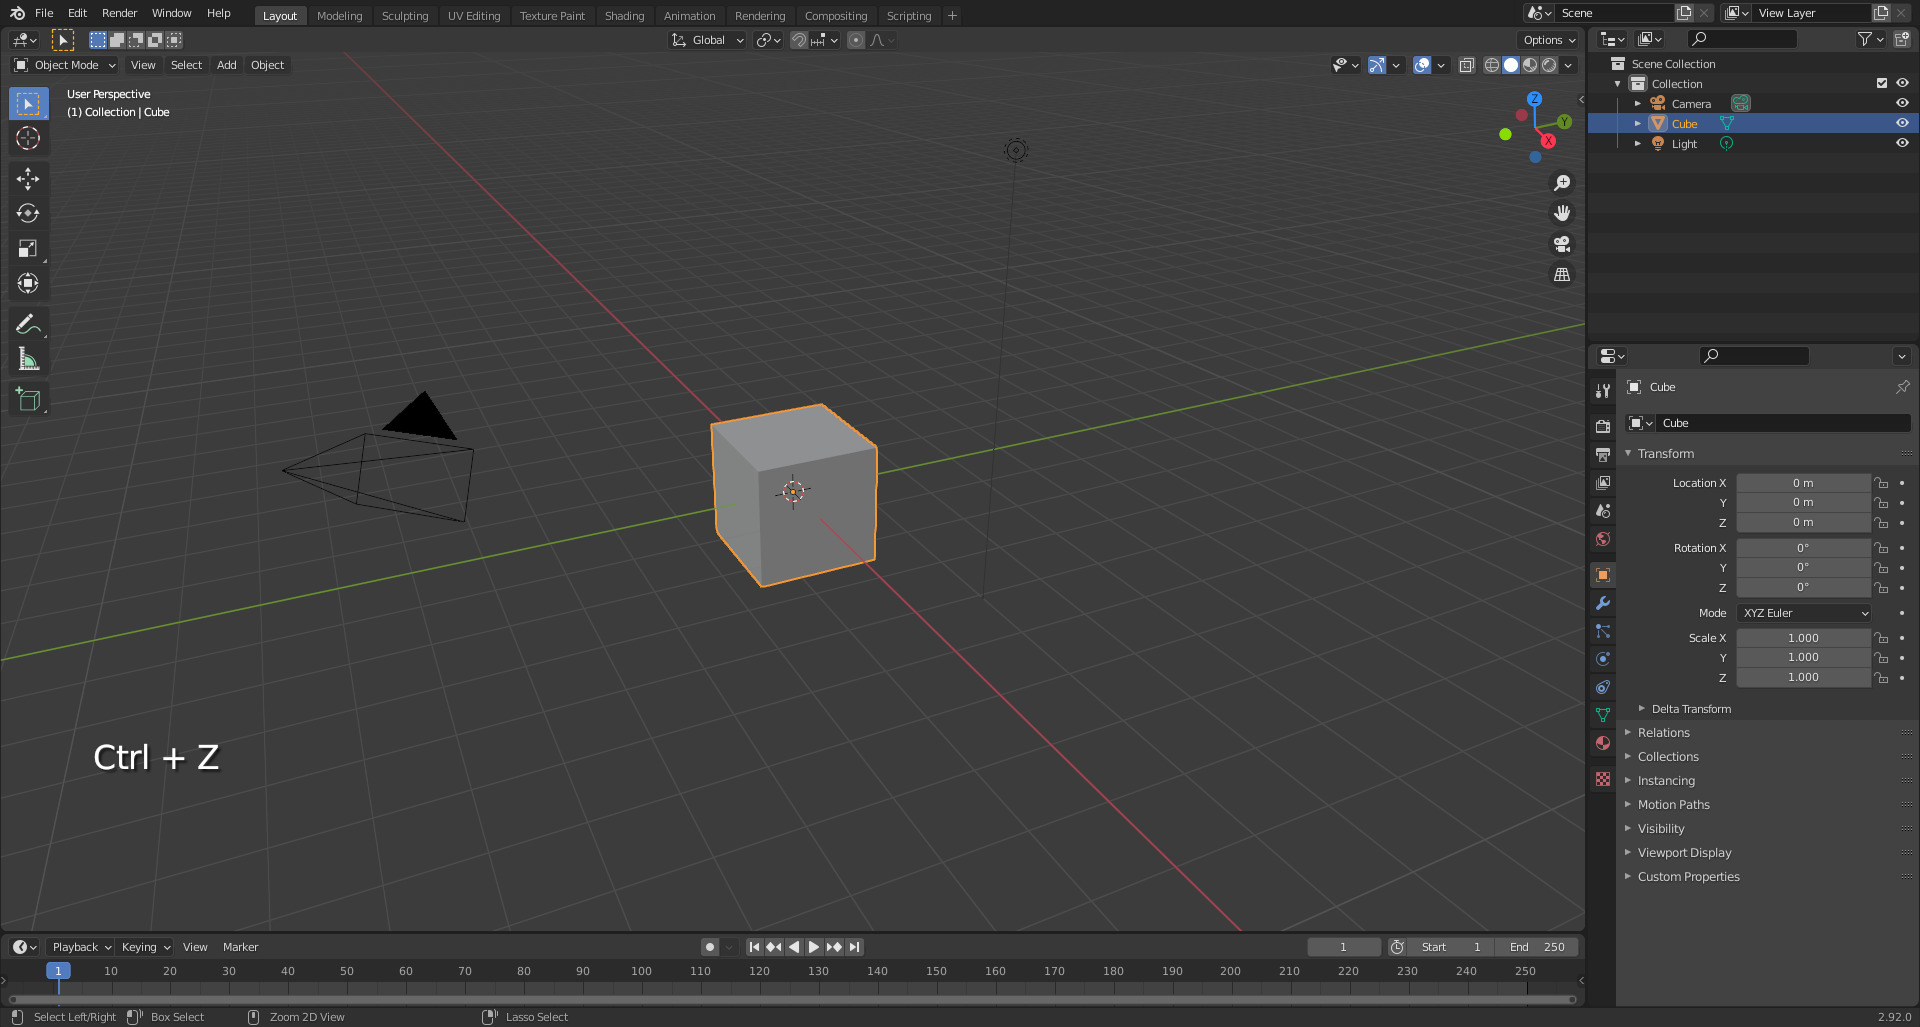
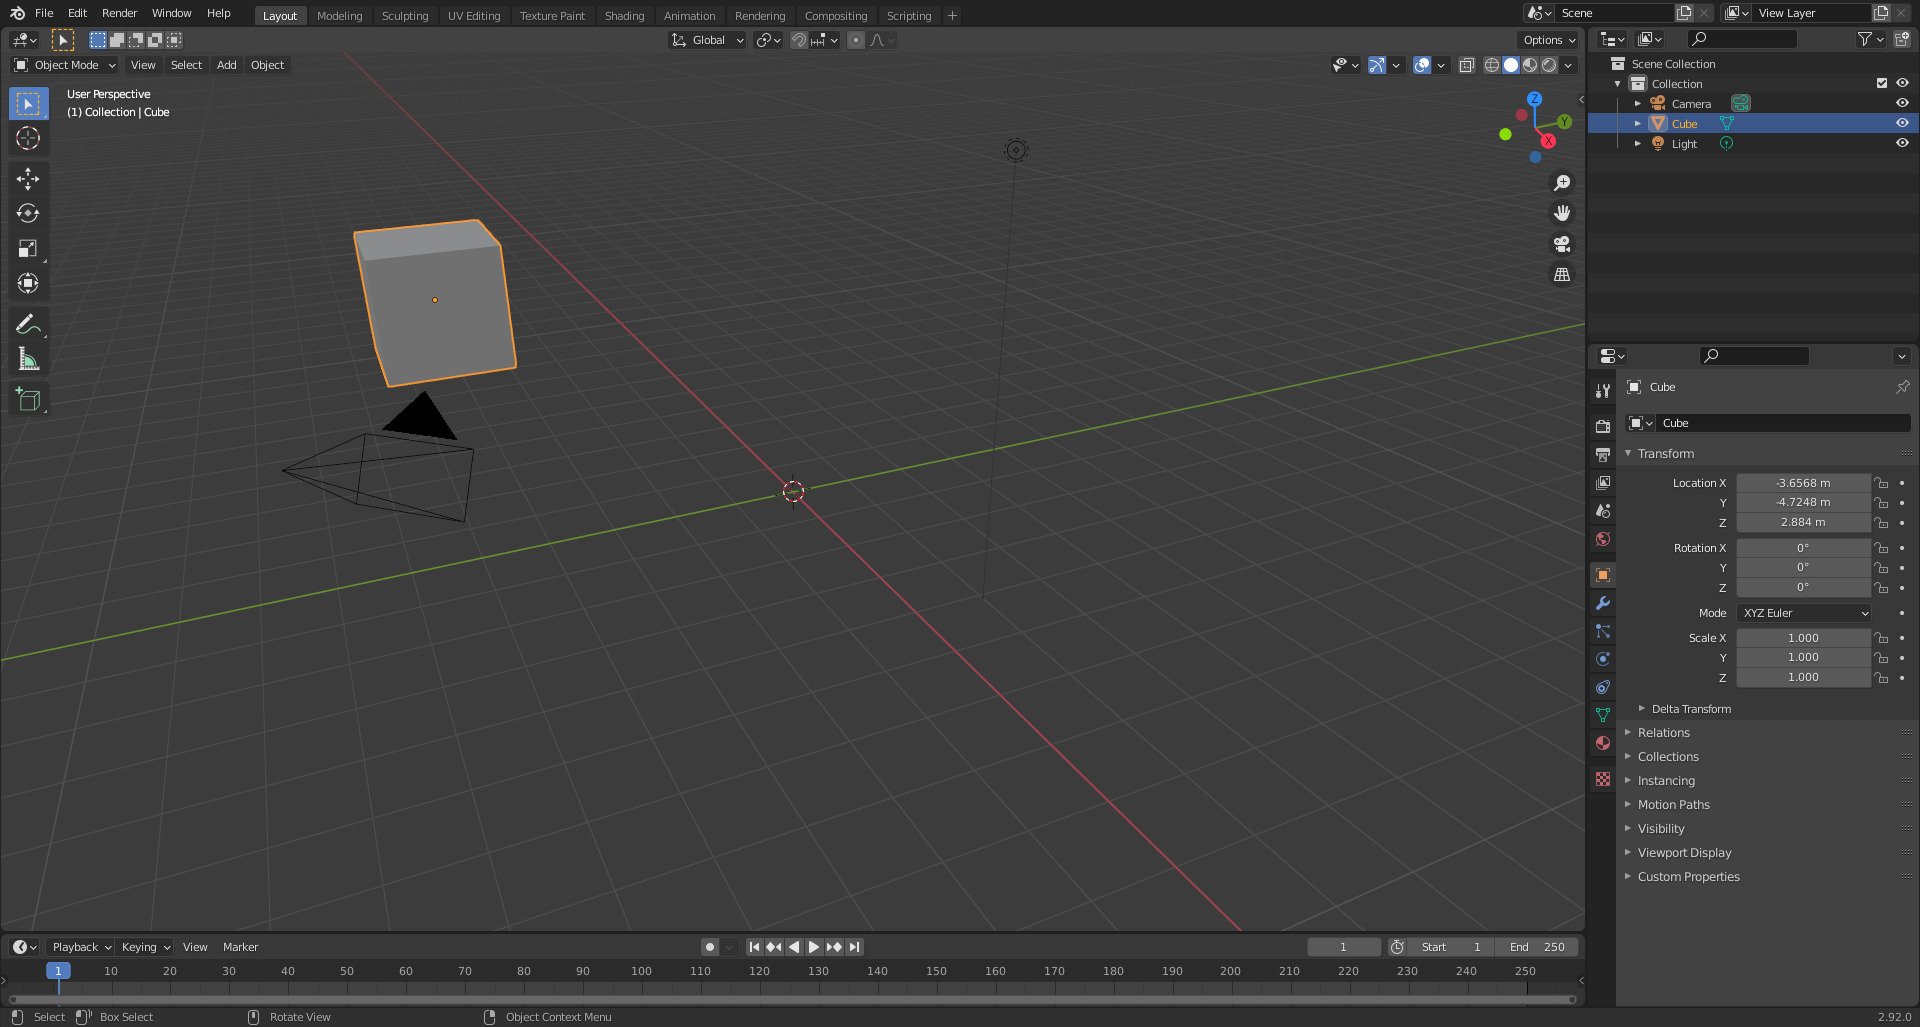
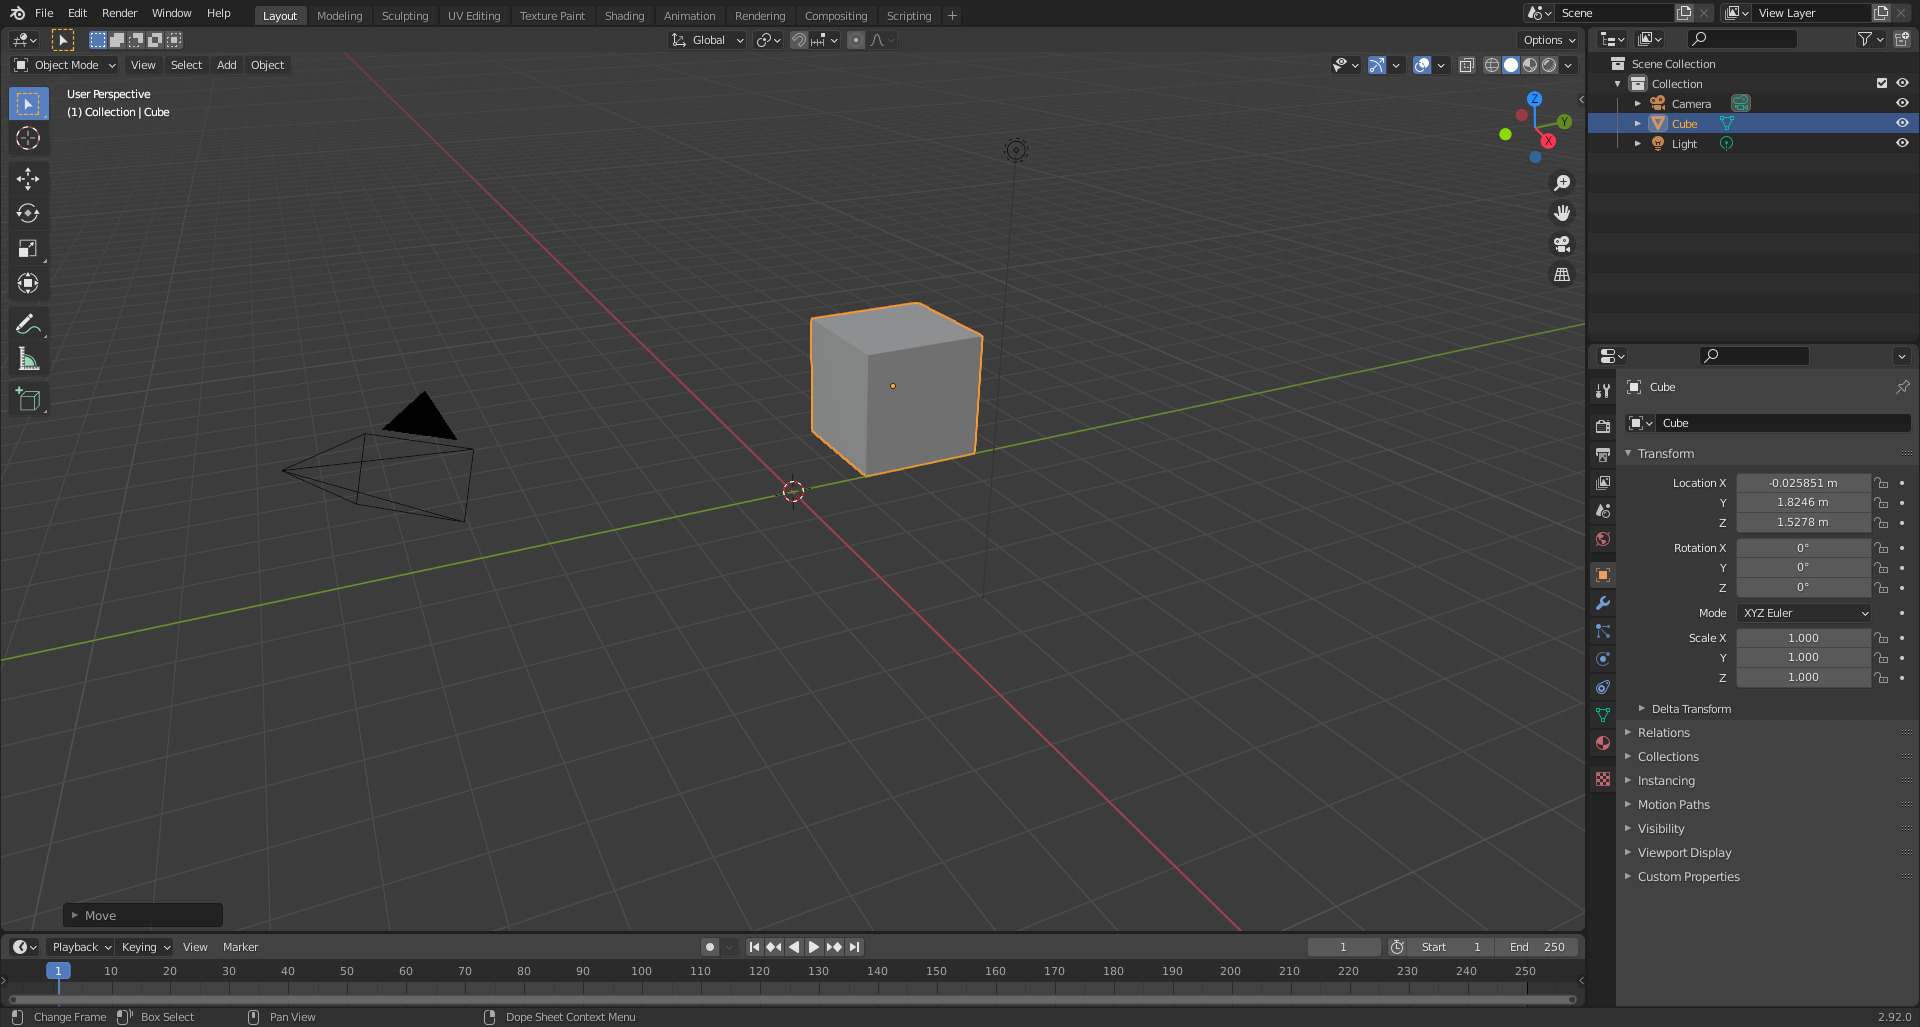
You can’t undo something without having anything to undo, right? So let’s move the default cube up a bit.

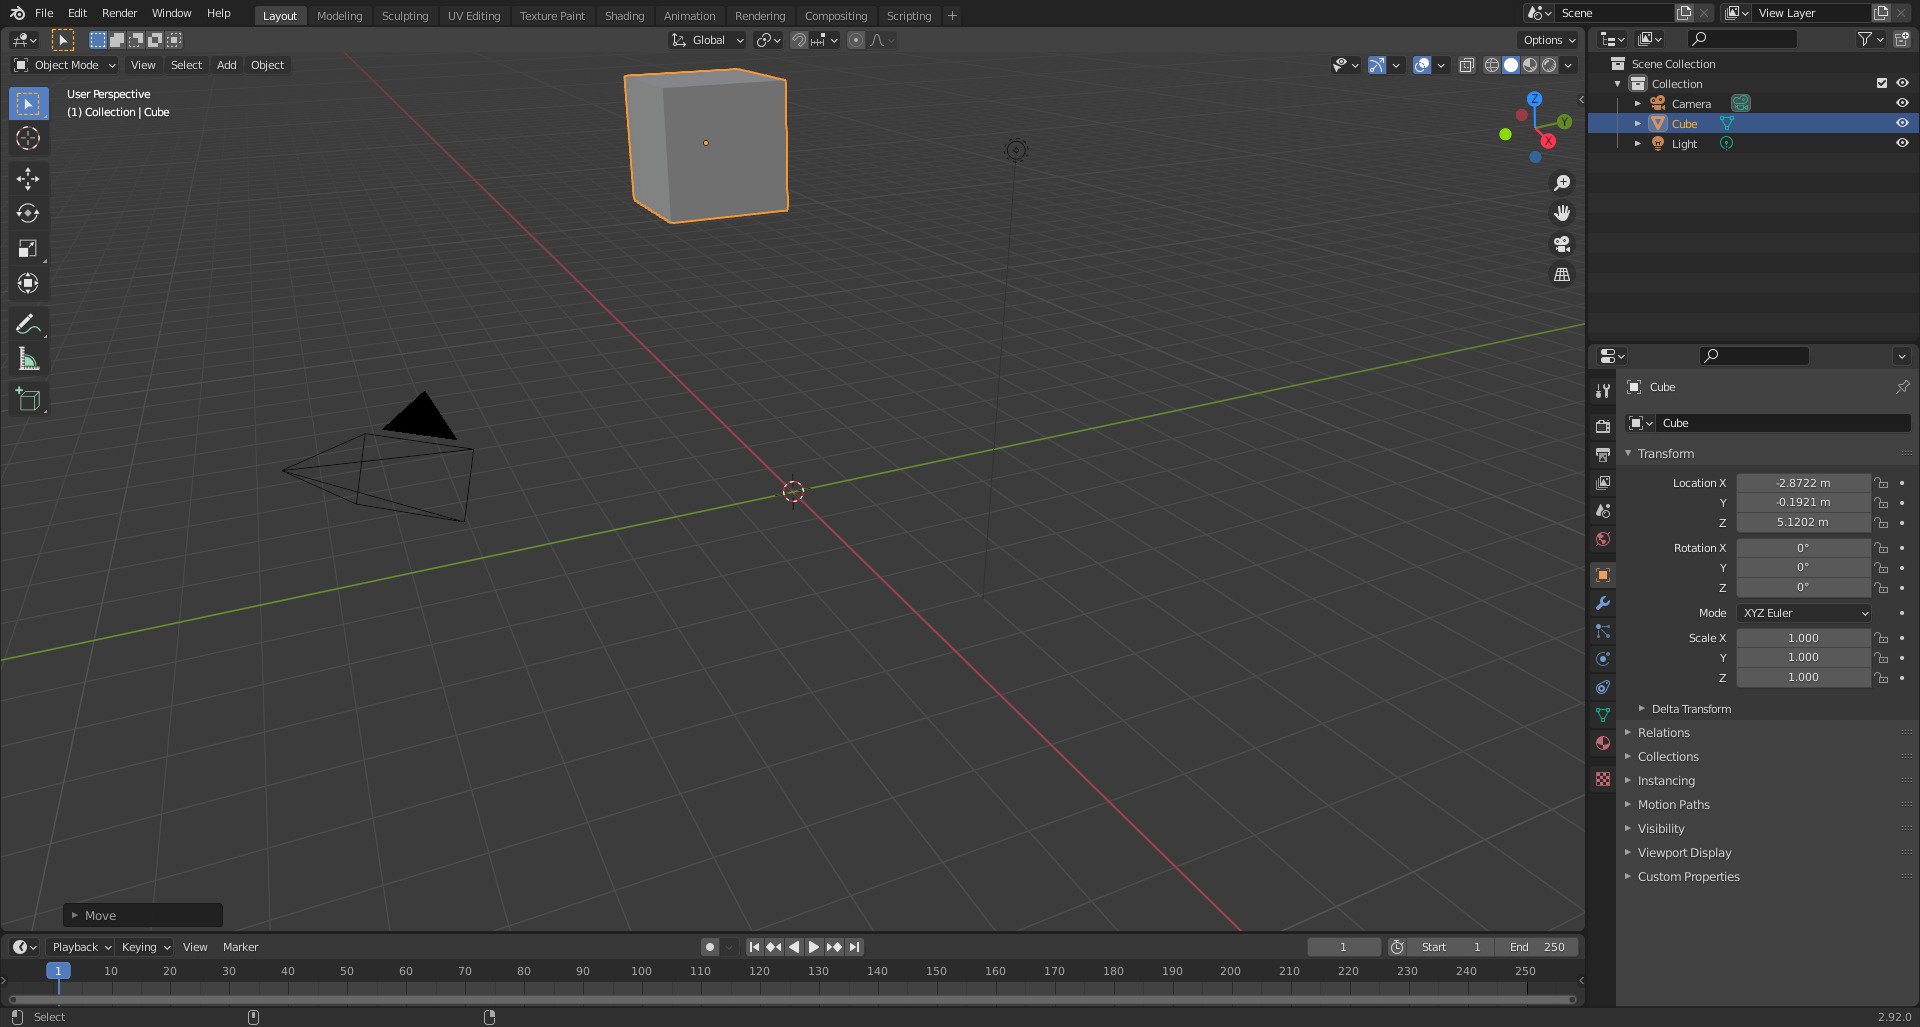
Oops. The default cube was moved up alright, but also to the side a bit. That’s not what we want in this context. Let’s undo that.
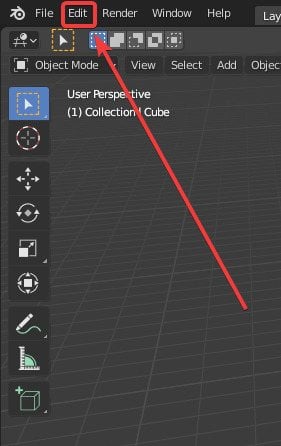
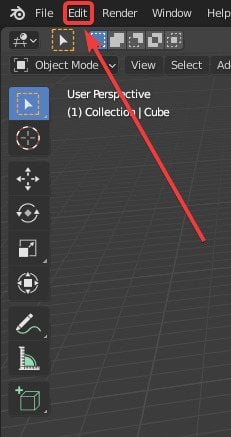
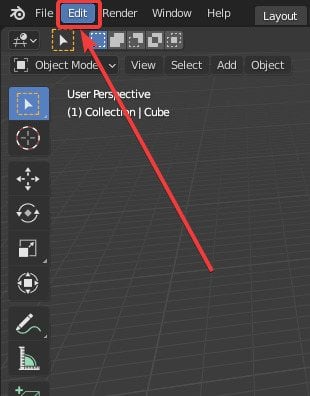
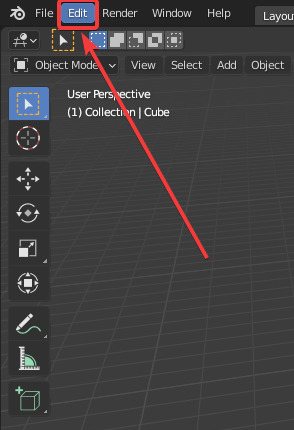
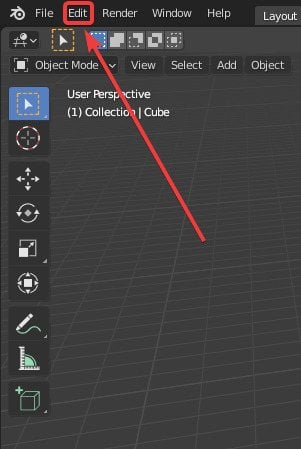
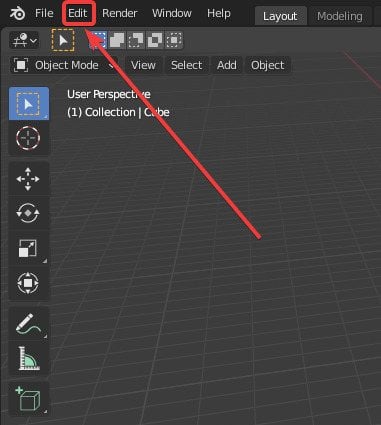
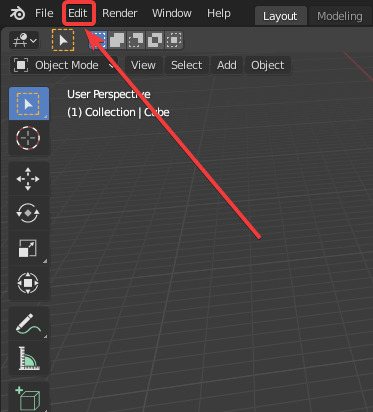
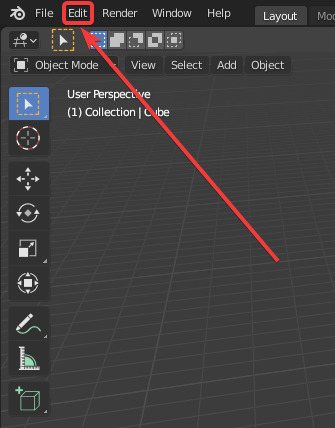
To do that, go to the top left of your Blender window and click on “Edit”.
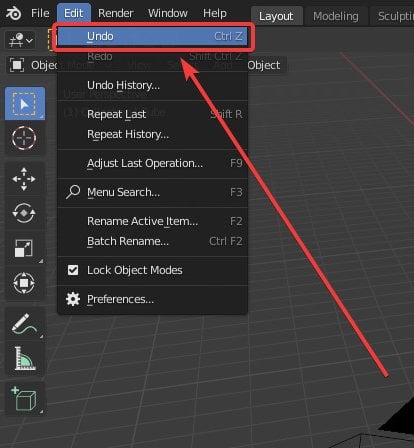
The edit menu will pop up. At the top of the edit menu, you’ll see the “Undo” option. Click it.
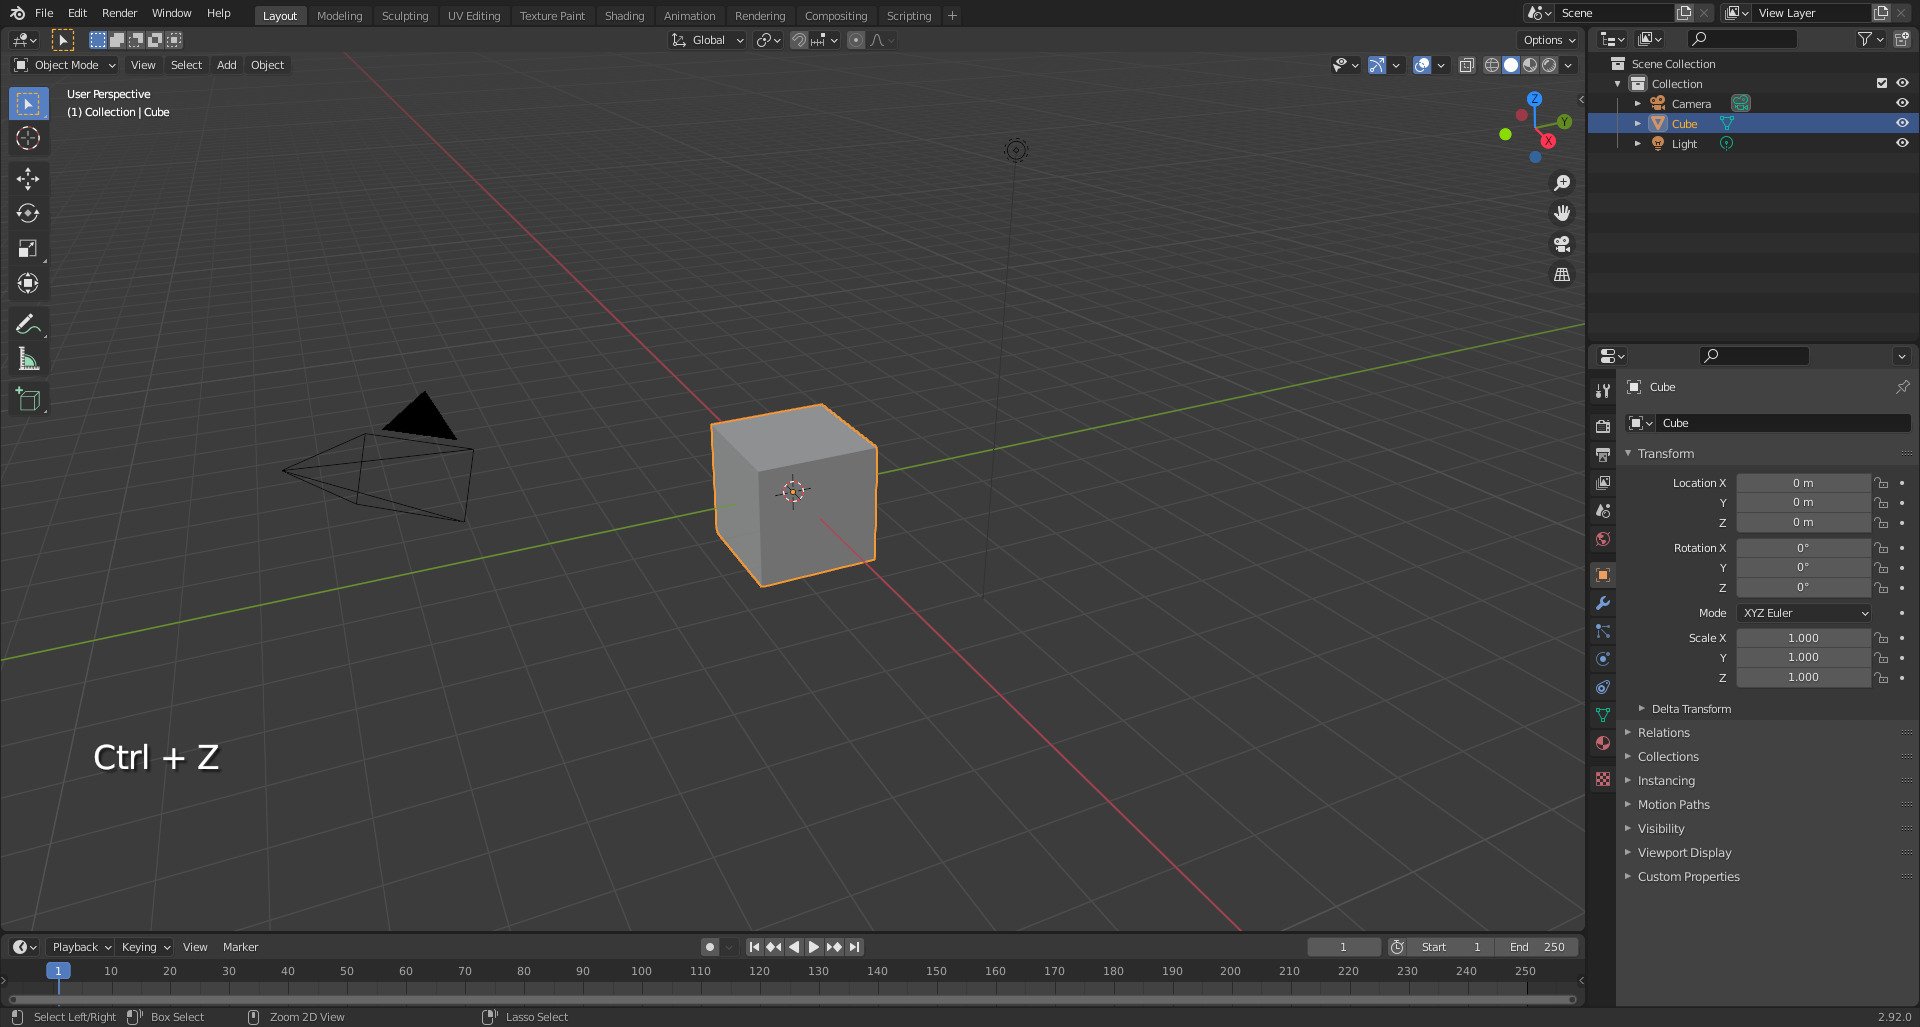
And there you go. Your default cube is back where it originally was!
If you need to undo some more, just do the steps again until you’re back where you want to be—up to a limit; read on to learn more about that.
If you learn better through visuals, here is that same process in video form.
Undoing something using the keyboard shortcut (Recommended)
You might be wondering why there’s a recommended tag on the header.
Why would I recommend using the keyboard shortcut overusing the menu?
Because it’s a faster and more convenient way to work.
Going back to the menu over and over again when you’re working breaks the flow and is a major hassle.
It’s far simpler to just use the keyboard shortcut—even if it might be a bit awkward at first if you’ve never used it.
So, how do you do that?
Start up Blender.

Do your operation(s).
Press Ctrl + Z on your keyboard to undo your operation.
It’s way faster and more efficient, don’t you think?
Here’s that same process in video form.
Everything About The Redo Function In Blender
A frequent occurrence when undoing—especially when using the keyboard shortcut I find—is that you’ll overshoot it and go back further than you intended to.
Perhaps you liked how your sculpt looked with that extra thick stroke. But you undid it and now lost it.
This section is all about redoing something that you undid.
Redoing something using the menu
Start up Blender.

Do your operation(s). 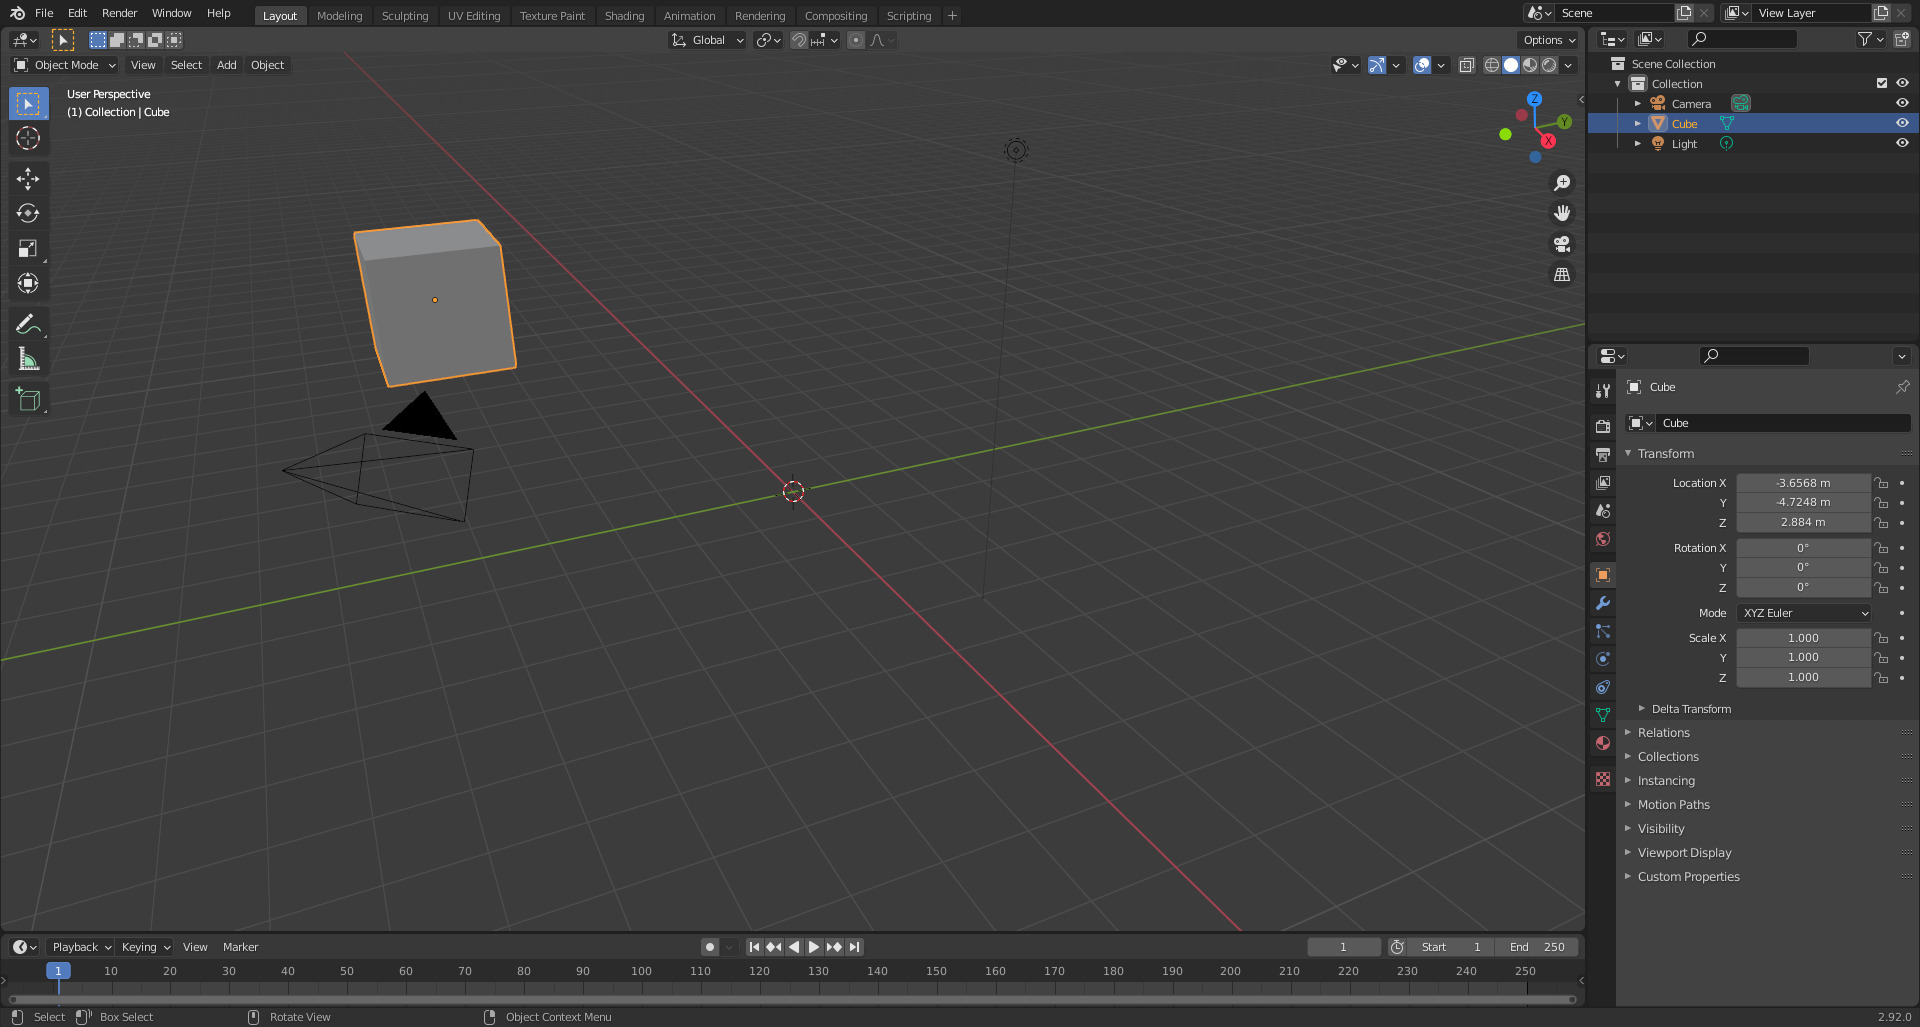
Now undo the operation(s).

But wait, maybe you actually kinda liked where the default cube was originally. Here’s how you get it back to its original location.
Go to the top left of your Blender window and click on “Edit”.
The edit menu will pop up. Just below the top most option in the edit menu, you’ll see the “Redo” option. Click it.
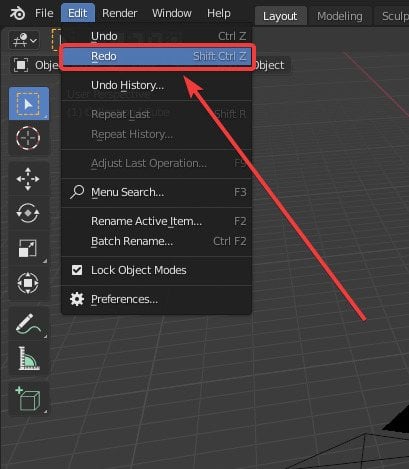
And there you go. Your default cube is now back where it was before.
If you need to redo some more, just do the steps again until you’re back where you want to be—up to a limit; read on to learn more about that.
Here’s that same exact process in video form.
Redoing something using the keyboard shortcut (Recommended)
It’s the same as undoing something using the keyboard shortcut.
Going back and forth between menus when you’re in the zone is more difficult and potentially distracting.
And if you want to work on any sort of creative software, it’s generally well advised to get familiar with the undo and redo functions as soon as possible.
So here’s how to redo something in an easy to access way, using the Blender keyboard shortcut.
Start up Blender.

Do your operation(s).

Now undo what you did using the command: Ctrl + Z.
And then you can redo it again by using Shift + Ctrl + Z.

Simple as that. I’d recommend you familiarize yourself with those two shortcuts as you’ll most likely be using them a lot.
Here’s that same exact process in video form.
Everything About Repeating The Last Function In Blender
“Repeat Last” is a function in Blender that allows you to string together multiple operations quickly to save you time.
The name is quite self-explanatory.
It aims to repeat the last operation that you did in Blender.
I usually use the Repeat Last function when I need to duplicate or instantiate nuts and bolts and whatnot.
It’s convenient for small details like that when you don’t want to bother with an array modifier.
It can also come in handy when, say, you want to repeat a move operation and make sure that you exactly double (or more) the original move operation.
I generally don’t use Repeat Last all that much, but it sure can come in handy when you do end up needing it.
This section is all about repeating something using Blender’s Repeat Last Function.
Repeating something using the menu
Start up Blender.

Do your operation(s).

Go to the top left of your Blender window and click on “Edit”.
The edit menu will pop up. At the middle of the edit menu, you’ll see the “Repeat Last” option. Click it.
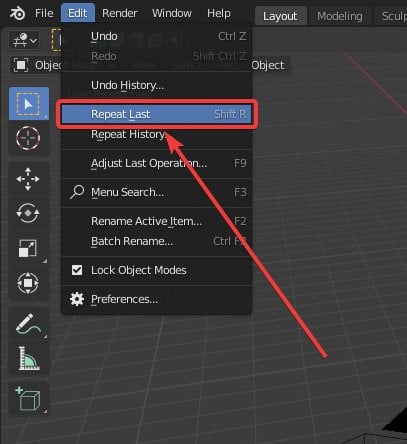
And now the previous operation that you did will happen again.
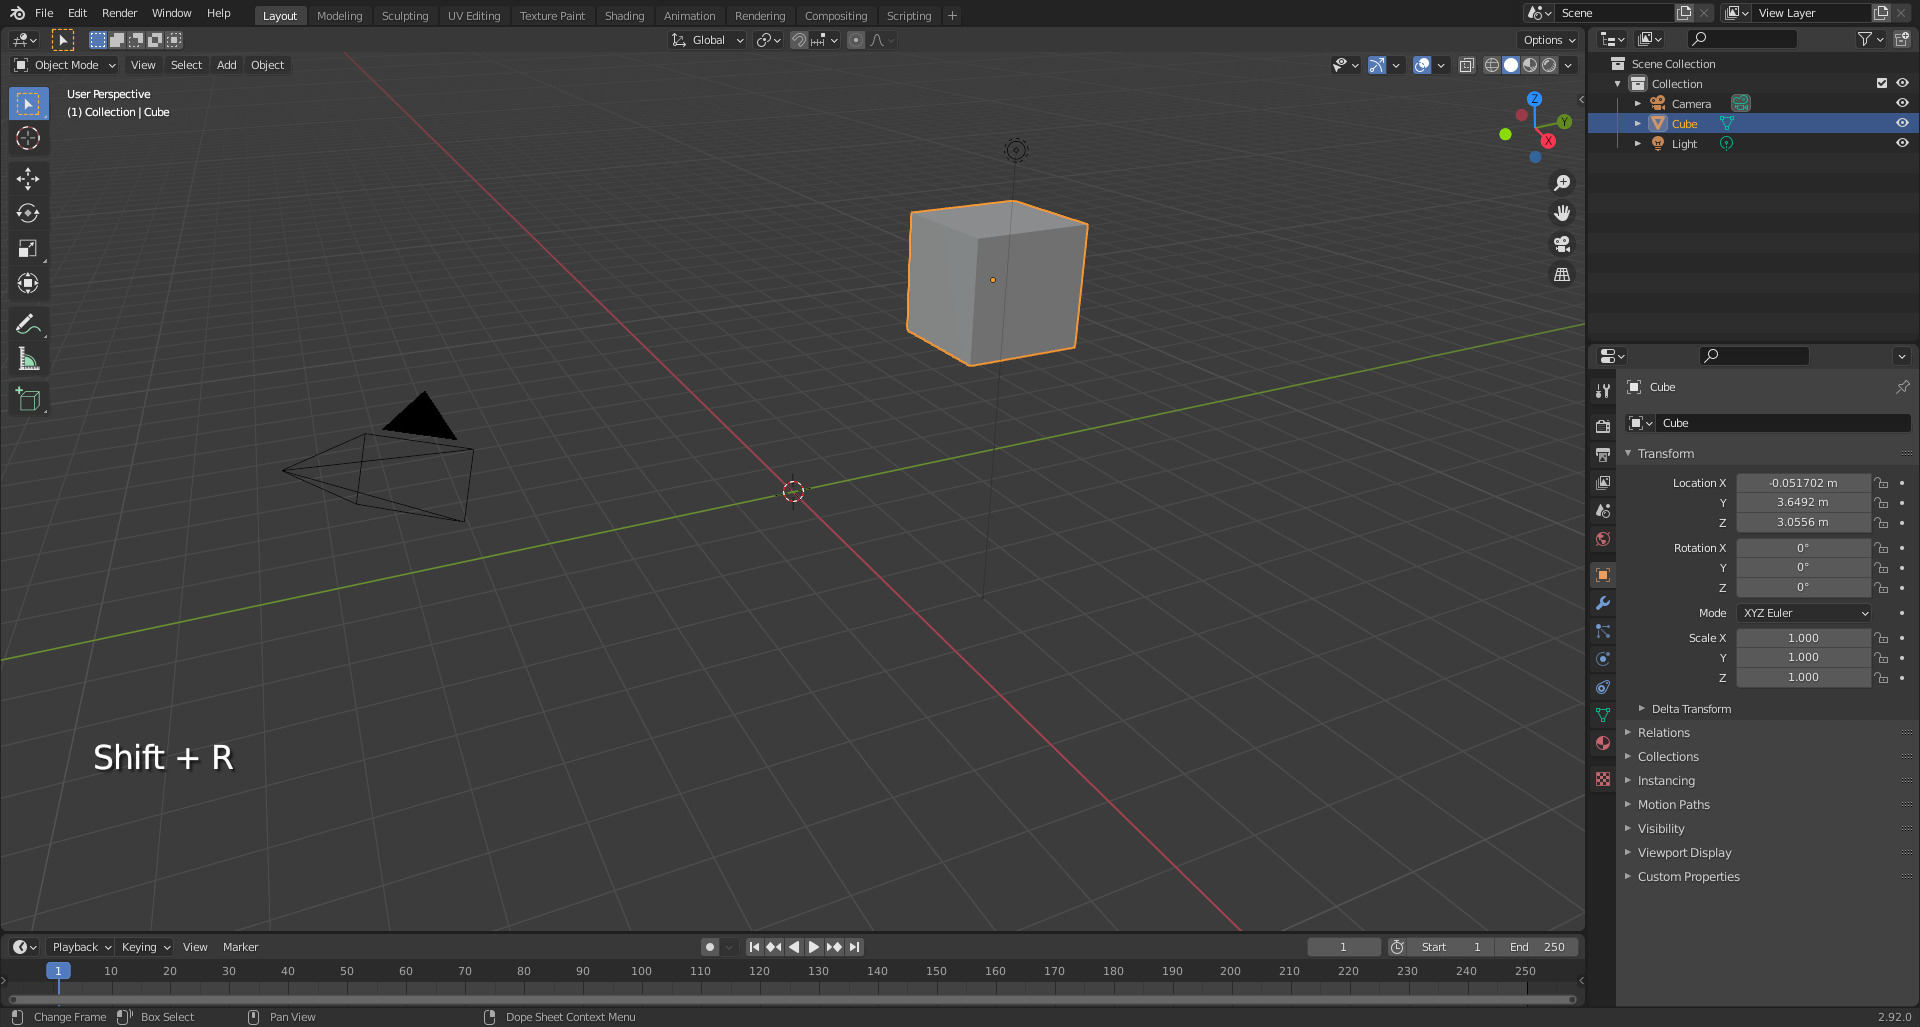
(See how the location values have multiplied?)
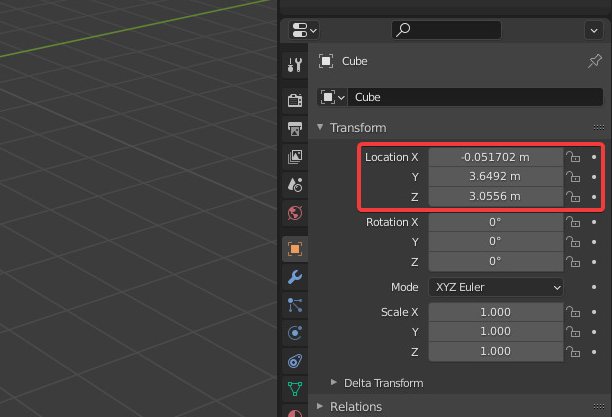
This demonstration doesn’t show the best case scenario for the sake of brevity and simplicity, but I’m sure you can think up some cool uses for this function!
Here’s that same exact process in video form.
Repeating something using the keyboard shortcut (Recommended)
It’s the same as undoing and redoing something using the keyboard shortcut.
Going back to the menu over and over again is inefficient with your time, and breaks you away from the flow.
So here’s how to use the Repeat Last function using the Blender keyboard shortcut.
Start up Blender.

Do your operation(s).
You can repeat your last operation by using the Shift + R keyboard shortcut.
Here’s that same exact process in video form.
Everything About Undo And Repeat History In Blender
Undo History
Undo history is a very useful feature in Blender that allows you to see and go back to previous operations by picking a specific operation to go to from a list.
It’s useful if you know that you want to go back quite a bit and you don’t want to spam Ctrl + Z an obscene amount of times.
Accessing Undo History Using The Menu
Start up Blender.

Do your operation(s).
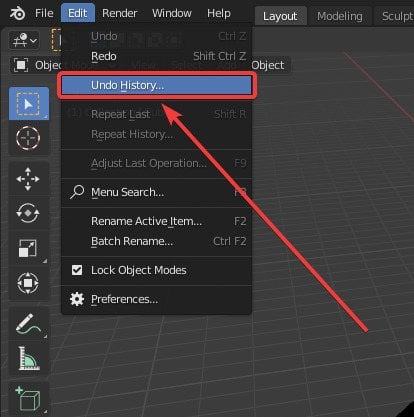
Go to the top left of your Blender window and click on “Edit”.
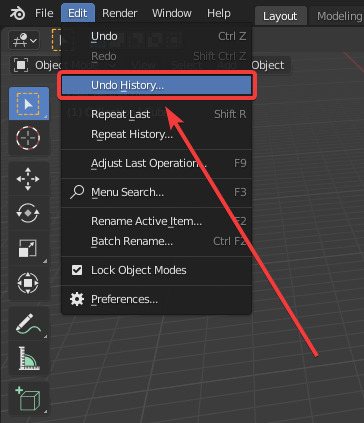
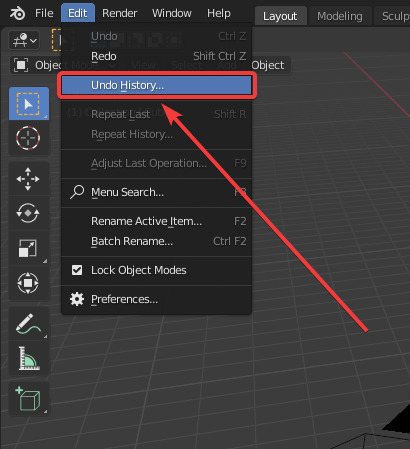
The edit menu will pop up. Just below “Redo” in the edit menu, you’ll see the “Undo History” option. Click it.
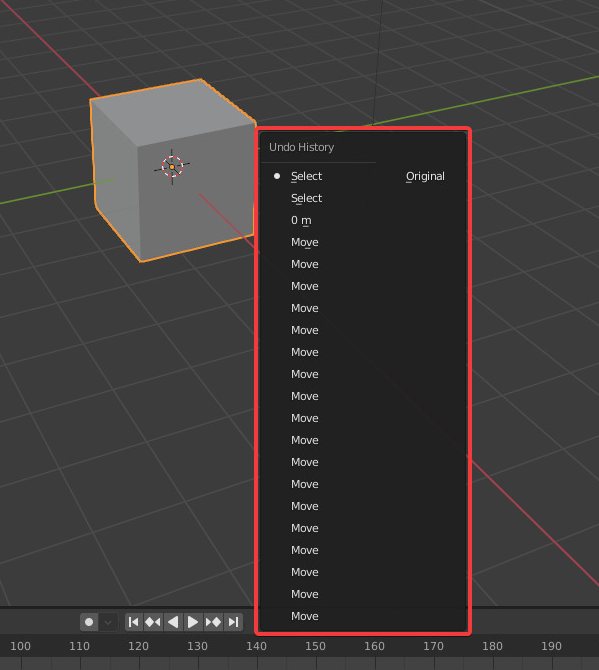
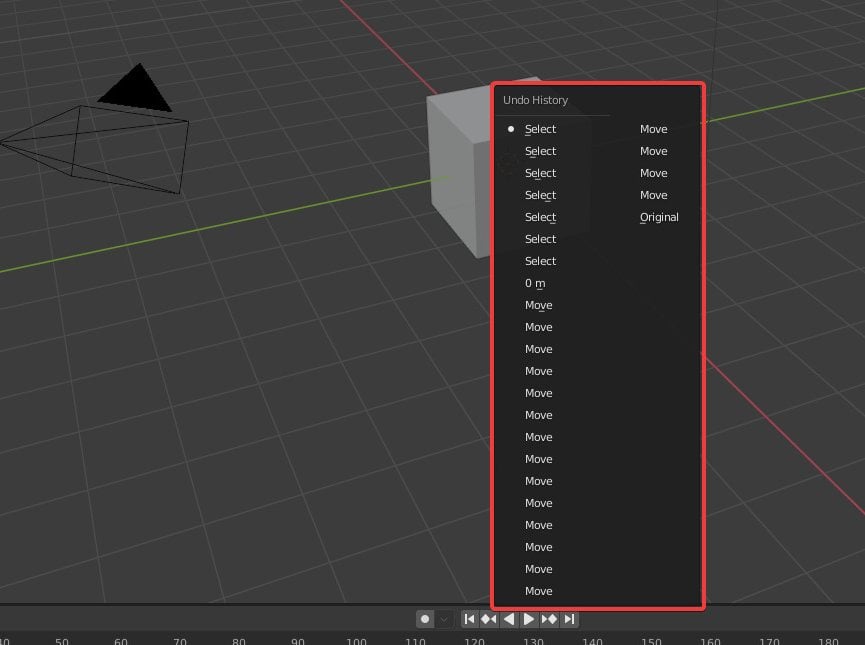
The Undo History menu will pop up.
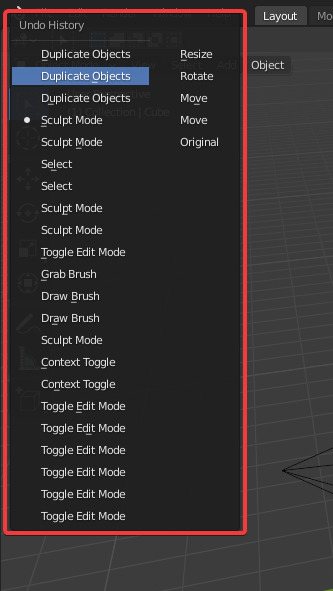
You can pick and choose where you want to go from there.
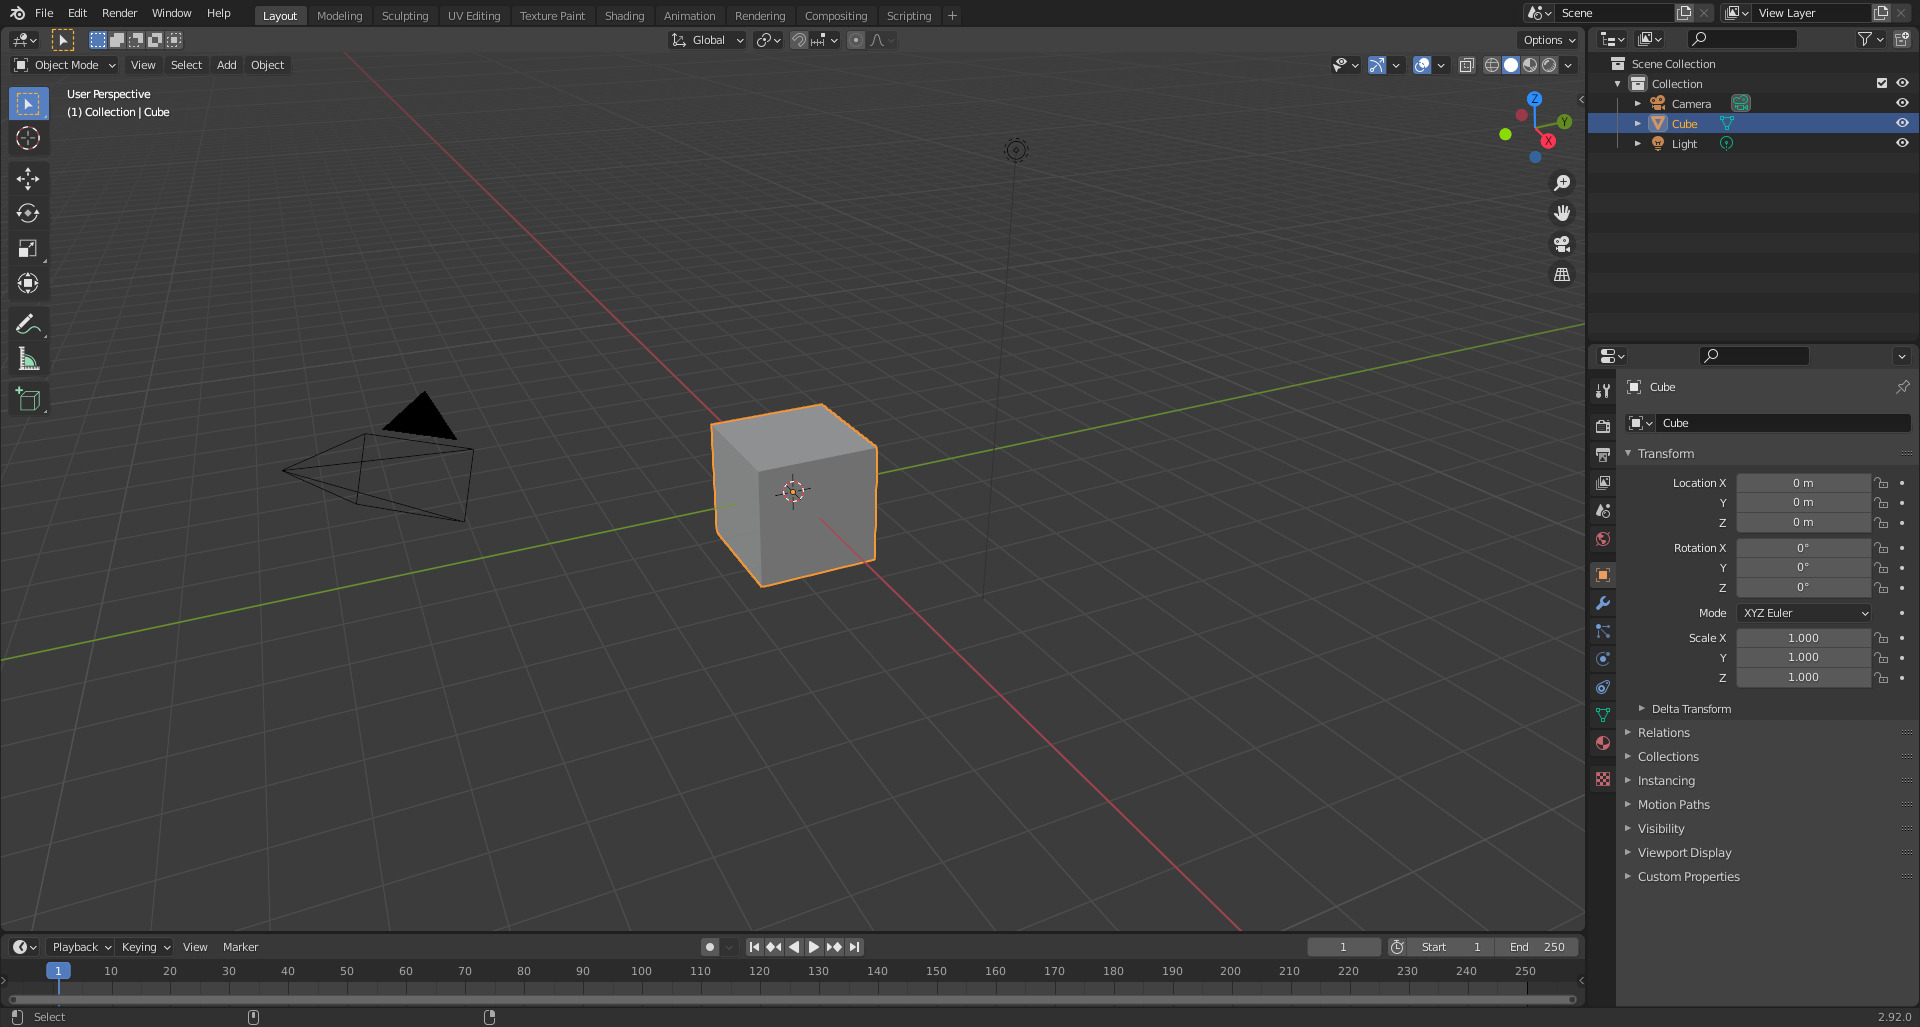
If you want to go back to the original state of the default cube, you can simply click “Original”.

And you’re back at the beginning.

Here’s that same exact process in video form.
Accessing Undo History Using A Custom Keyboard Shortcut
Undo History in Blender doesn’t actually have a default keyboard shortcut. Perhaps they didn’t think it was needed.
But if you want to access it using a keyboard shortcut, Blender allows you to set a custom shortcut.
Let me show you how to do that.
Start up Blender.

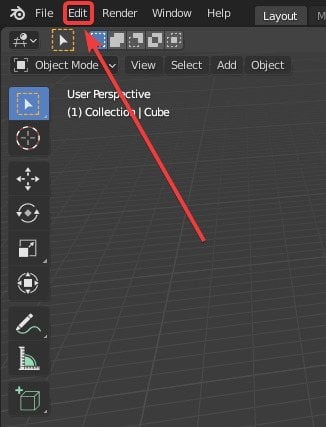
Go to the top left of your Blender window and click on “Edit”.
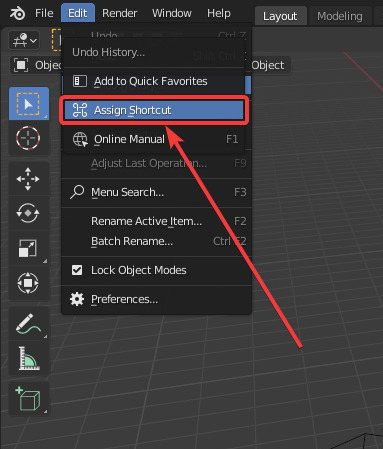
The edit menu will pop up. Just below “Redo” in the edit menu, you’ll see the “Undo History” option. Left click it.
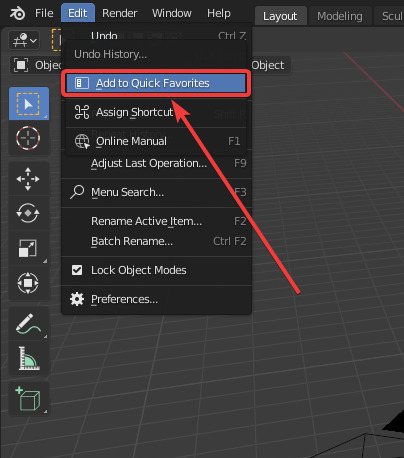
A menu will pop up with three options. Click the middle “Assign Shortcut” option.
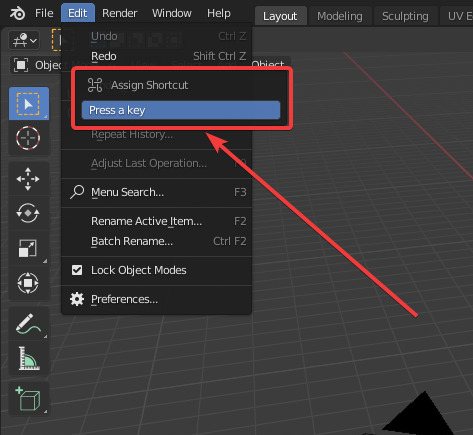
A new pop-up will show telling you to “Press a key”. You can assign your preferred keyboard shortcut now.
I personally don’t assign any keyboard shortcuts to Undo History as there are so many shortcuts already, and it’s bound to clash with something.
More on the recommended way to access the Undo History in the section right after this.
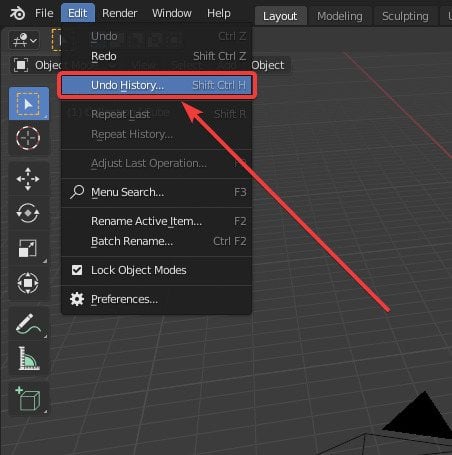
But for demonstration purposes, I’ll use Shift + Ctrl + H as my shortcut. Feel free to customize it to your preference.
After pressing your preferred shortcut keys simultaneously, the shortcut input menu will close automatically, and your new shortcut will be shown beside the menu option.
You’ve now created your own custom keyboard shortcut! The Undo History Menu will open wherever your cursor is currently located on the screen.
Here’s that same exact process in video form.
Accessing Undo History Through The Quick Favorites Menu (Recommended)
This is my preferred method of accessing the Undo History menu.
Like I mentioned previously, there are so many keyboard shortcuts to keep track of already, that adding another one would just complicate things.
For the less frequently accessed functions like the Undo History, I assign them to the Blender Quick Favorites menu instead.
Here’s how to do that.
Start up Blender.

Go to the top left of your Blender window and click on “Edit”.
The edit menu will pop up. Just below “Redo” in the edit menu, you’ll see the “Undo History” option. Left click it.
A menu will pop up with three options. Click the top most “Assign Shortcut” option.
Now it should be assigned to your Quick Favorites menu.
To access your Quick Favorites menu, press “Q” anywhere on the screen, and click on “Undo History”.
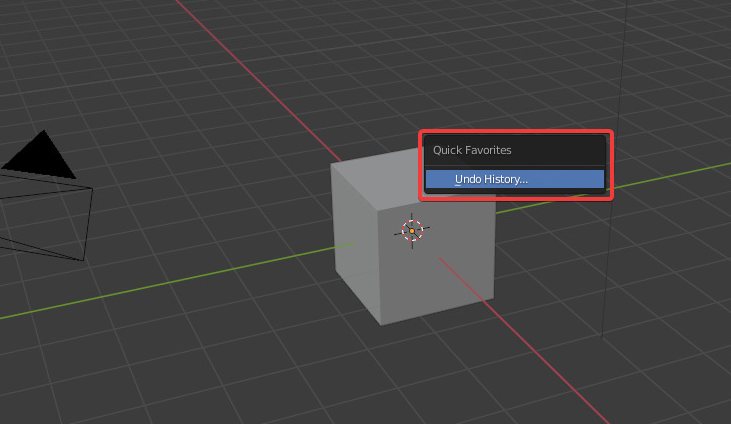
The Undo History menu should now pop up.
A couple more clicks than the keyboard shortcut method, but more usable in my opinion.
Here’s that same exact process in video form.
Repeat History
Repeat History is very similar to Undo History in that it allows you to see and go back to the previous operations through a list.
Repeat History also allows you to repeat specific operations.
This function is useful if you know that you want to repeat a certain action that you did a couple operations back, while preserving whatever modifications you’ve made since then.
Something to keep in mind is that when you select an operation to repeat in the Repeat History menu, that option will move to the top of the stack.
So, say that you have 3 operations in the Repeat History menu.
If you repeat operation 3, it will then be moved to the top of the stack and operations 1 and 2 will be shifted down to positions 2 and 3, respectively.
In order to repeat operation 3, you’d now select the first option in the menu.
You also have to keep in mind that if at any point you undo something, you’ll lose the ability to repeat your last operation and your repeat history.
A new history will start from the moment that you undo, but you will lose all your previous operations. So keep that in mind.
This does not happen with Undo History however.
Accessing Repeat History Using The Menu
Start up Blender.

Do your operation(s).
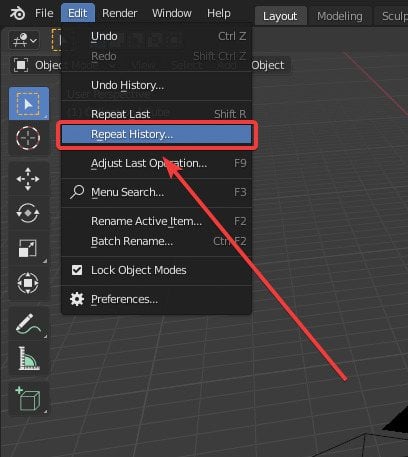
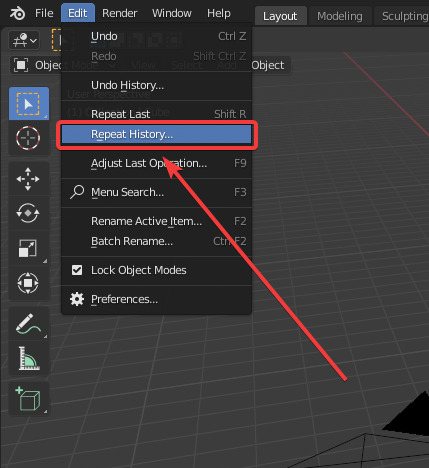
Go to the top left of your Blender window and click on “Edit”.
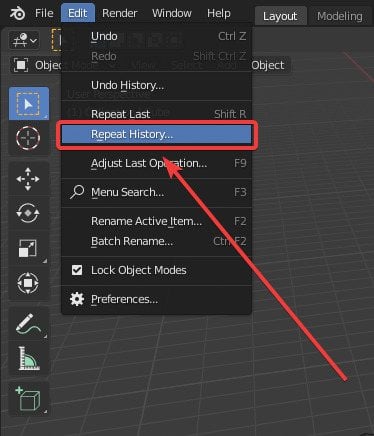
The edit menu will pop up. Just below “Repeat Last” in the edit menu, you’ll see the “Repeat History” option. Click it.
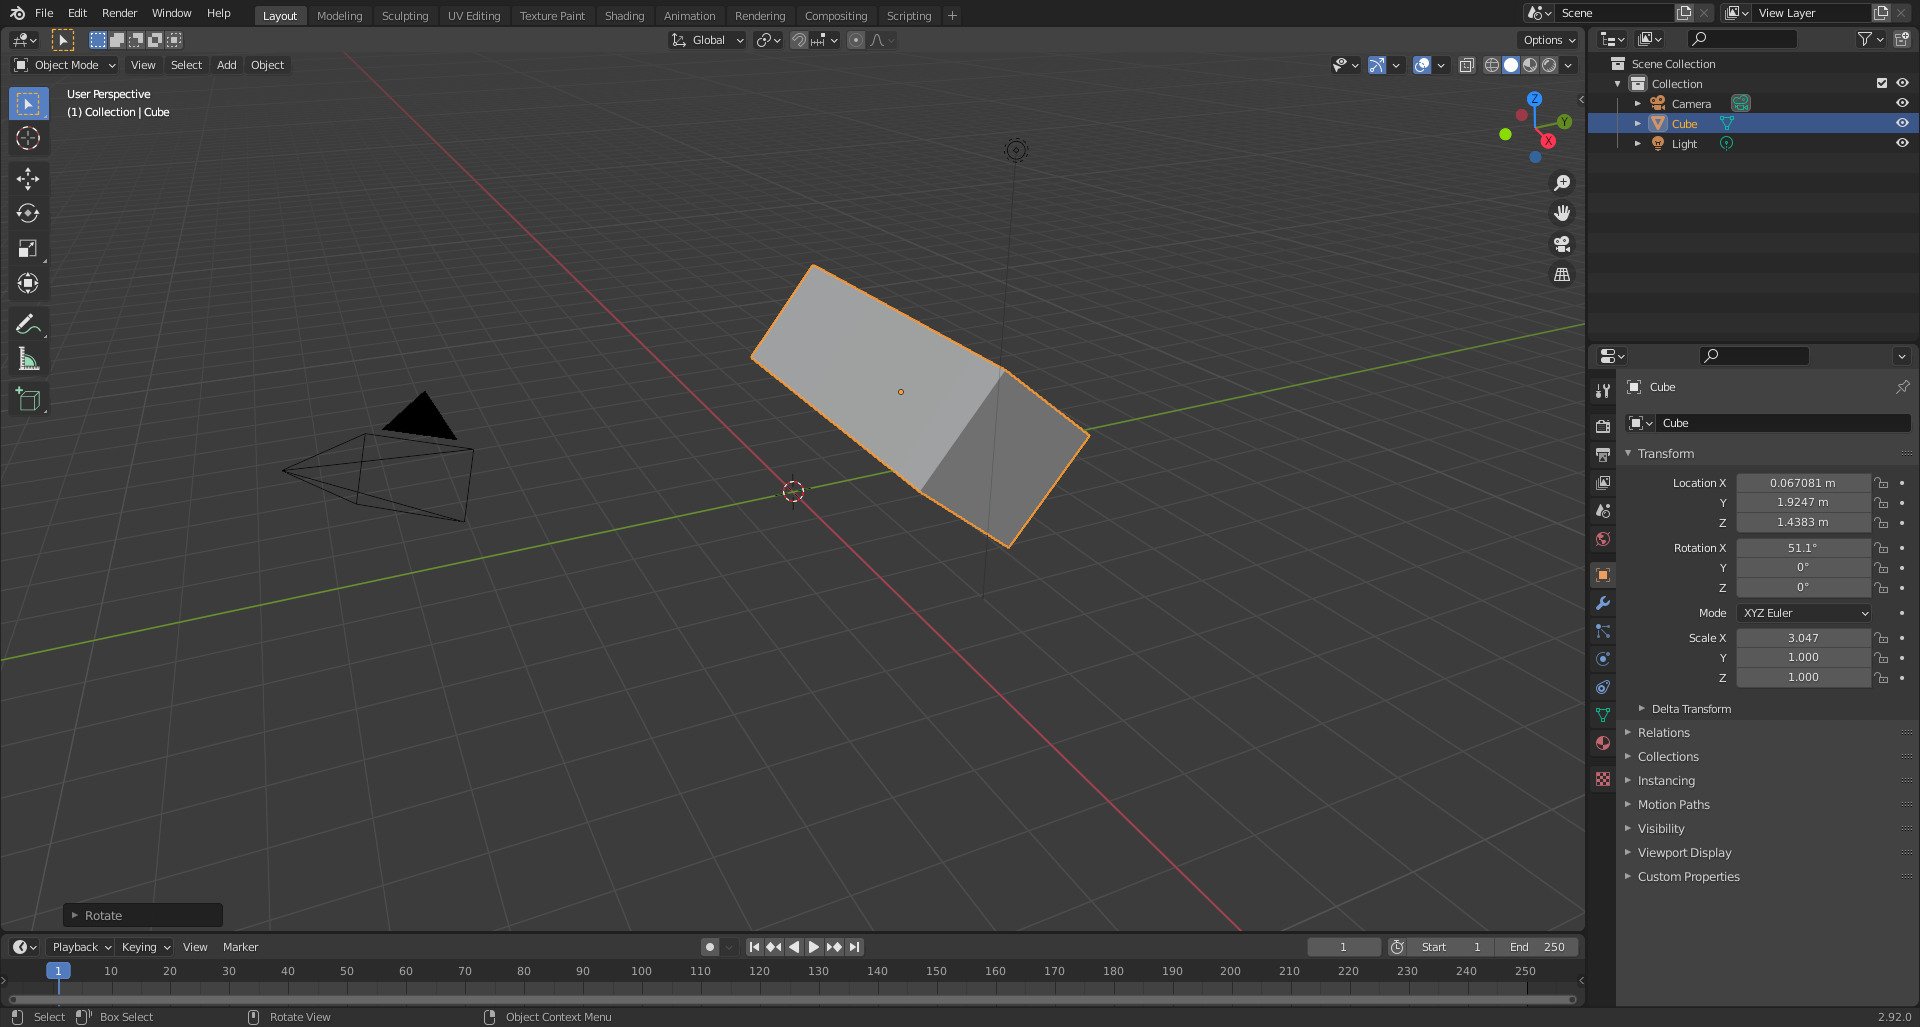
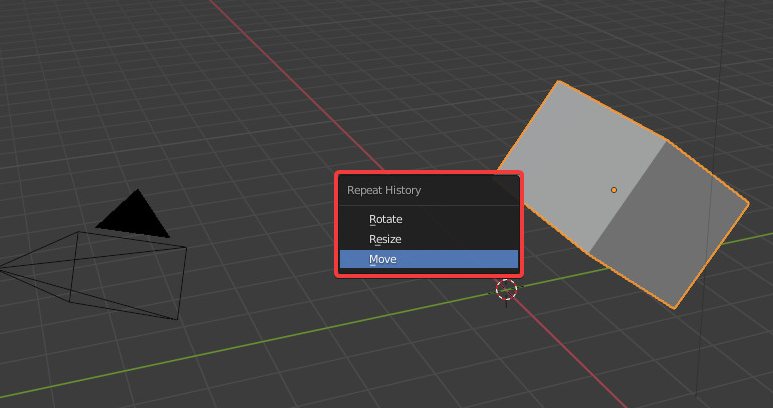
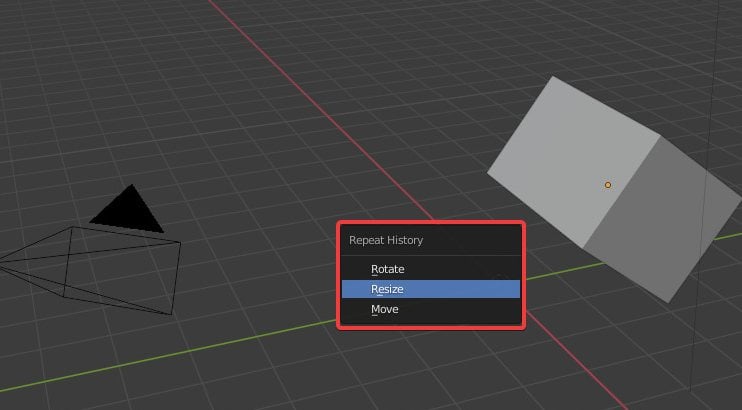
The Repeat History menu will now open showing you all the operations that you can repeat.
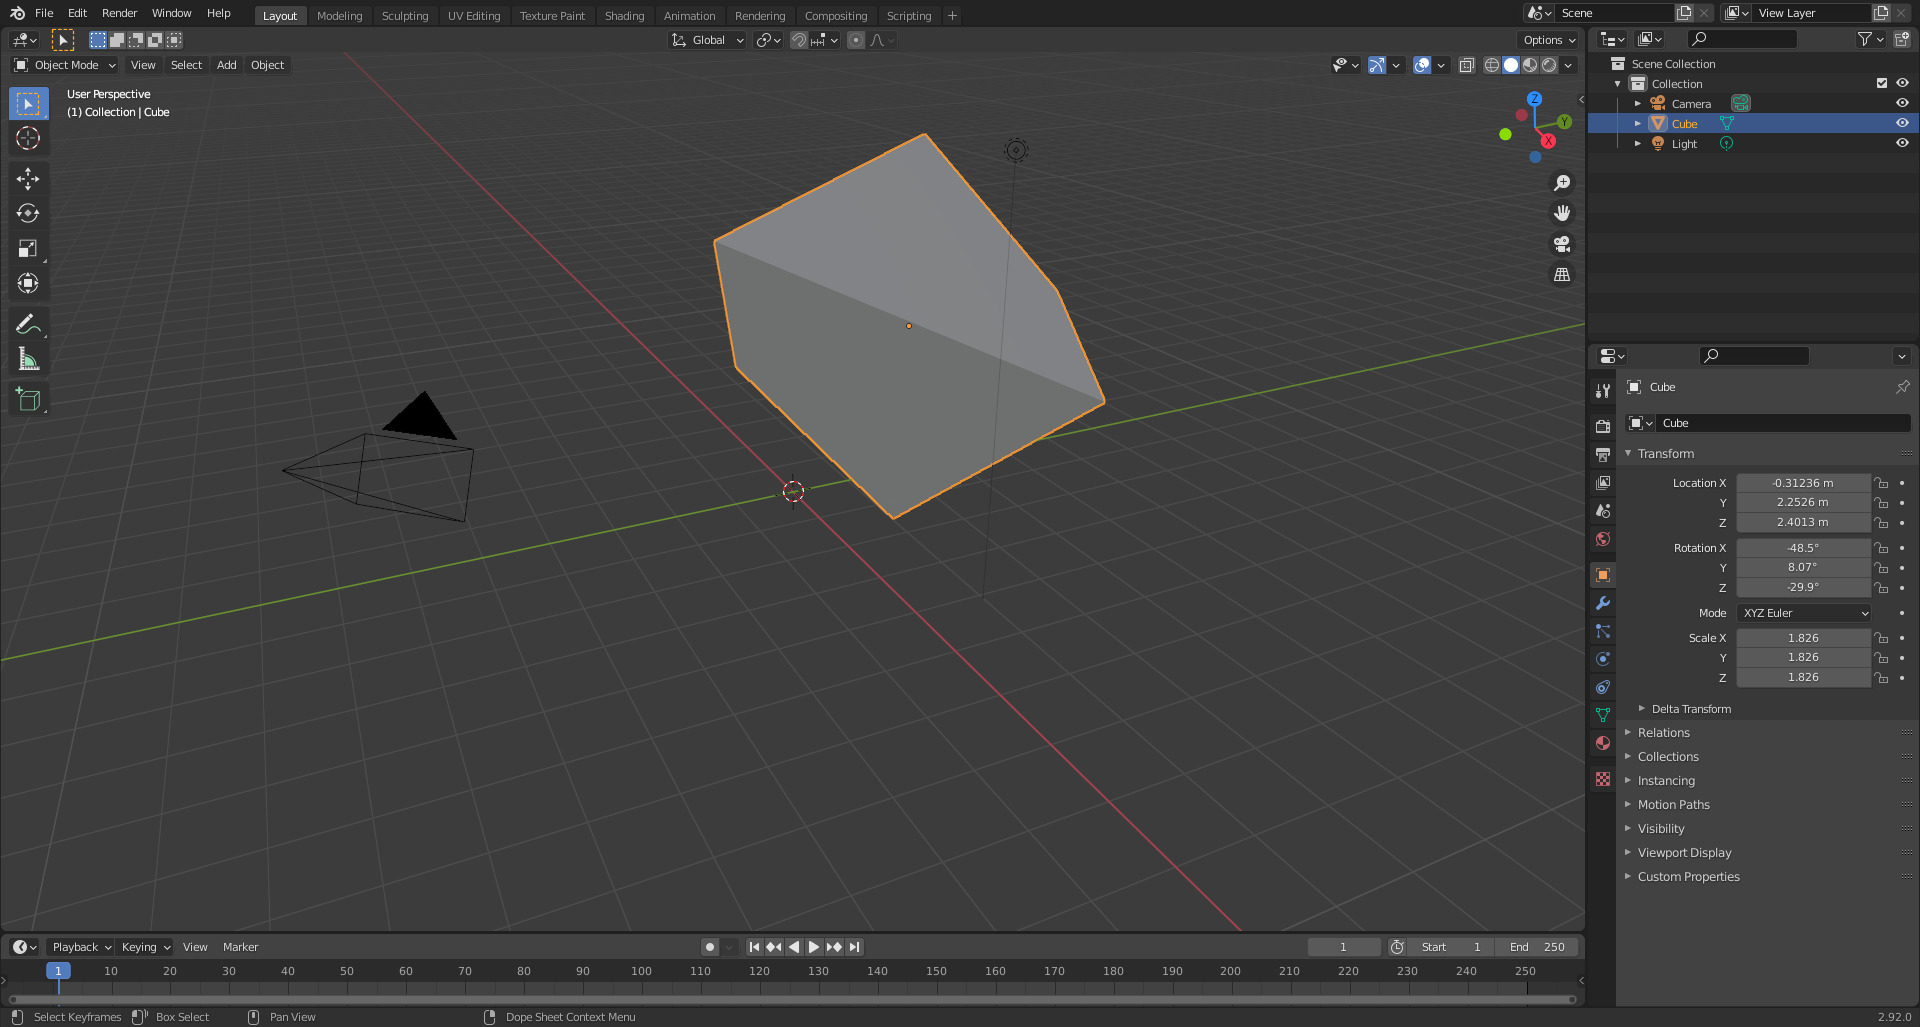
I’ll choose to repeat my scale operation.
Pick an operation that you want to repeat.
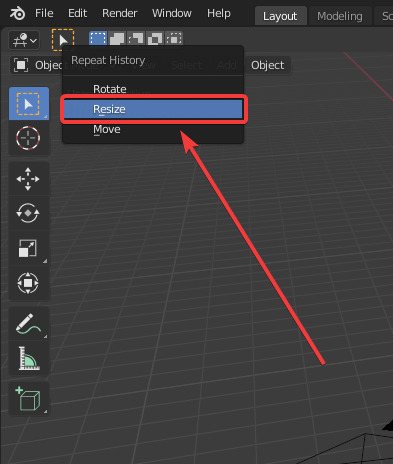
And the operation gets repeated.
Here’s that same exact process in video form.
Accessing Repeat History Using A Custom Keyboard Shortcut
As with Undo History, Repeat History doesn’t have a default keyboard shortcut.
But if you want to access it using a keyboard shortcut, Blender allows you to set a custom shortcut.
Let me show you how to accomplish that.
Start up Blender.

Do your operation(s).

Go to the top left of your Blender window and click on “Edit”.
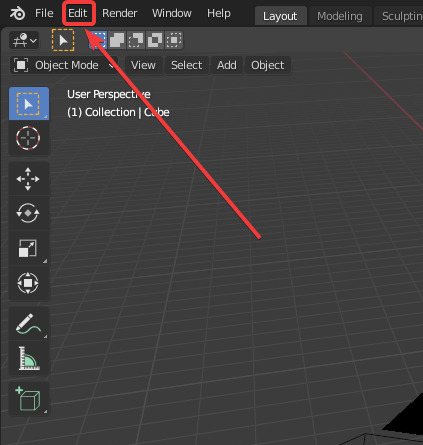
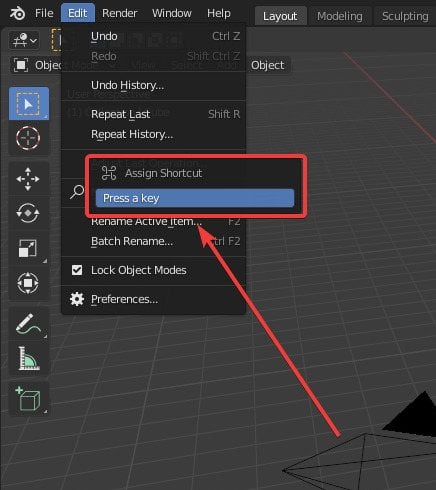
The edit menu will pop up. Just below “Repeat Last” in the edit menu, you’ll see the “Repeat History” option. Left click it.
A menu will pop up with three options. Click the middle “Assign Shortcut” option.

A new pop-up will show telling you to “Press a key”. You can assign your preferred keyboard shortcut now.
I personally don’t assign any keyboard shortcuts to Repeat History either, for the same reasons as Undo History.
There are so many shortcuts already, and it’s bound to clash with something else, which will add complications to your creative process.
More on the recommended way to access the Repeat History in the section right after this.
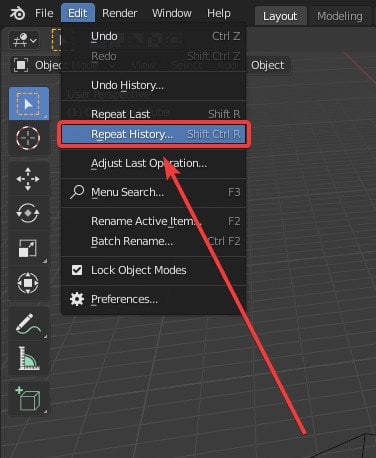
But for demonstration purposes, I’ll use Shift + Ctrl + R as my shortcut. Feel free to use whatever works best for you.
After pressing your preferred shortcut keys simultaneously, the shortcut input menu will close automatically, and your new shortcut will be shown beside the menu option.
You’ve now created your own custom keyboard shortcut! The Repeat History Menu will open wherever your cursor is currently located on the screen.
Here’s that same exact process in video form.
Accessing Repeat History Through The Quick Favorites Menu (Recommended)
This is my preferred method of accessing the Repeat History menu.
Like I mentioned previously, there are so many keyboard shortcuts to keep track of already that adding another one would just needlessly complicate things.
For the less frequently accessed functions like the Repeat History, I assign them to the Blender Quick Favorites menu instead.
Here’s how to do that.
Start up Blender.

Do your operation(s).

Go to the top left of your Blender window and click on “Edit”.
The edit menu will pop up. Just below “Repeat Last” in the edit menu, you’ll see the “Repeat History” option. Left click it.
A menu will pop up with three options. Click the topmost “Assign Shortcut” option.

Now it should be assigned to your Quick Favorites menu.
To access your Quick Favorites menu, press “Q” anywhere on the screen, and click on “Repeat History”.
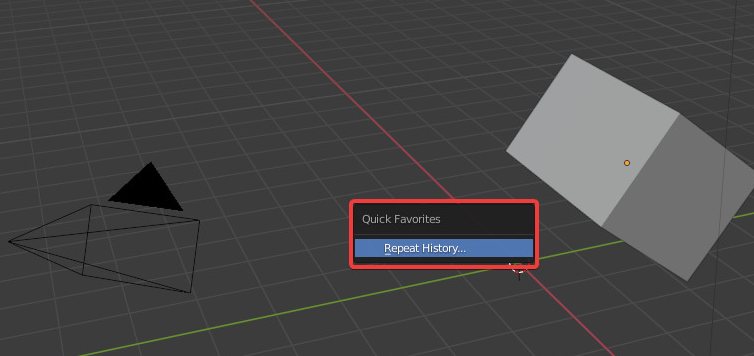
The Repeat History menu should now pop up.
Here’s that same exact process in video form.
What Is Stored In The History, And What Is Not?
Basically, there’s no hardline.
It’s hard to say exactly what will and won’t go to the history in all of Blender.
But there are some things that you can know for a fact won’t go into the history though.
For example, nothing you change on the Blender properties will go into the history.
None of the changes you make to the interface, and none of the changes to the viewport camera will go into the history, either.
And some settings in the N-panel and selecting options in the T-Panel don’t go into the history as well.
But for most purposes, everything you need to generally access in an undo history goes into Blender’s undo history.
Everything About Undo Steps In Blender
You can think of undo steps as the number of operations that can be stored in Blender’s undo/redo/repeat history.
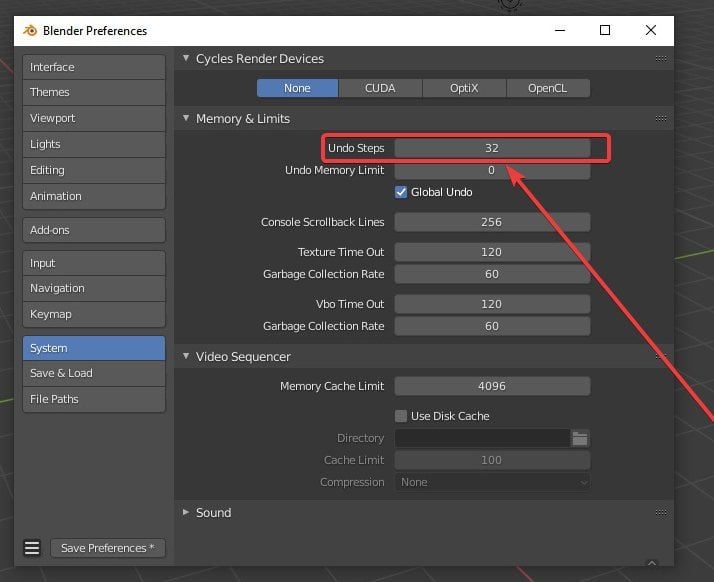
Blender, by default, stores 32 “undo” steps. Meaning you can access the undo history up to 32 steps back.

So if you try to undo 33 times, or press Ctrl + Z 33 times, you won’t be able to go back further than 32 steps.
But, you can easily change this to match your preferences in Blender. Let’s see how.
How To Change Undo Steps In Blender
Start up Blender.

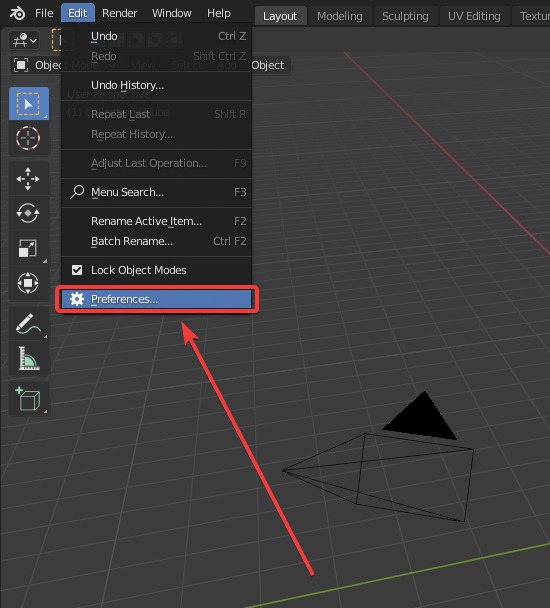
Go to the top left of your Blender window and click on “Edit”.

The edit menu will pop up. Go to the last option “Preferences” and click it.
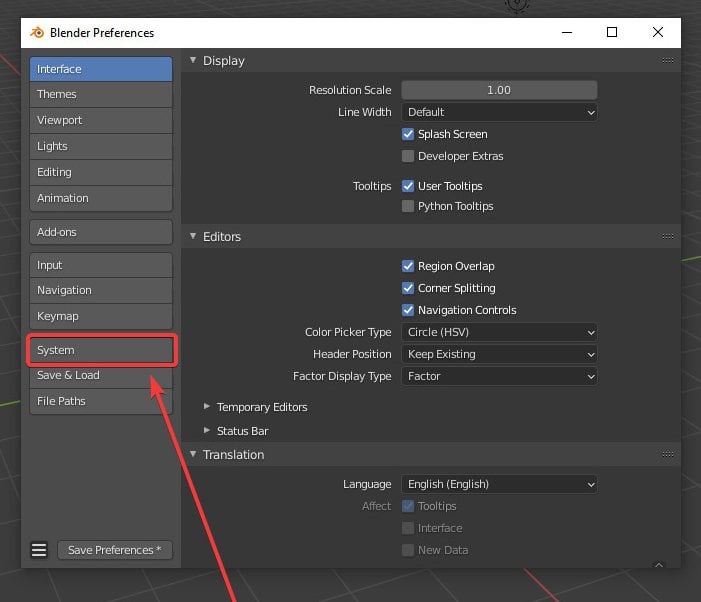
The preferences menu will pop up. Go down to where it says “System” and click it.
At the top of “Memory & Limits”, you’ll find the option to increase Blender’s undo steps.
You can set the undo step limit to be a max of 256 undo steps.
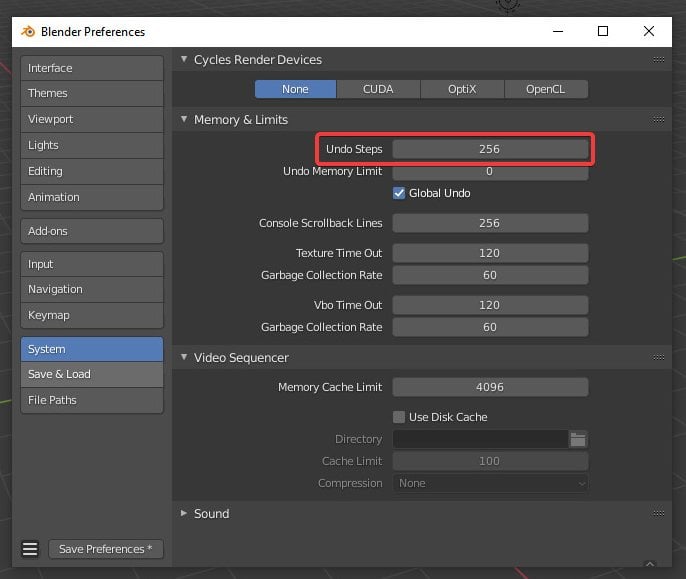
Blender’s undo function maxes out completely at 256 steps. If you try to go back 257 steps, it will only go up to the 256th step.
But you should probably keep separate saves to access modifications that many steps back.
Here’s that same process in video form.
Everything About Adjust Last Operation Function in Blender
Adjust Last Operation is a function in Blender that allows you to adjust certain aspects of some operations that you do in Blender.
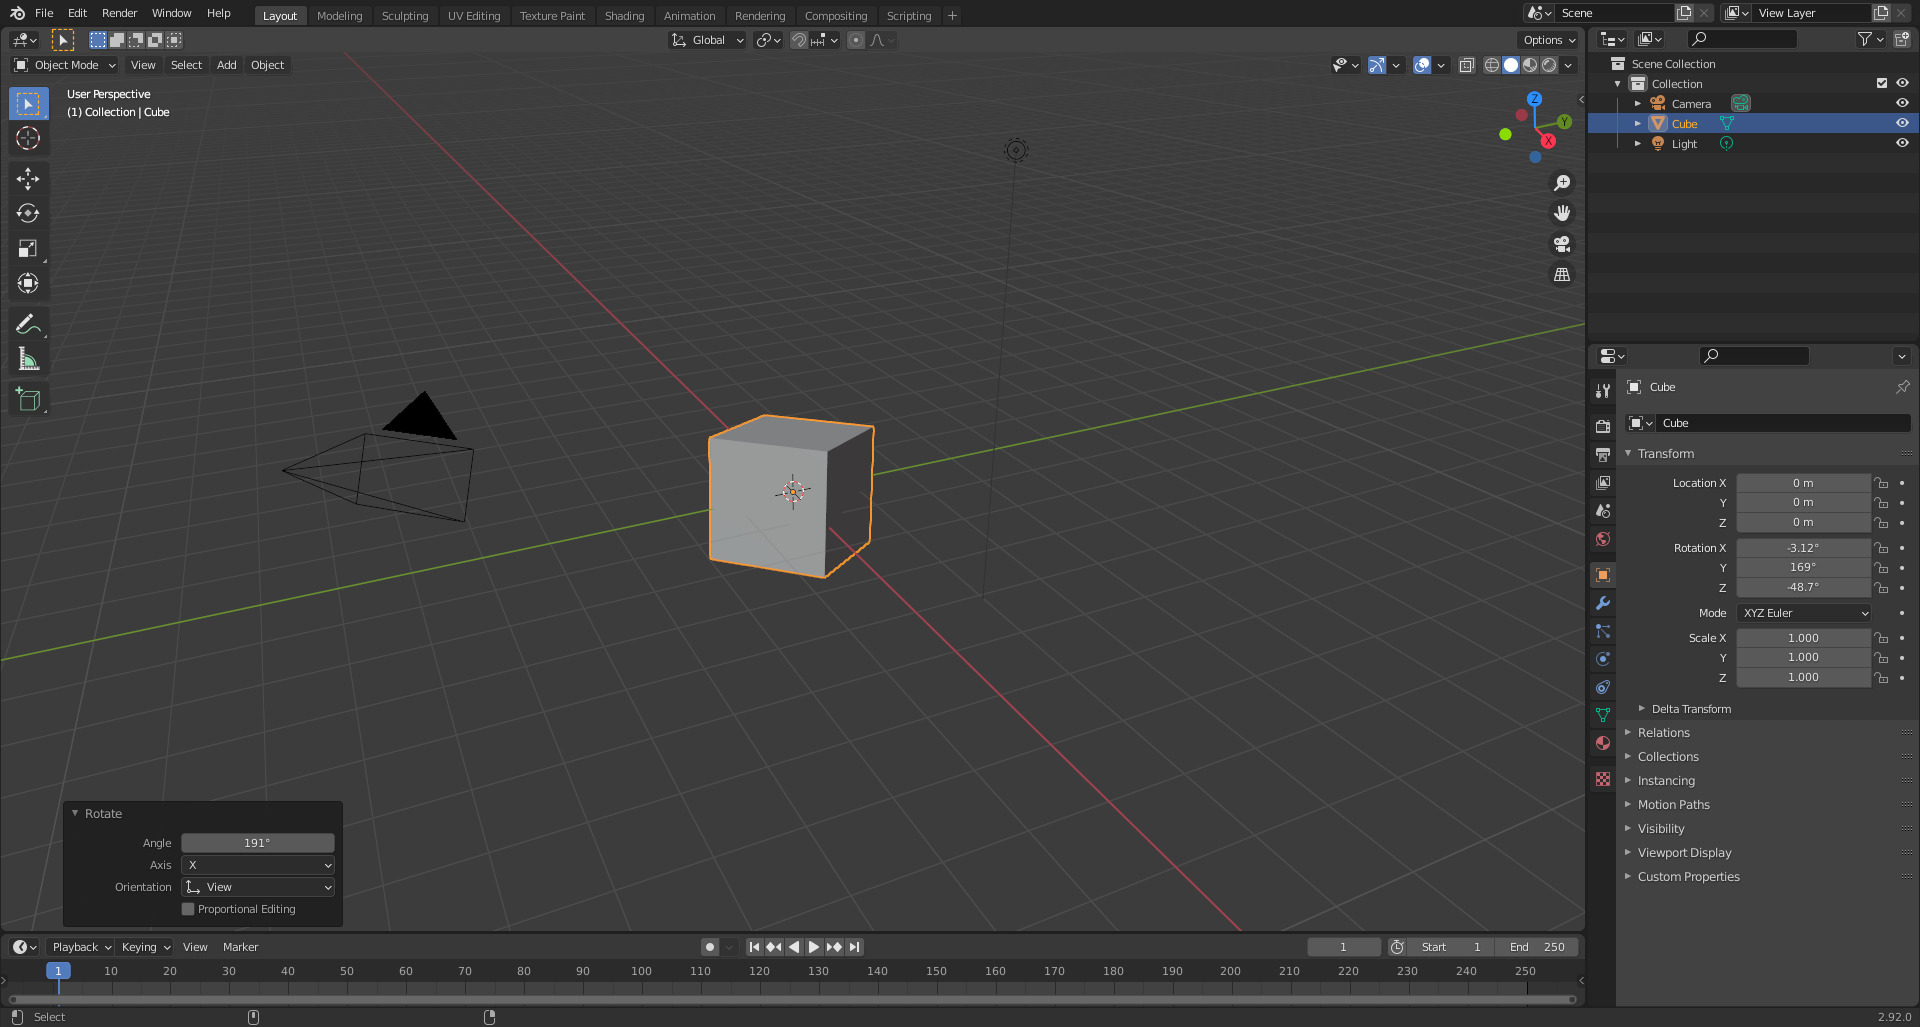
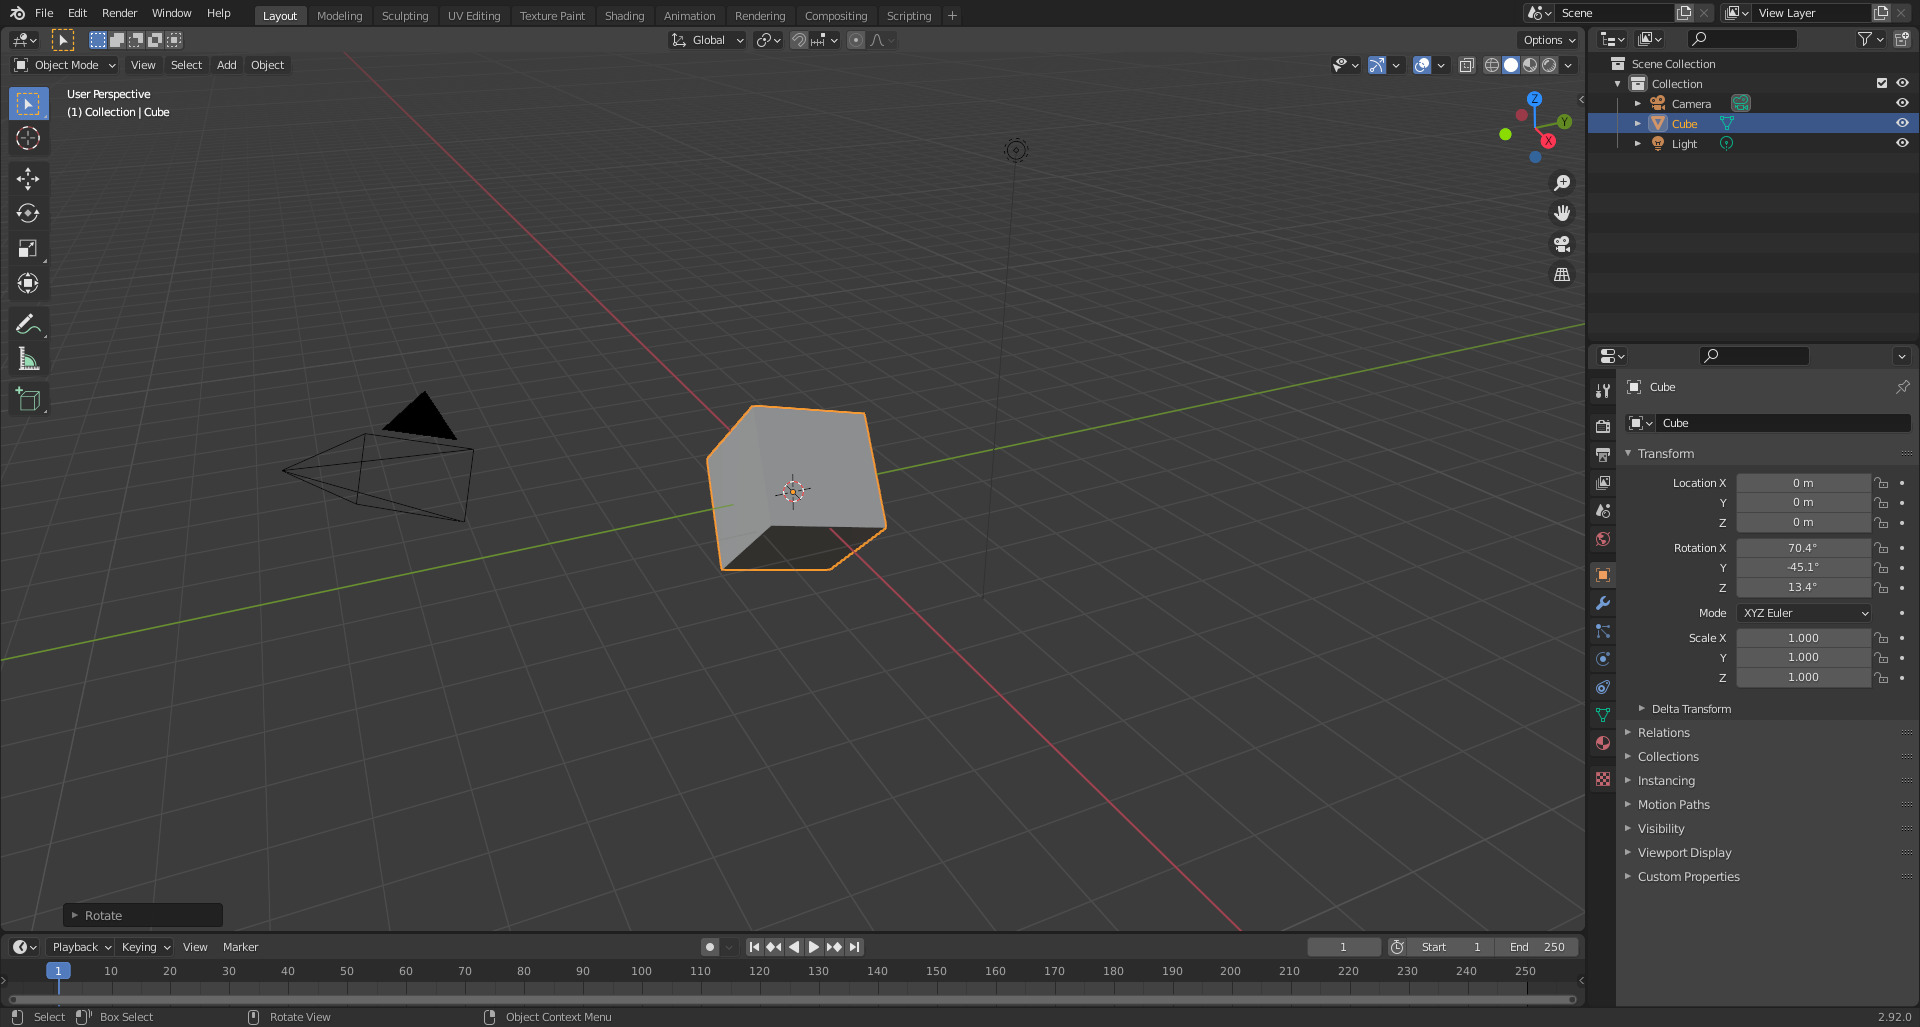
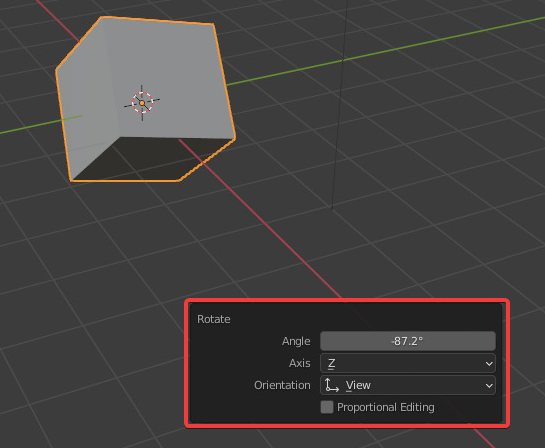
For example, if you were to rotate the default cube in all axis accidentally, you can change that operation through the Adjust Last Operation menu to what you want without having to undo.
It’s a function that I don’t personally use too often but can come in handy from time to time, so it’s useful to keep it in mind.
Adjust Last Operation is also only useful for any operations you do in the 3D viewport.
Some options like creating a custom image file, for example, allow you to undo and to delete the whole operation, but it does not allow you to go back and change properties like the color or resolution by using Adjust Last Operation.
It doesn’t work for any property changes or any other operations you might do outside of the 3D viewport, either.
It’s also important to keep in mind that you can’t adjust anything after you’ve undone something either.
You can only use Adjust Last Operation right after you do an operation in the viewport. And that’s it.
Let’s see how you can access it.
Accessing Adjust Last Operation Using The Menu
Start up Blender.

Do your operation(s).
Go to the top left of your Blender window and click on “Edit”.
The edit menu will pop up. Just below “Repeat History” in the edit menu, you’ll see the “Adjust Last Operation” option. Click it.
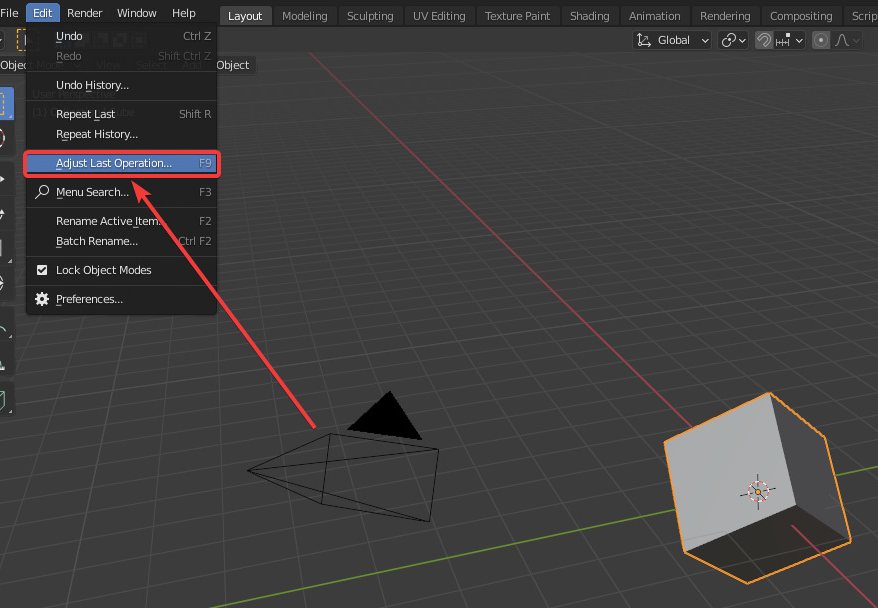
The Adjust Last Operation menu will pop up where your mouse is.

You can also simply access it by clicking on the minimized menu in the lower left corner.
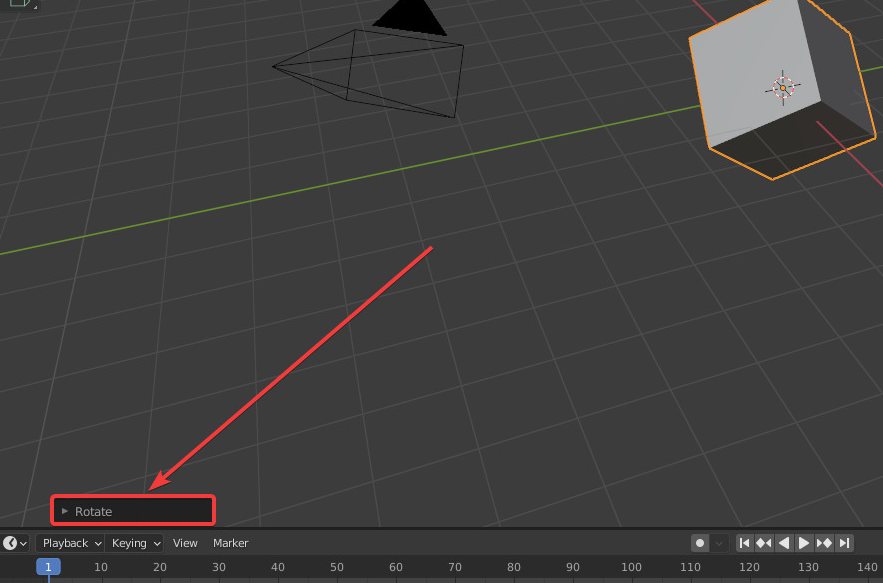
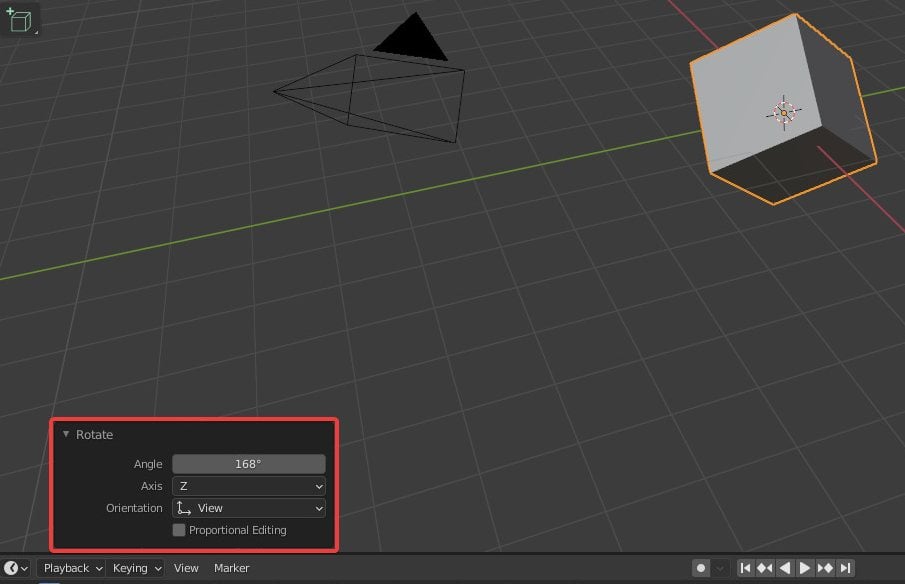
There, you can adjust what property you like.
Something to keep in mind with the menu in the corner is that it will disappear the moment you select, deselect, or do anything other than modify the properties within it.
But you can still access Adjust Last Operation through the Edit menu.
Here’s that same process in video form.
Accessing Adjust Last Operation Using The Keyboard Shortcut (Recommended)
Like with pretty much everything else in Blender, it’s simply more efficient to use the keyboard shortcut to access Adjust Last Operation.
Let me show you how to accomplish that.
Start up Blender.
Do your operation(s).
Now you can bring up the Adjust Last Operation menu by using the shortcut F9.
Here’s that same process in video form.
Everything About Undo, Redo, Repeat Last, and Adjust Last Operation Context In Blender
Undo, Redo, Repeat, and Adjust Last Operation is context-sensitive, but also kind of isn’t.
Meaning that if you do an operation while you’re in Object Mode, switch to Edit Mode, and then try to undo, redo, etc, you won’t undo whatever operation you did in Object Mode while in Edit Mode.
What will happen is, you will switch from Edit Mode to Object Mode, and then, you will undo, redo etc your operation.
Blender counts the switching of object interaction modes, changing of property values, interaction with the graph editor, shader editor, etc, as undoable operations.
So whenever you try to undo something, Blender will always undo the most recent operations in the current context before switching to whatever previous context you were in to undo there.
In Summary
There are a lot of ways you can undo and modify an operation after you’ve done it in Blender.
Play around with your usual undo/redo and the interesting other operation modification methods shown here to find out what fits your style!
Some of the “Recommended” methods in this article aren’t meant to be taken as gospel either.
I’ve tried my best to stick to conventions that most people—including me—use, but that doesn’t mean that you have to stick to them either.
Customize Blender however works best for you, and I hope you found this article informative!
A table of all the keyboard shortcuts shown in this article
| Undo | Ctrl + Z |
|---|---|
| Redo | Shift + Ctrl + Z |
| Repeat | Shift + R |
| Undo History | (Custom) Shift + Ctrl + H |
| Repeat History | (Custom) Shift + Ctrl + R |
| Adjust Last Operation | F9 |
Missing anything or have questions? Let us know in the comments or the forum.

")
")
 for Blender in 2023")

3 Comments
13 July, 2021
Hi, I am just beginning to learn blender. Yesterday, I rendered my first animation, which took me 6 hours for that 4 seconds clip on a 16 GB, 512 GB SSD, i7 10th Gen, Nvidia MX330 Lenovo IdeaPad Flex 5 laptop. I couldn’t get the 5th & 6th seconds rendered due to battery issues.
How do I boost up my render time significantly without adding up something physically?
16 July, 2021
Hey Divyam,
Here’s a great beginner’s article to speeding up your renders:
https://www.cgdirector.com/how-to-render-faster/
Hope that helps.
Cheers,
Alex
16 July, 2021
Thank you for sharing!