 by
by  In BIOS")
Wondering how to enable TPM 2.0 In BIOS? You’ve come to the right place! Today, I’ll walk you through all you need to know in order to enable TPM on a compatible motherboard.
I’ll also answer a few TPM-related questions before I wrap up this article, but you can skip around as you please with the Table of Contents below. Let’s get into it!
TABLE OF CONTENTS
A Brief on TPM (Trusted Platform Module) and TPM 2.0
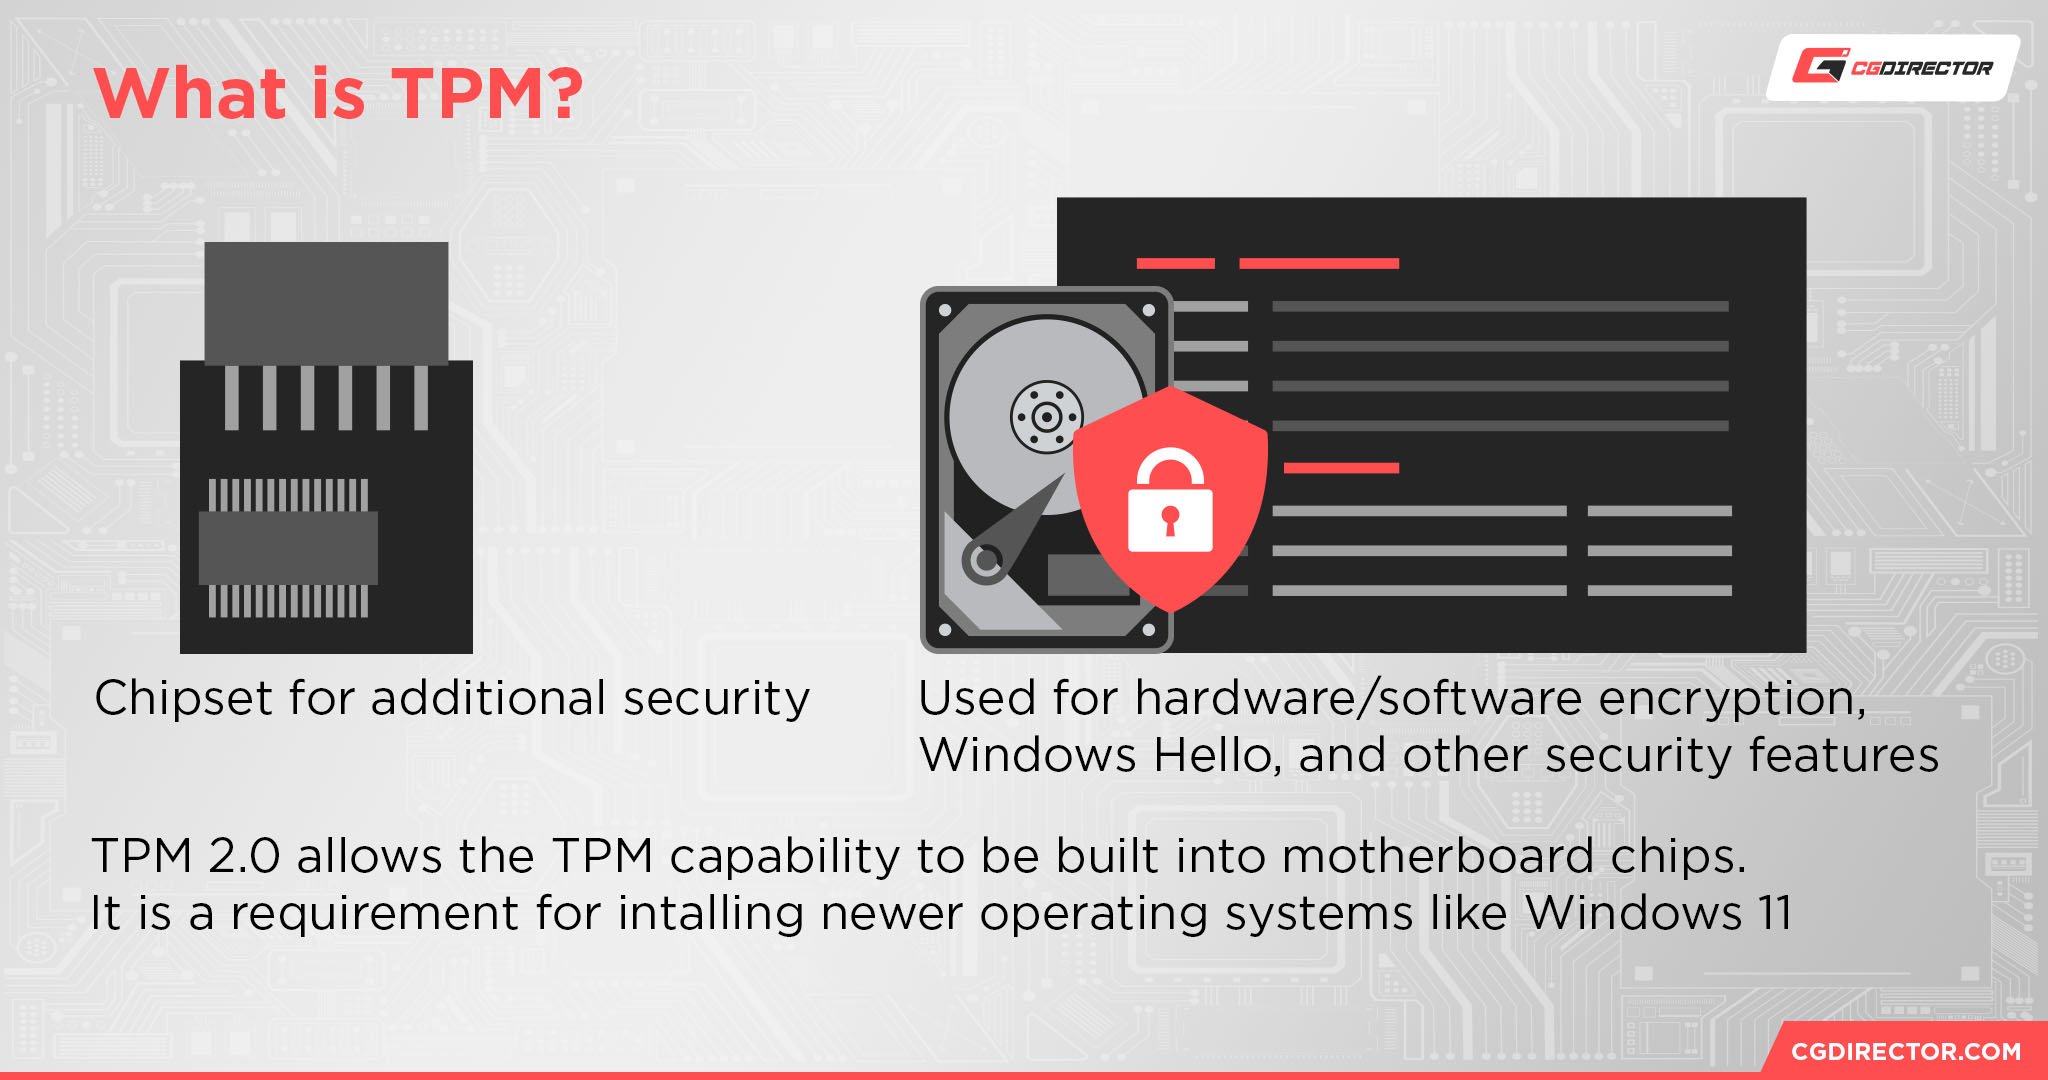
First, a TPM is a Trusted Platform Module. This is a dedicated piece of hardware that is either already built into your motherboard, or is added through a dedicated onboard TPM header for installing the device.
The function of a TPM is to serve as an added layer of security on your PC, in particular by serving as a cryptographic key for your encrypted storage drives.
A TPM helps keep your system more secure, and they’re actually commonly-used in software for encryption functionality, not just encrypting storage drives.
While TPMs and TPM headers have existed for a long while, TPMs didn’t surge in popularity until TPM 2.0, thanks to Windows 11.
The most likely reason you’re concerned about TPM is if you’re trying to install Windows 11 or a newer Windows OS, since TPM 2.0 is now a requirement for installing modern Windows operating systems. (There are potential methods of TPM subversion too, if you really need them— I’ll discuss that in the FAQ later.)
But even if your motherboard has a TPM 2.0 module or you’ve installed one, you still need to enable it in your BIOS! Let’s talk about how to do that.
How To Enable TPM 2.0 In BIOS
For the below guide, I’ll be using screenshots from an ASRock BIOS.
The specific names of options in your BIOS may be different if yours is not an ASRock BIOS, however, they should still be named and organized similarly enough for this guide to be helpful. If you need more hands-on assistance, though, feel free to ask in the comments!
So, to enable TPM, you’ll want to boot into your BIOS. The key for doing this from your PC’s launch should be shown on the splash screen, and will most likely be F2 or Delete.
Alex has a dedicated How To Enter BIOS Guide for MSI, ASUS, Gigabyte, and ASRock boards if you aren’t sure how to get into your BIOS.
Once you’re in your BIOS, you’ll most likely be spat onto a main screen like the one pictured below.
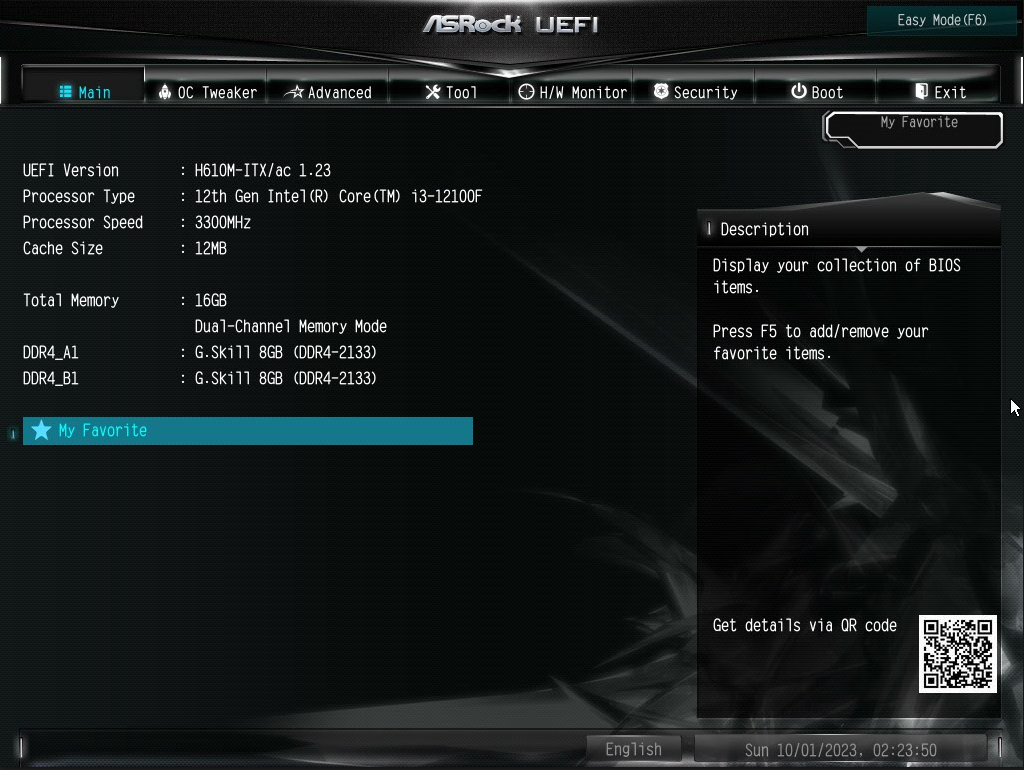
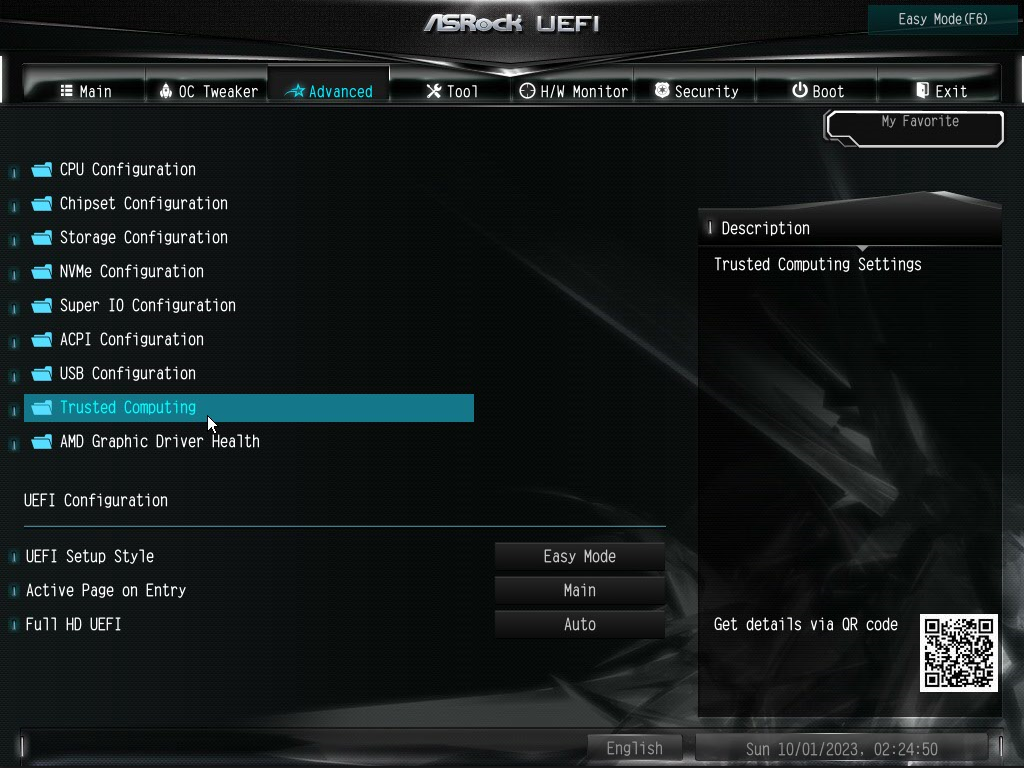
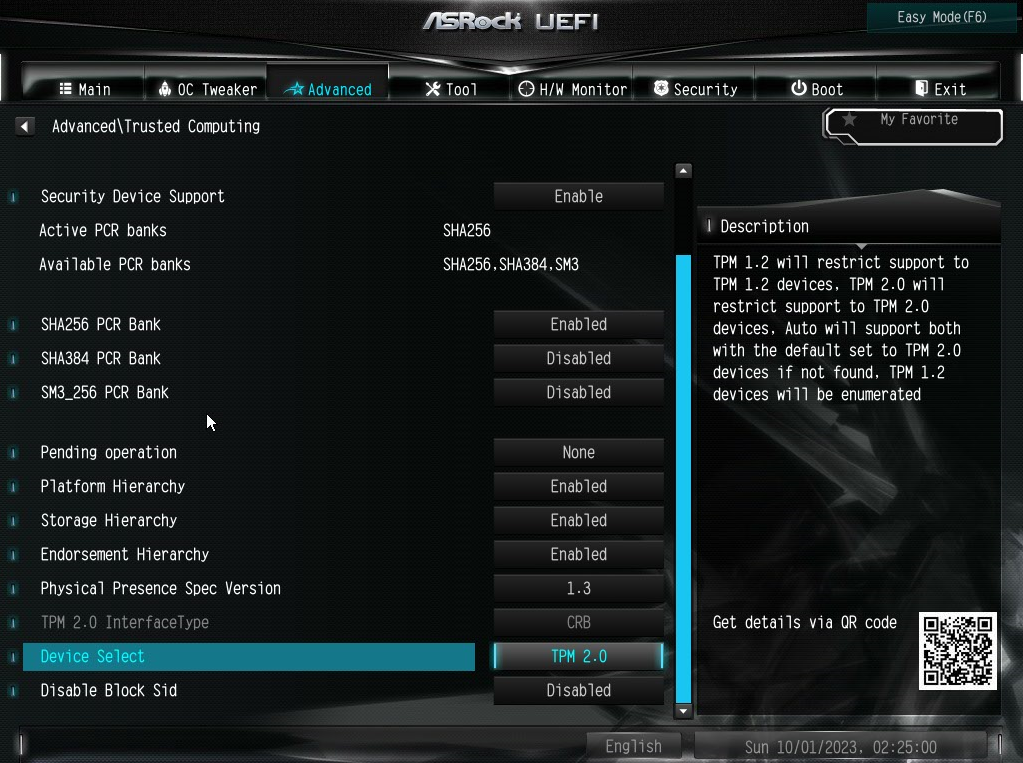
From here, go to your Advanced Configuration menu and look for a “Trusted Computing” section. This is where your TPM settings should be located.
Look for “Security Device Support” or a similarly-named setting. It may also just be outright named “TPM Support”. You’ll want to enable this setting to use a TPM properly.
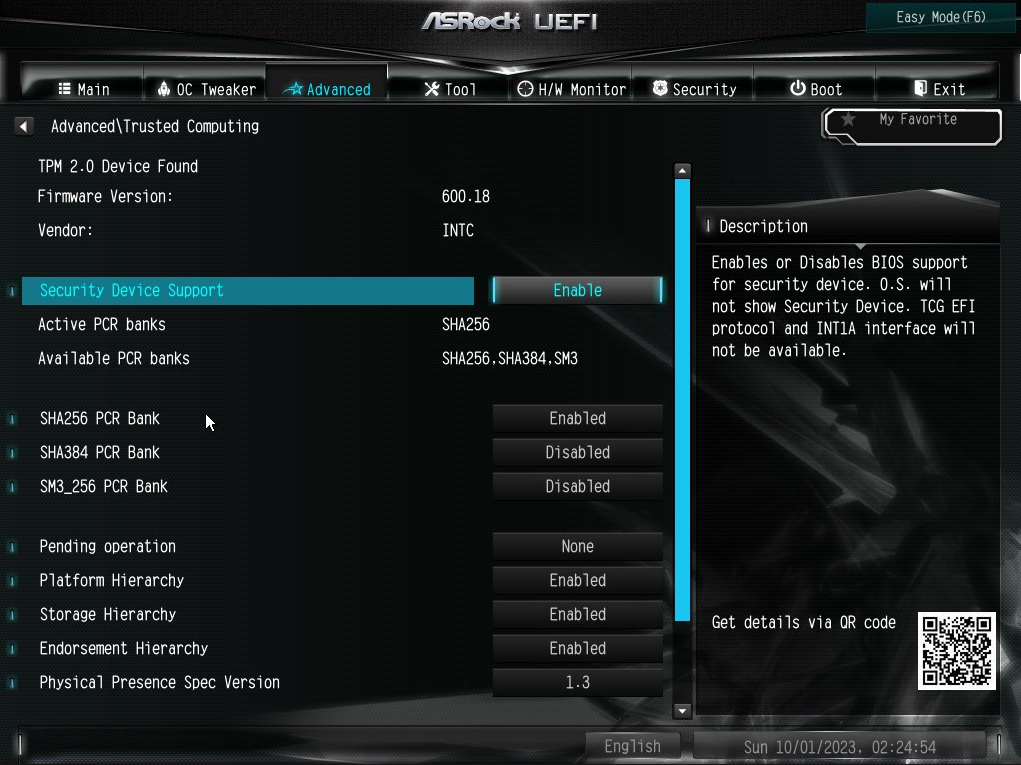
Next, look for a “Device Select” option. Depending on your board and installed configuration, you’ll be able to choose between TPM 1.2, TPM 2.0, or no TPM.
Select TPM 2.0, as pictured below, if you’re needing to install Windows 11 or newer.
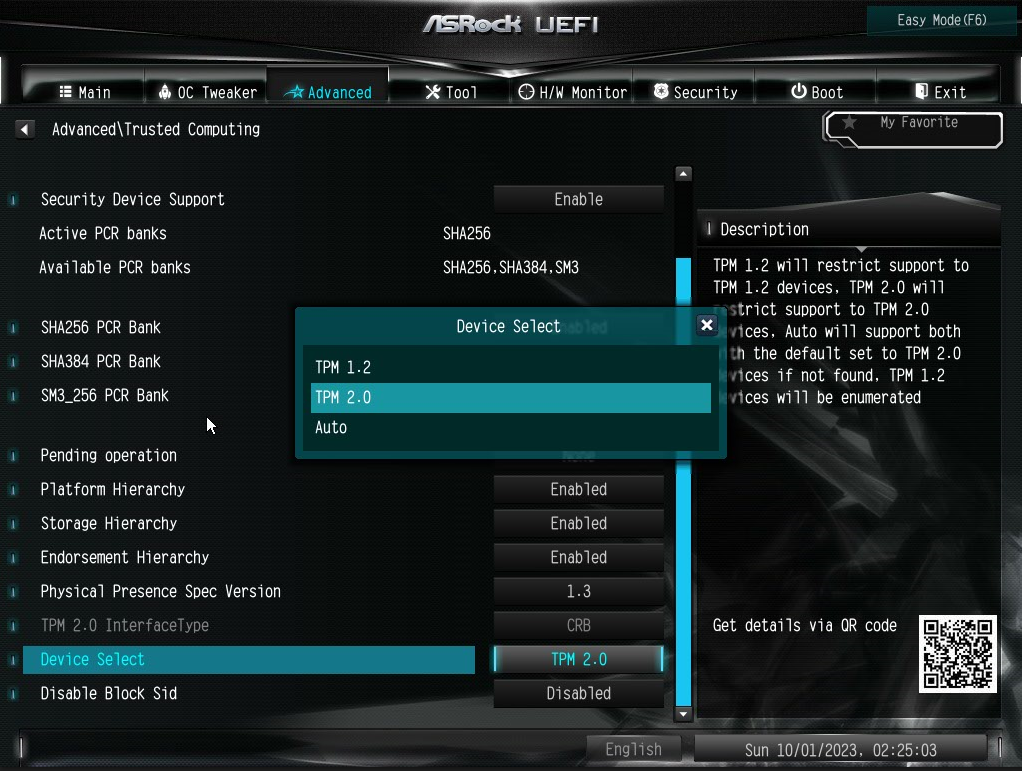
And now your TPM device should be fully enabled!
Before you leave your BIOS, though, you may also want to enable Secure Boot while you’re there. Secure Boot is required for Windows 11 alongside TPM 2.0, so if that’s why you’re following this guide, be sure to head to your “Boot” menu and make sure Secure Boot is enabled.
Now, all you have to do is hit “Save and Exit” in your BIOS and you should be done!
FAQ
Can You Install Windows 11 Without TPM?
Yes, you can! Tom’s Hardware has a lengthy, dedicated guide to installing Windows 11 without TPM which I’ll go ahead and link here for your convenience.
Installing Windows 11 while working around this hardware requirement does require some extra tweaking and headaches, but overall you shouldn’t have any issues using Windows 11 installed in this manner.
As long as you have an 8GB Flash Drive on standby, you should be ready to go!
Should You Install Windows 11 Without TPM?
Microsoft won’t like it and you will technically be more vulnerable to attack without TPM than with it, yes.
However, the majority of PCs in existence were manufactured before TPM 2.0 was released and many of those same PCs don’t have a TPM header for adding the functionality.
If you want Windows 11’s features on your current PC and the only way to get that is to subvert the TPM requirement, I think you should do it.
Realistically you’re not taking any bigger of a risk than anyone else on a pre-Windows 11 operating system is, and that’s still most of the market according to reports as recent as October 2023.
Over to You
And that’s all, for now!
I hope this article clarified how to enable TPM 2.0 in your BIOS and helped you properly prepare your system for…most likely a Windows 11 install or upgrade.
Alternatively, if you don’t have a TPM module, I hope this article helped direct you toward the right course of action for your PC, whether that’s upgrading to Windows 11 or just working around the TPM requirement.
In any case, let me and the rest of the CGDirector Team know in the comments below if you need more help with this or other PC hardware topics!
You can also try our dedicated Forum to engage with us and our wider Community of Experts and Enthusiasts, especially if you prefer longer discussions.
Until then or until next time, though, happy computing!


0 Comments