 by
by ![How To Reset An MSI BIOS? [All Possible Ways]](https://www.cgdirector.com/wp-content/uploads/media/2022/09/How-To-Reset-MSI-BIOS-All-Possible-Ways-Twitter-1200x675.jpg "How To Reset An MSI BIOS? [All Possible Ways]")
TABLE OF CONTENTS
Your PC’s BIOS contains a myriad of different settings, all of which are designed to help you make the most out of your system and fine-tune its performance to your liking.
If something happens to go awry, however, you should definitely know how to restore said settings to their default values.
That’s what we’ll cover down below: ways in which you can reset the BIOS, along with a few very specific details you ought to keep in mind before embarking on this process.
We’ll focus on MSI motherboards in particular, but these tips and methods are universal in nature and are, therefore, still relevant even if you own a motherboard from a different manufacturer.
How To Reset Your BIOS?
Using the Clear CMOS Button
Most high-end motherboards have a dedicated button that makes resetting your BIOS a breeze.
This button is either located along the bottom edge of the motherboard, close to the CMOS battery, or around the rear I/O ports (adjacent to the USB connections), as shown in the image below.
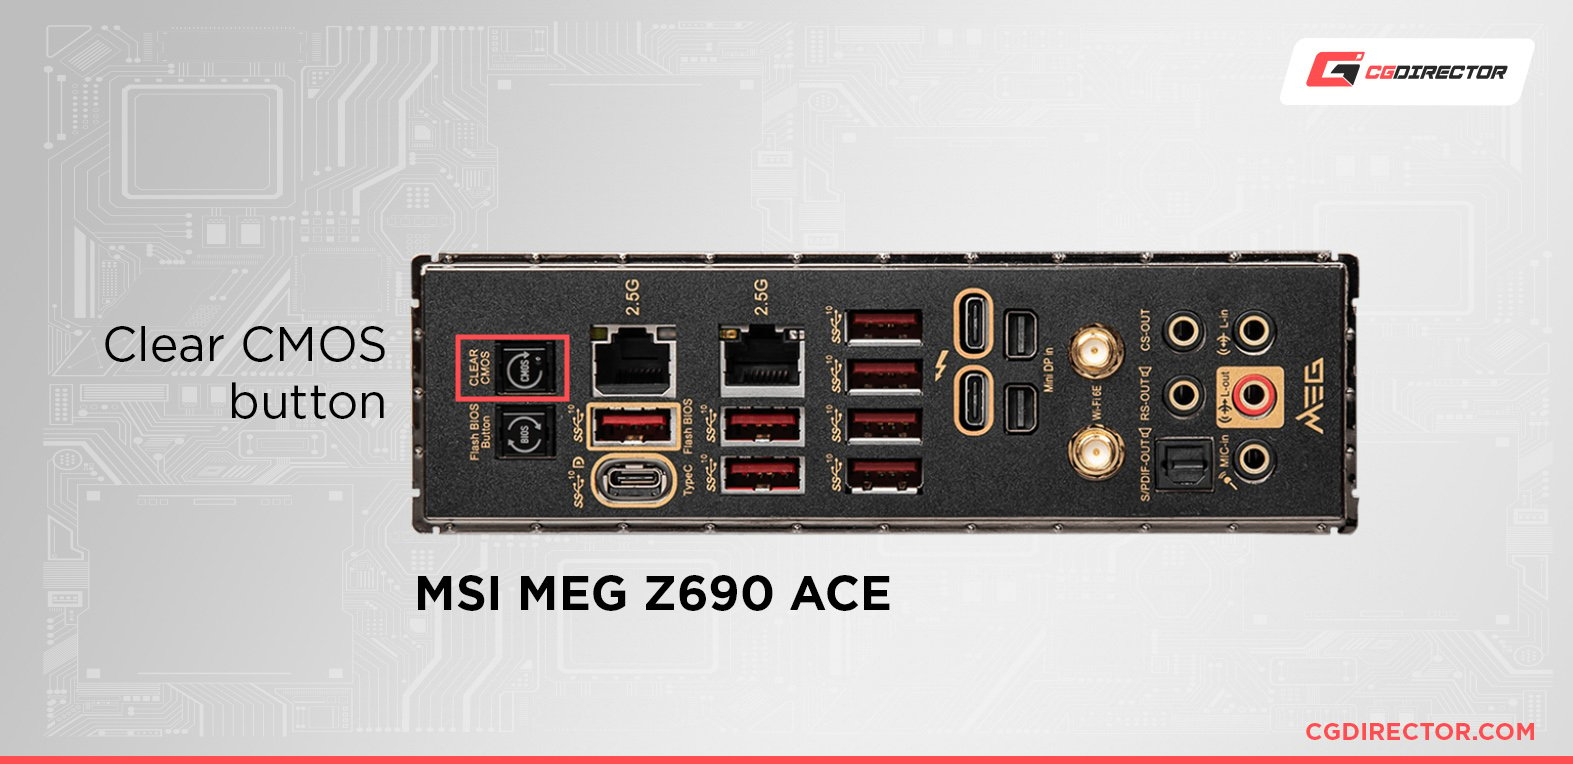
Simply press the button to reset your BIOS settings to their factory values.
Note: Many MSI motherboards have two buttons on the rear I/O: the BIOS flashback button and the Clear CMOS button. Make sure you do not accidentally press the BIOS flashback button.
From the BIOS Itself
If your system successfully POSTs, you can simply enter the BIOS and revert all settings to their default values. To do so, follow these steps:
- Enter your BIOS by pressing either DEL or F2, depending on its manufacturer. If you don’t have a lot of experience, make sure to check out the following article that explains how to enter the BIOS.
- The BIOS options should appear in either UEFI or Legacy modes. Rest easy because the process is the same for both.
- Navigate to the Save & Exit tab using the arrow keys or your mouse.
- Next, select the option “Restore (Factory) Defaults” and hit Yes when the dialog box pops up.
If your motherboard does not possess the Clear CMOS button – or you cannot enter the BIOS for whatever reason – you’ll have to open your system and perform a very simple (albeit somewhat intimidating) procedure.
Before you go any further, make sure your system is unplugged, and the PSU is switched to “off”.
Reseating the CMOS battery
One of the easiest ways to reset your BIOS (despite it requiring a bit of “manual labor”) is to simply reseat the CMOS battery. It is most often located near the bottom edge of your motherboard – usually below the PCIe slots.
Press on the lock (red arrow in image below) to release the CMOS battery, wait around 30 seconds and then insert it again until you hear a faint click which indicates the battery has locked back in place.
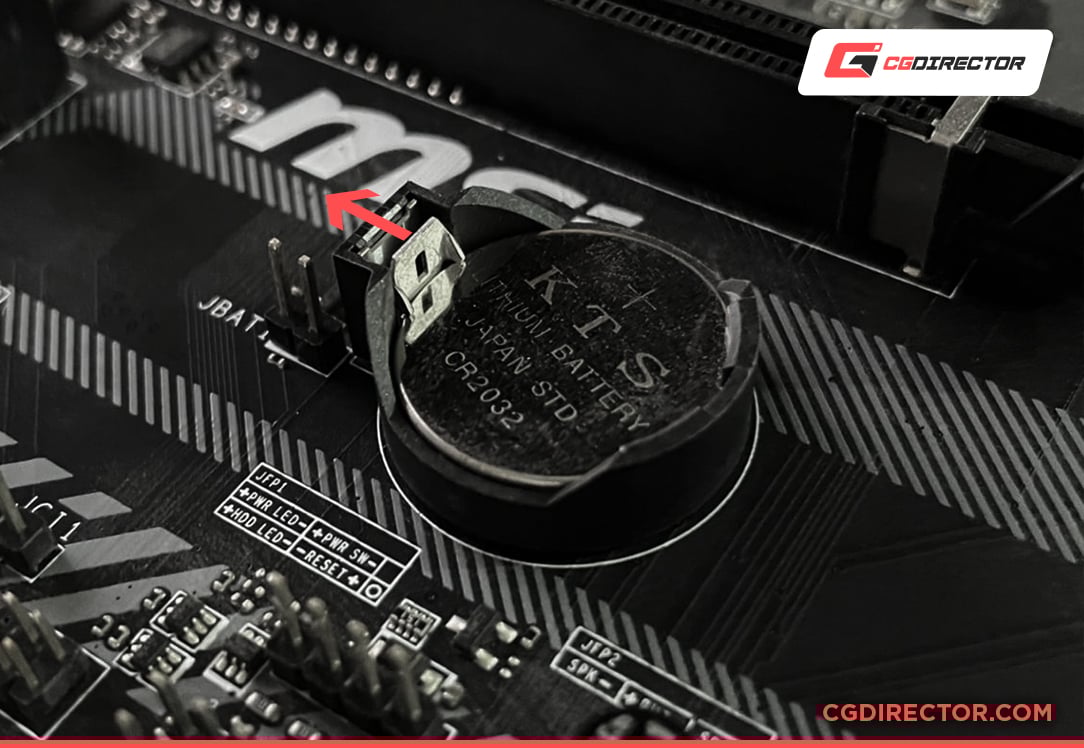
Because the BIOS needs power at all times to retain custom BIOS settings, after removing the Battery, it will no longer be able to do so. The BIOS will therefore be reset to default values after the battery is back in place and you turn your Computer on.
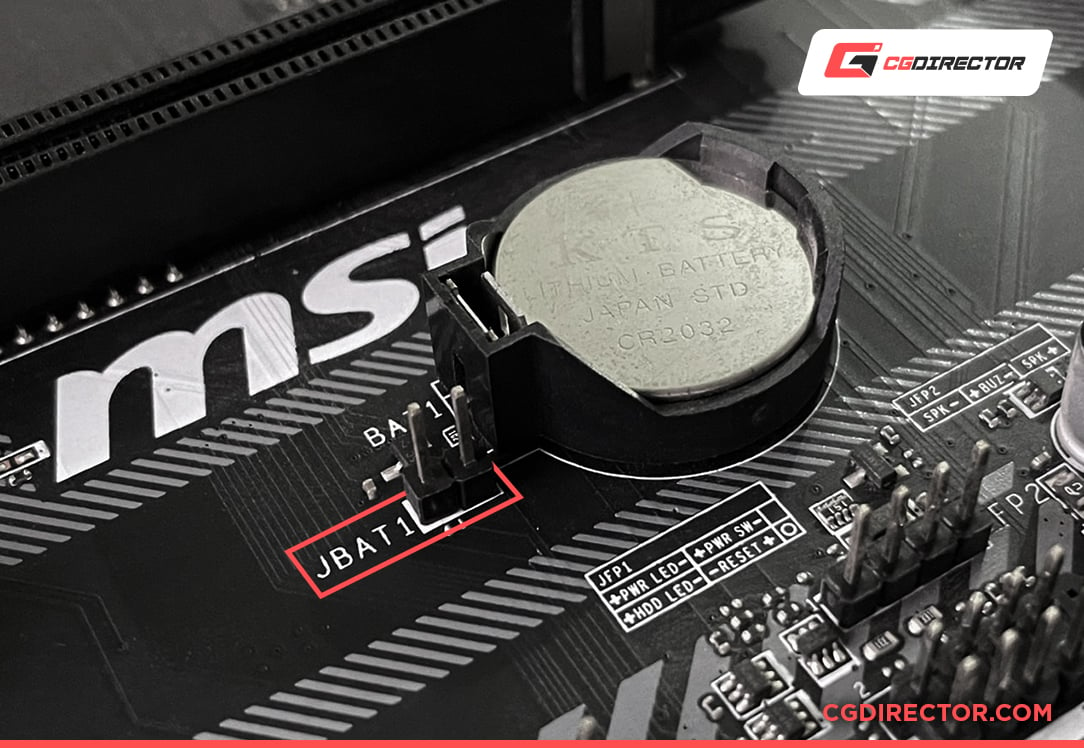
Clearing the CMOS using a Jumper
How To Short a 3 Pin Jumper
The CMOS jumper on your motherboard is usually located towards the bottom, adjacent to the CMOS battery.
It should look like a three-pin header with a label that reads JBAT1, JP1, CLEAR_CMOS, or CLR_CMOS.
By default, the jumper should be on pins 1-2. To perform this simple procedure, simply move the jumper to pins 2-3, wait a few seconds, and then move it back to its default state.
How To Short a 2 Pin Jumper?
A motherboard with a two-pin jumper does not feature jumper caps; all you need is a screwdriver that is electrically conductive.
Simply use a metal screwdriver’s head to touch both pins for a second or two. Doing so will short the jumper pins and clear your CMOS, thus returning your BIOS to its default values.
How To Short an RTCRST Jumper
If you’re rocking an older motherboard, it may possess a Real Time Clock Reset (RTCRST) jumper. This jumper can also be used to reset the BIOS.
To do so, locate the password connector (PSWD) and RTCRST pins on your motherboard. Often, these will be located below all the PCIe slots or around the PSU power connectors.
Next, remove the PSWD jumper and put it on the RTCRST pins for 5-10 seconds. Then, put the PSWD jumper back in its original place and press the power button. This will reset your BIOS to its original state.
How To Short the Jumper(s) On MSI nForce2 Motherboard
Older MSI motherboards with an nForce2 chipset (released in the early 2000s) have a Front Side Bus (FSB) jumper in addition to the regular one; if you happen to have overclocked your FSB frequencies, shorting the regular jumper will not reset your BIOS.
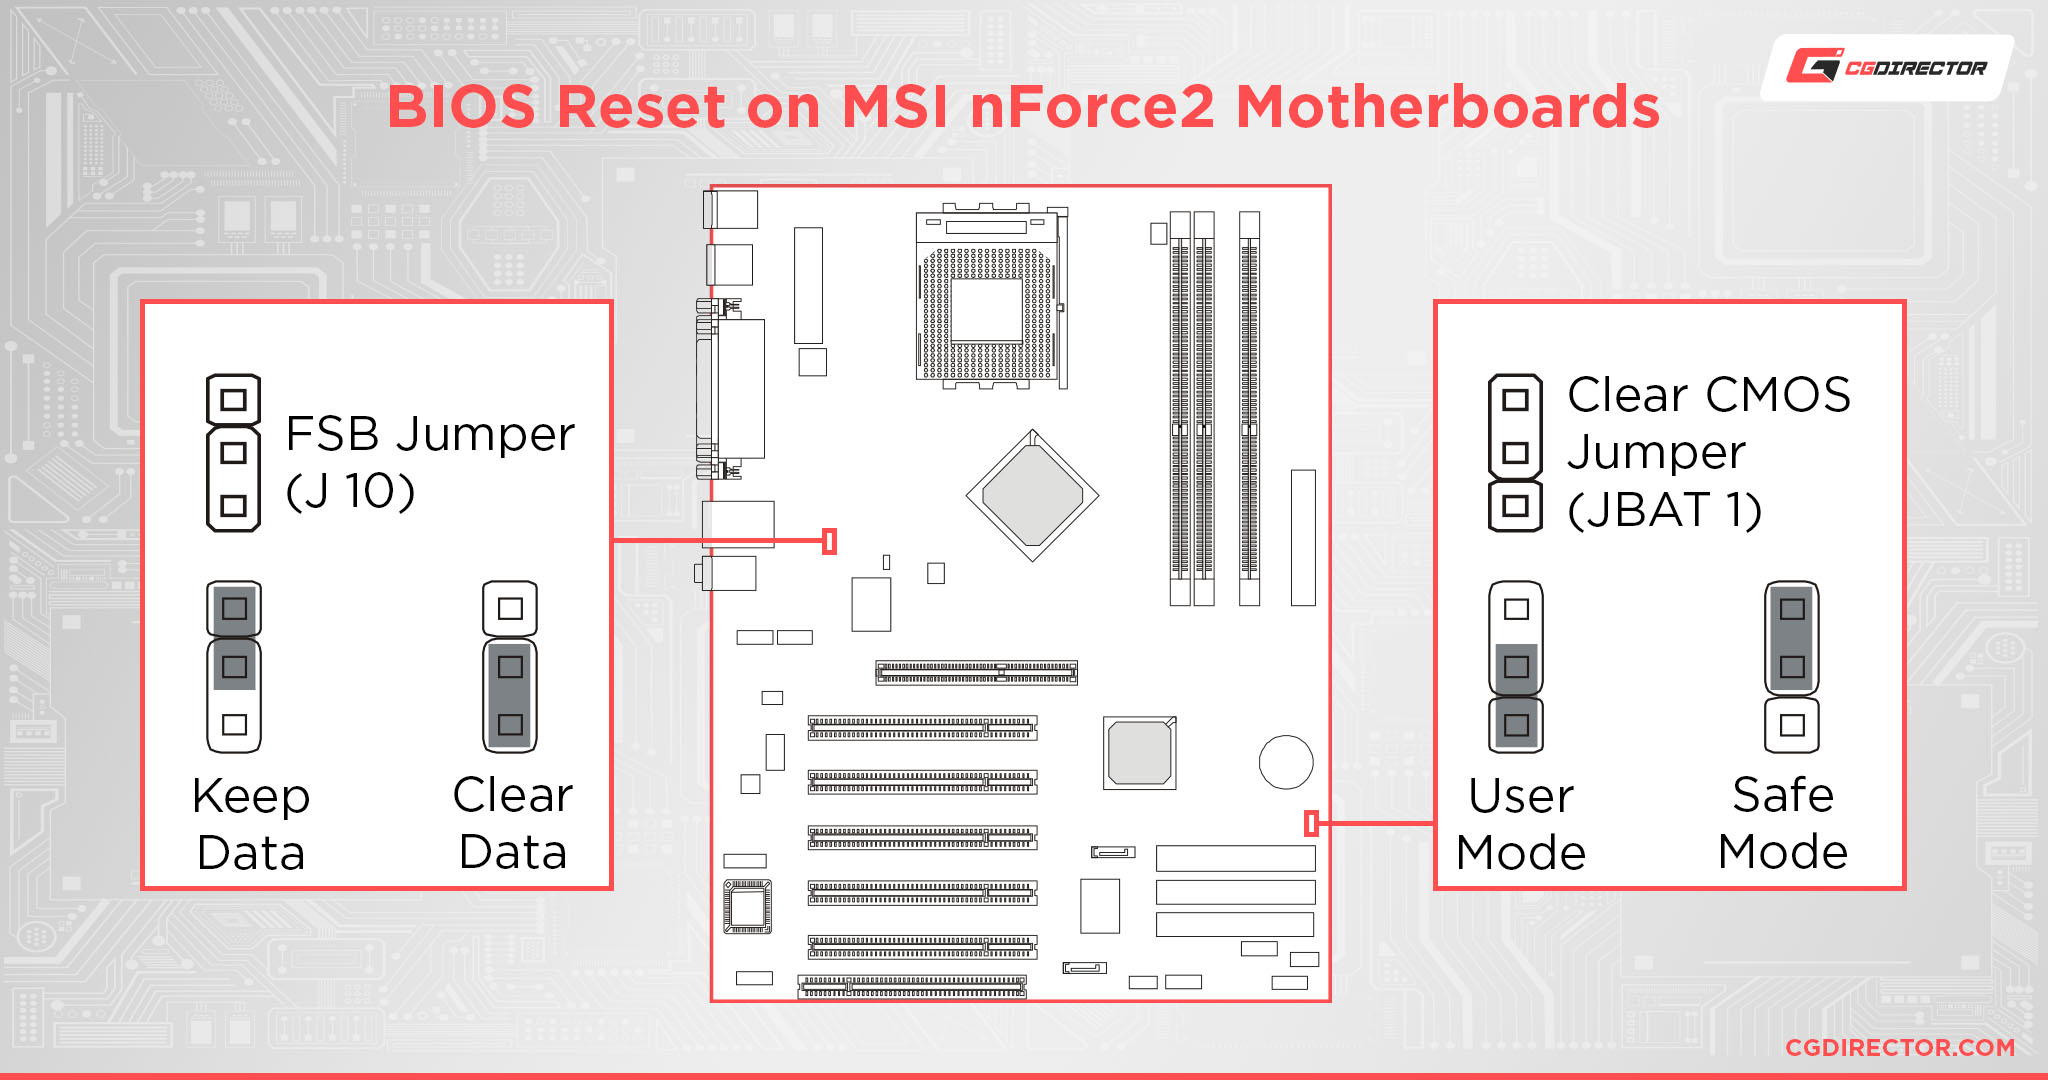
Therefore, you will need to short both the “safe mode” jumper and the standard CMOS jumper to fully reset the BIOS.
As mentioned above, you can use a screwdriver (for a two-pin jumper) or switch the caps (for a three-pin jumper) to restore the BIOS settings and FSB frequencies to their default values.
What Is the BIOS and Why Is It So Important?
The Basic Input/Output System (or BIOS, for short) is the first piece of software that loads up when you switch on your PC. It’s responsible for making all your PC’s parts work together smoothly, figuring out if any of them are incompatible or need specific settings.
You can also use it to change certain settings related to your hardware, such as the processor’s clock speeds, voltage, the speed of your case fans, and a metric ton of other things as well.
When Should You Reset Your BIOS?
Resetting your BIOS is a great all-in-one solution for whenever your PC fails to POST.
Let’s say you’ve recently overclocked your CPU and/or RAM frequencies, and the system crashes or becomes unstable. In that case, it’s always a good idea to revert the BIOS to its factory settings.
Then, once you boot into the OS, you’ll be able to increase the voltage/frequency by small values while running stress tests to gauge the overall stability of your system.
Before You Reset Your Motherboard’s BIOS
Resetting the BIOS will also reset its password. Moreover, if your work requires you to use a hypervisor or any kind of virtual machine, you’ll have to re-enable the CPU virtualization setting once you reset the BIOS.
Last but certainly not least, before opening up your PC to tinker with the CMOS battery or a jumper, you should unplug your system from the wall outlet, turn off your power supply, and then press and hold the power button for at least 30 seconds.
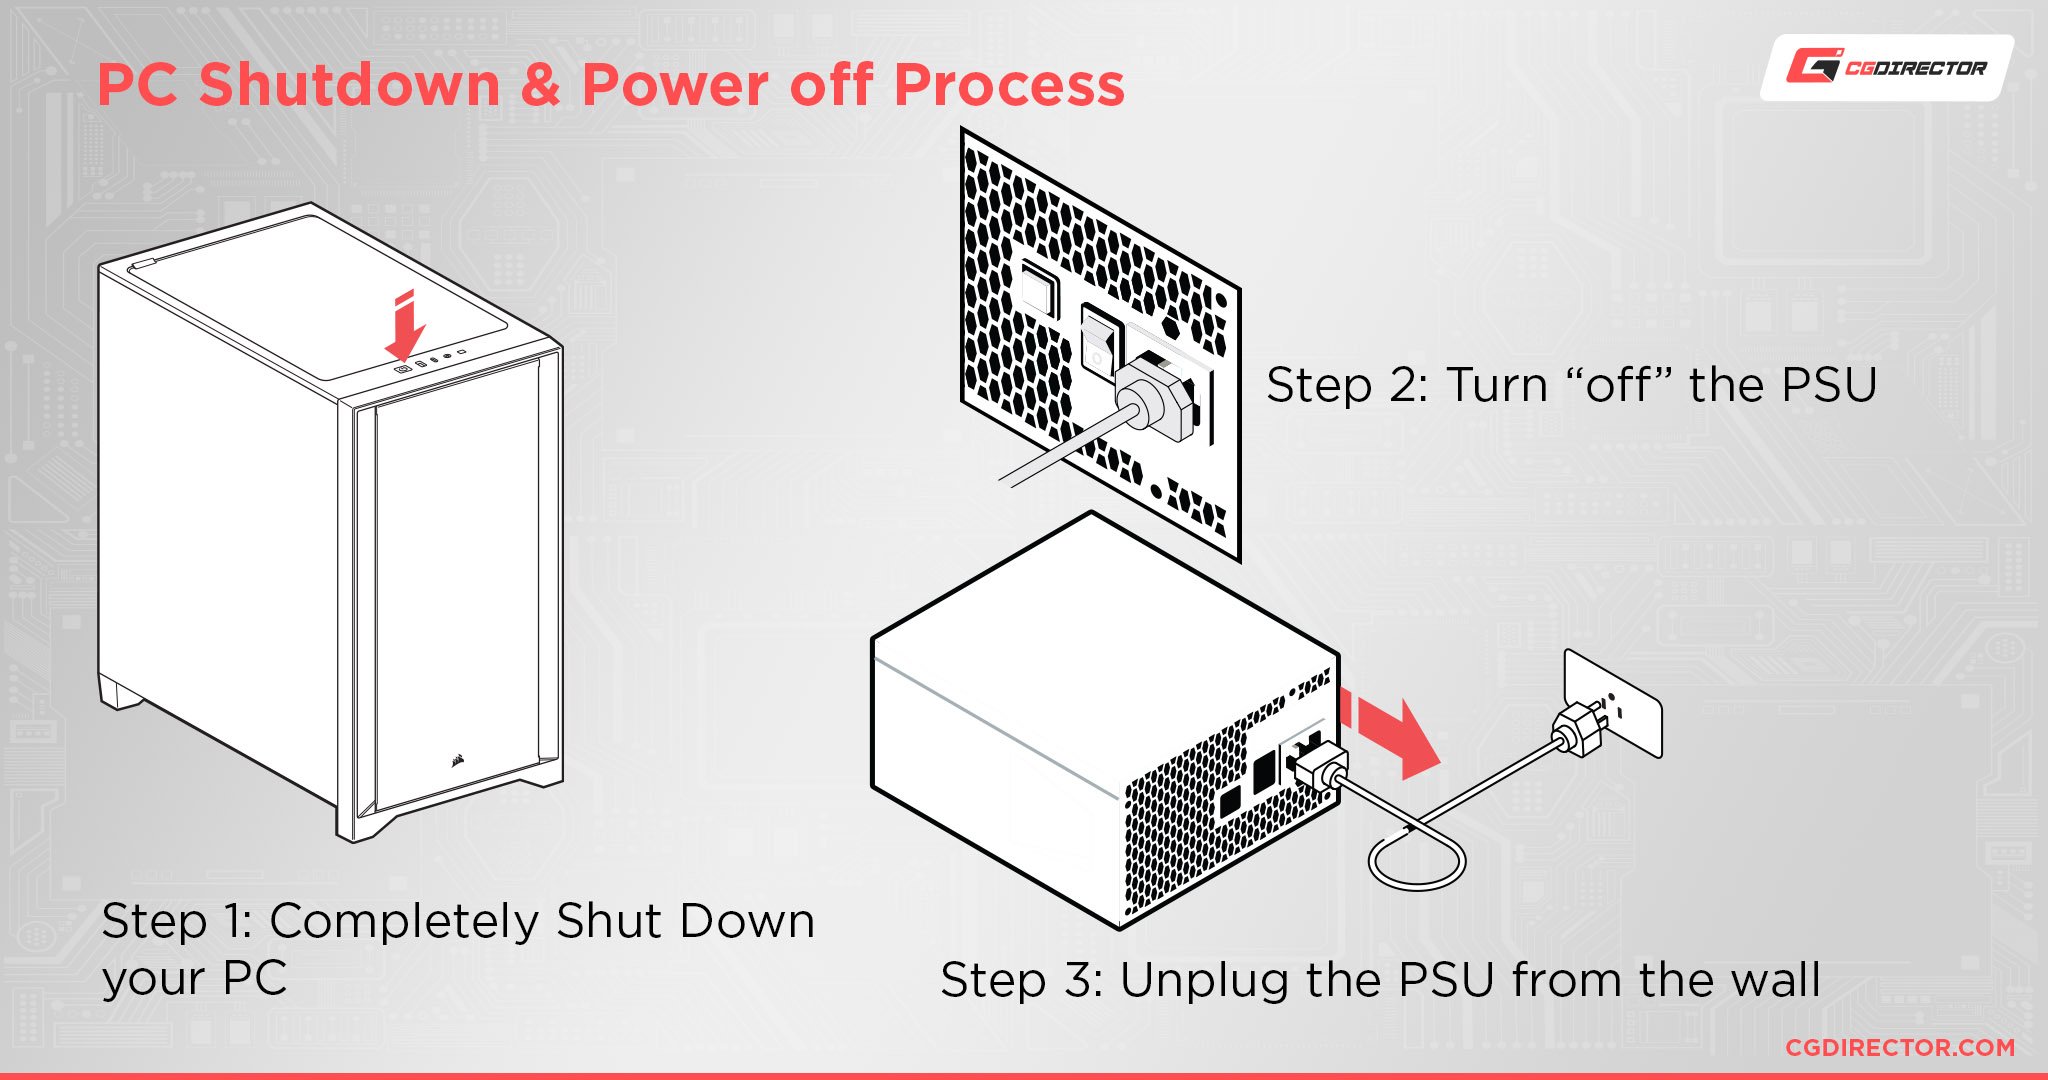
This will discharge any remaining power from the PSU capacitors.
FAQ
BIOS Flashback vs. BIOS Reset: What’s the Difference?
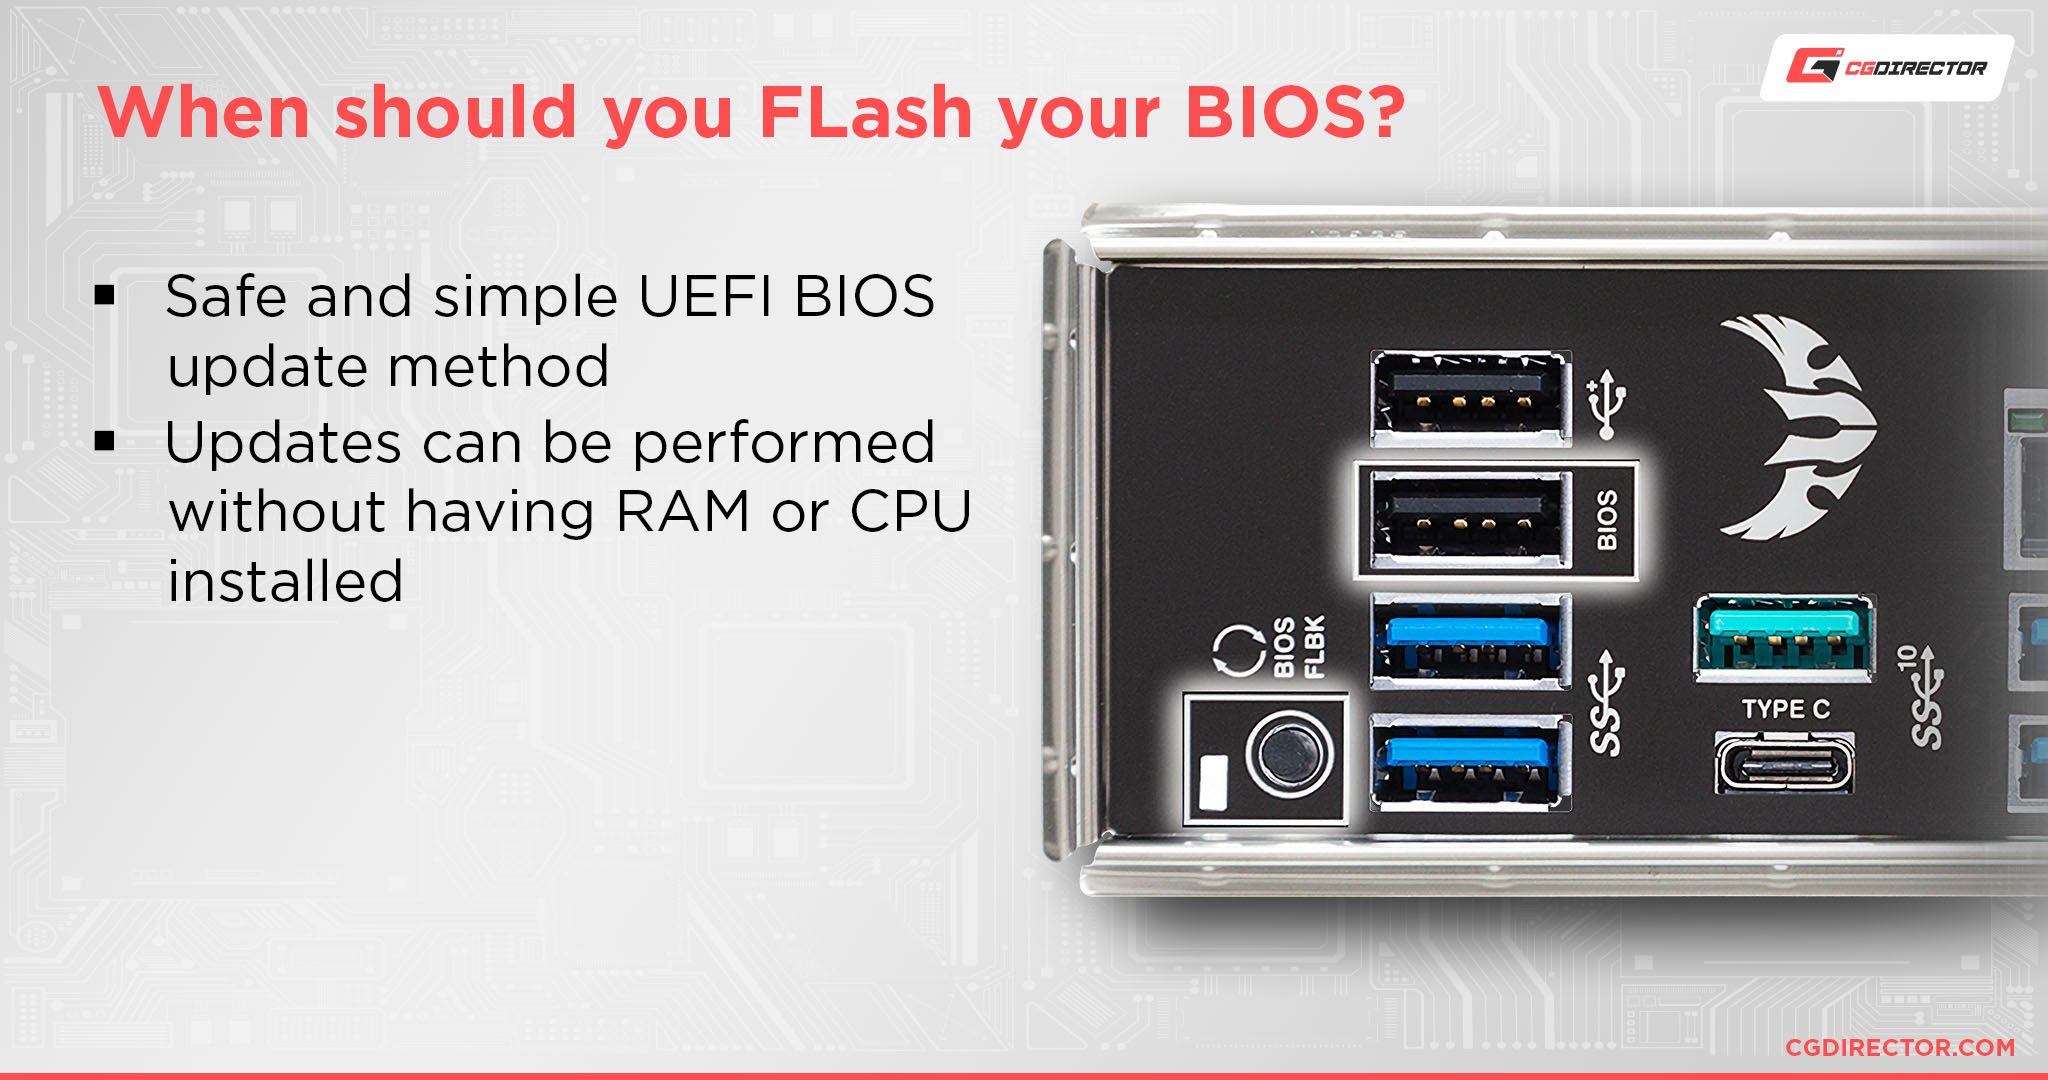
Unlike BIOS reset, BIOS Flashback (or the “Flash BIOS Button”, as MSI calls it) is used to install, update or “flash” the BIOS file. This feature is used to flash a more compatible BIOS firmware if your motherboard does not support your CPU.
The benefit of using BIOS Flashback compared to M-Flash is that it does not require the CPU or even the GPU to be plugged into your motherboard when you flash your chosen BIOS firmware.
Although this method is generally safer as it allows you to reinstall the firmware (hence the name “flashback”), you should still exercise caution as flashing the BIOS incorrectly can end up bricking your motherboard – that’s the worst-case scenario.
Can I Downgrade the BIOS Firmware?
Absolutely! Most MSI motherboards will allow you to revert to a previous version of the BIOS firmware if you happen to run into any kind of stability issue.
Simply create a bootable disk by formatting it in FAT32 and place the appropriate BIOS file onto your USB drive.
You can then use MSI’s M-Flash – or perform a regular flashback – to complete the procedure (i.e. flash an older version of the BIOS).
Over To You
Although entering the BIOS may seem complicated, it’s actually neither difficult nor particularly dangerous – assuming you follow all of the steps written above.
If you have any questions after going through this article, feel free to post them in the comments section down below or, alternatively, on our forum!

 in BIOS and Should You Use It?")
")


7 Comments
27 May, 2023
What about a Mobo that boots up powers everything on but gets stuck at a Black Screen of Death? Only the red EZ-Debug light comes on for the GPU slot, but the white light under the GPU comes on if I swap slots. GPU confirmed working on another PC and tried a working GPU on mobo with the same results. Already Stripped it down to 1 RAM stick etc., reset cmos, and it’s a x370 Gaming Pro Carbon so no buttons. And it happened after trying to boot up after upgrading to the newest Microsoft Update Windows 10 2H22 which is apparently bricked a number of systems.
31 December, 2023
Hi, I have a MSI Motherboard: PRO B660M-A CEC WIFI DDR4 V2 on my computer built by Ibuypower. I recently updated my bios. I have added SSD Drives to my computer with different Linux OS on separate hard drives. I only see 2 drives with different OS including Windows 11, with my current option to boot one of these drives. I was able to enable the drives in the Bios but not able to add more drives on the boot list. I have asked the MSI tech support and they don’t have the answer. What to do?
2 January, 2024
Hardware-wise make sure your new drives’ SATA connectors don’t get disabled by other components (such as NVME or PCIe slots that are in use, check the manual). Software-wise, make sure they are formatted appropriately for the OS in question to recognize them.
Alex
25 April, 2023
Hello, i have laptop MSI GF 63 THIN 10SC i updated WIN 10 and after that blue screen with error appear. I re install WIN 10 and the problem persist. Please, hepl me
14 March, 2023
warning please insert usb key and press any key the only message in my monitor?i tried cmos jumper cmos battery and pressing the delete,,,,nothing change,,?what should i do to enter the bios,,please help me
4 January, 2023
HOW to Update Asus ROG Crosshair VIII Dark Hero x570 motherboard BIOS.
Current BIOS Ver.3801
5 January, 2023
You can download the newest BIOS on the product Page here https://rog.asus.com/motherboards/rog-crosshair/rog-crosshair-viii-dark-hero-model/helpdesk_bios/
The Motherboard has USB BIOS Flashback so, it should be straightforward to follow any BIOS updating guide such as this one: https://www.asus.com/support/FAQ/1044348/
Cheers,
Alex