 by
by ![Monitor Goes Black For A Second [Causes & How to Fix]](https://www.cgdirector.com/wp-content/uploads/media/2022/11/Monitor-Goes-Black-For-A-Second-Causes-Fixes-Twitter-1200x675.jpg "Monitor Goes Black For A Second [Causes & How to Fix]")
TABLE OF CONTENTS
There’s nothing more infuriating than your monitor suddenly going black for a second.
It can throw you off whatever task you’re doing and, in the cases of concentrated working, gaming, or binge-watching Netflix, ruin your experience entirely. But you won’t have to put up with this for much longer.
Below, I’ve created an in-depth guide that covers the potential causes and solutions for this issue.
So, let’s get right to it!
What Causes a Monitor to Go Black for A Second?
Generally, your monitor goes black for a second because something interferes with the connection. The most common cause is loose, poorly fitted, or damaged cabling.
However, other possible causes include:
- Outdated or corrupted driver
- Poorly configured power settings
- Software incompatibility, especially antivirus software
- Faulty monitor or hardware
Fixing Monitor Goes Black for a Second: Most Common Fixes
We’ll begin with the easiest and quickest solutions and then gradually move on to more advanced fixes.
1. Examine Monitor Cable Connections
Before you proceed with anything else, make sure to examine your cables thoroughly.
Even just one loose, poorly fitted, or damaged cable can result in an unreliable connection and lead to the black screen issue.
Here’s how to properly check your cables:
- Check for Cable damage
Unplug each cable and inspect both the cable and connectors for signs of damage. Kinks, tears, bends, and fraying can all affect the connection to your monitor. You should also examine the connectors themselves since debris and dust can get clogged up in them. Or maybe they have bent pins or are rusted. - Ensure proper Cable Connection
If every cable appears to be in working order, replug them into your monitor and device. Ensure the cables are properly connected — you should be able to feel the cables “click” in as you push (for HDMI, DisplayPort, USB-C). Or, if it’s VGA or DVI, ensure both screws are tightly in place and aren’t wobbly. - Test a different cable & monitor
If the issue still persists, it might not related to your cable connections. However, some cable damage isn’t always visible to the naked eye. To be certain your cables aren’t the cause, you can test each one on a different monitor. Or test a different cable on your Monitor(s). Also, test your Monitors with a different cable connector than previously. If you’ve had your Monitors attached through DisplayPort, for example, try connecting them with, e.g., an HDMI cable instead.
2. Factory Reset the Monitor
Factory resetting the monitor may be all that’s needed to stop the black screen issue.
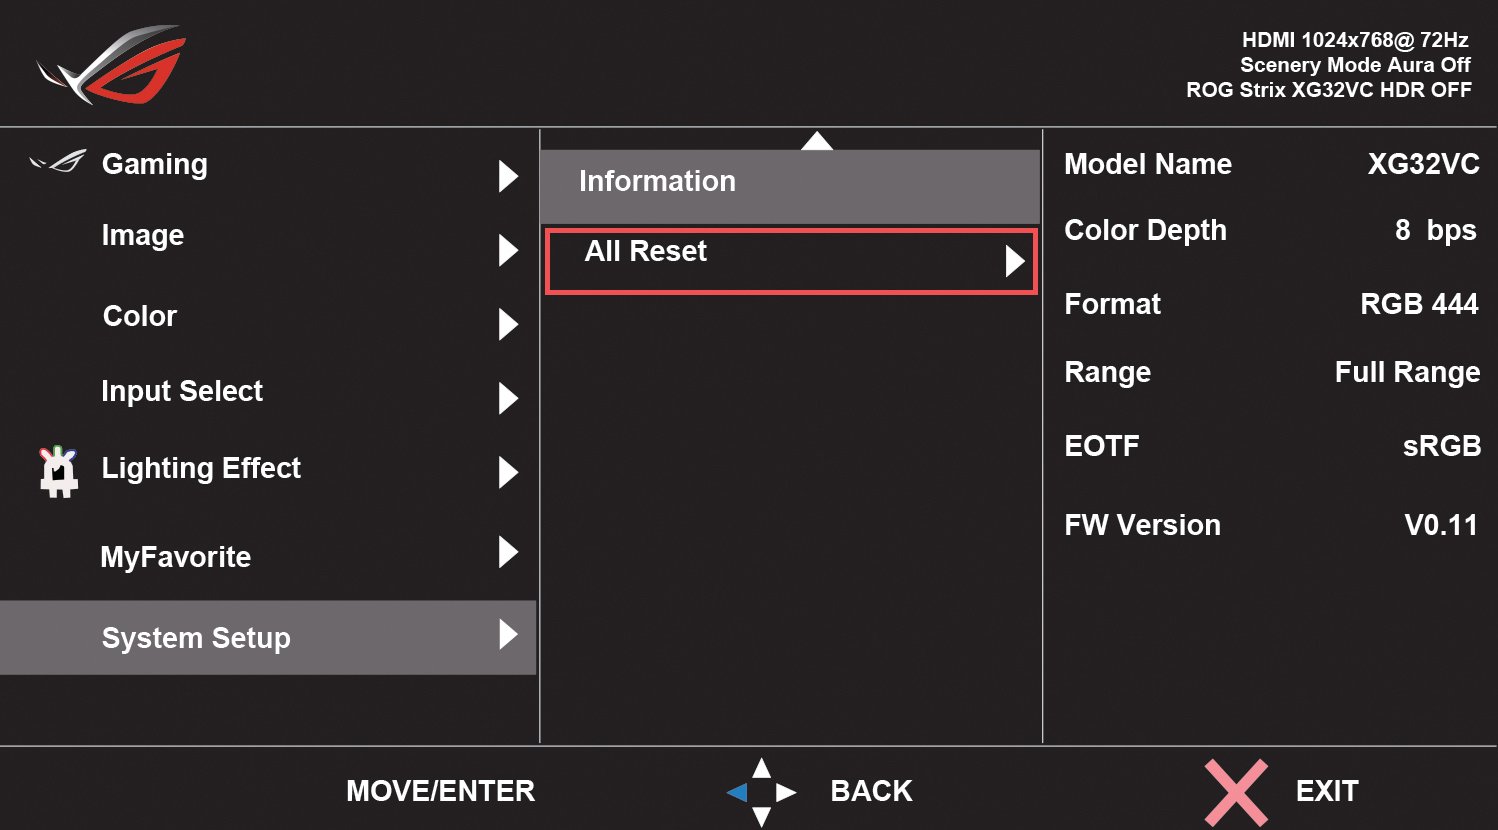
Exactly how you go about this process will depend on the type of monitor you have — you should be able to find this information in your monitor’s manual or on the manufacturer’s website.
Here’s how to do this on a BenQ Monitor.
3. Reconfigure Power Settings
Poorly configured power settings have been known to cause monitor issues, especially if you’ve set the mode to power saver.
Reconfiguring your power settings is a relatively quick process:
- Go to the Windows Start menu, type “Control Panel” in the search bar, then click on it when it pops up.
- Select “Hardware & Sound,” then “Power options.”
- Choose “Balanced.”
- Next, click on “Edit Plan Settings.”
- Set “Turn Off The Display” to never.
- Apply the changes.
4. Update or Rollback Your Graphics Driver
An out-of-date or corrupted graphics card driver can cause several display issues, including your monitor going black for a second.
Here’s how to check you have the latest driver installed. We’ll also cover how to update it if necessary:
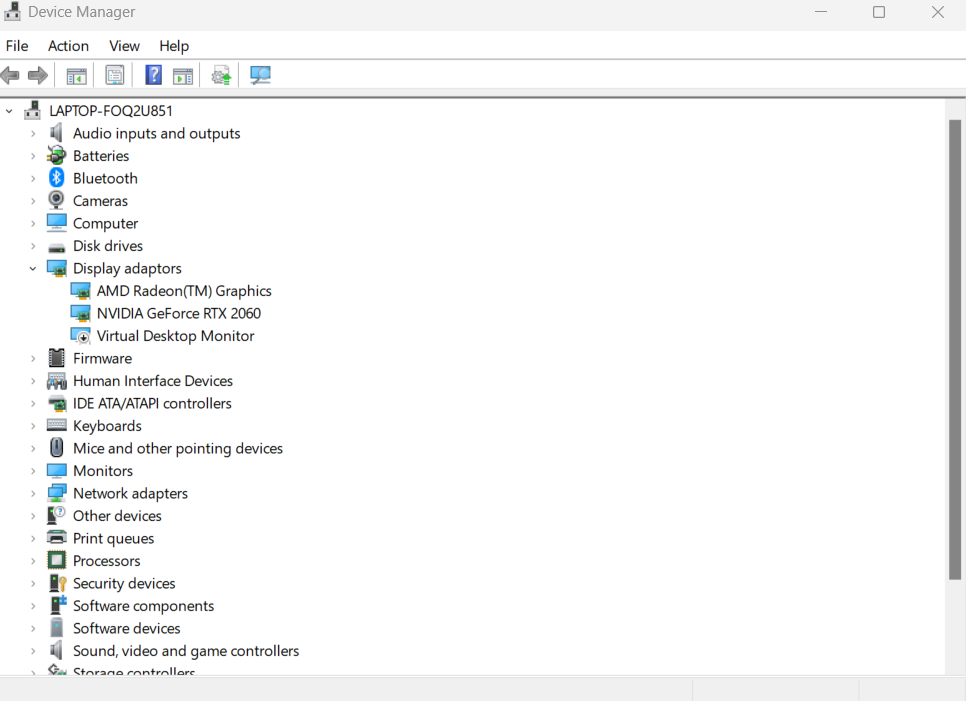
- Go to the Windows taskbar search box, type “Device Manager,” and then select “Device Manager” when it appears.
- Sift through the categories until you find the driver you need to update.
- Right-click the driver, then select “update driver.”
If your graphics driver has become corrupted, you can roll back to a previous version or reinstall the driver entirely after downloading it from the AMD, Nvidia, or Intel Support Website.
You can also (un-install, then) reinstall the graphics driver simply by right-clicking on the driver and selecting uninstall. After that, you’ll need to restart your PC.
Windows will automatically reinstall a new driver version after the next boot.
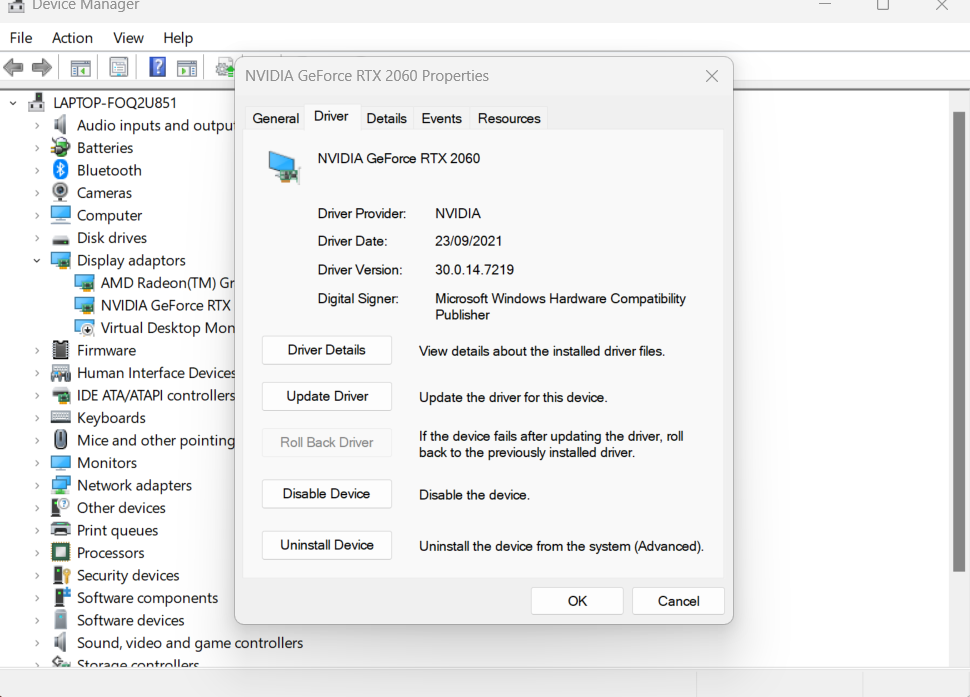
If your monitor is incompatible with the latest driver update, for whatever reason, you can rollback to a previous version by doing the following:
- Open “Device Manager” and click on the “Display Adapters” category.
- Right-click on the appropriate driver.
- Go to “Properties,” “Driver,” and then select the “Roll Back driver” option. (only possible if you’ve updated the driver previously)
- Click to restore the previous driver version.
5. Disable Conflicting Software
Conflicting third-party applications can interfere with your monitor’s display, so it’s worth temporarily disabling them to determine whether they’re the cause.
A clean boot of your system will allow you to do just this:
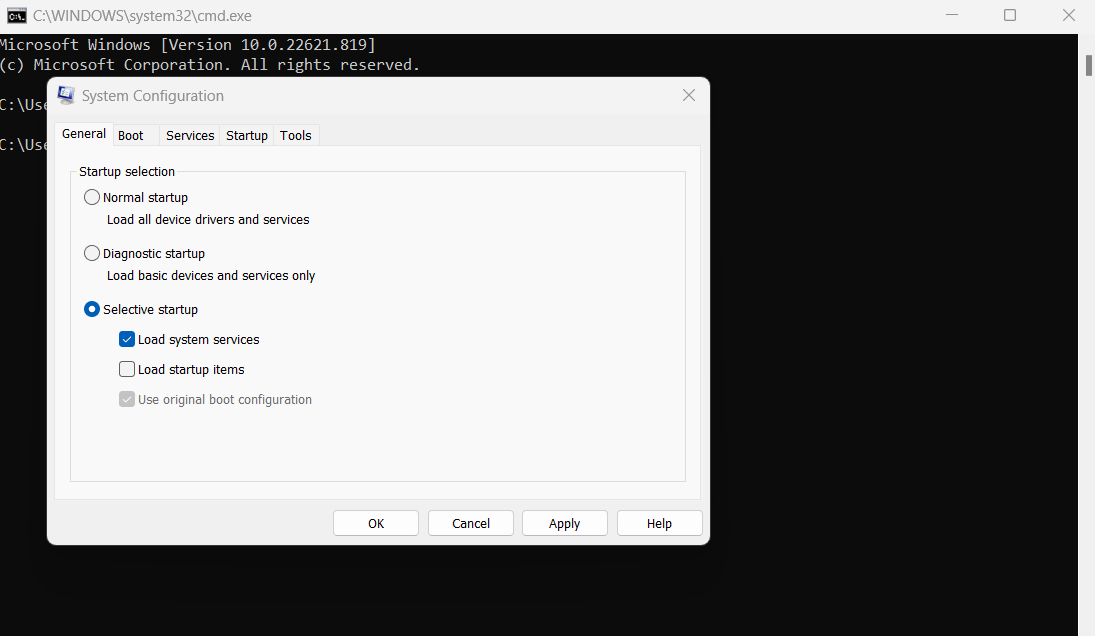
- Press the Win and R buttons simultaneously to open the command prompt.
- In the command box, type “msconfig” and then click enter.
- Go to the General tab and disable “Load Startup Items.”
- Next, click on the services tab. Select “Hide All Microsoft Services,” and then “Disable All.”
- Click “Apply” and restart your PC.
If your monitor no longer goes black, it’s a clear sign that an application that was previously automatically loaded on startup is causing the problem.
To determine which application it is, you’ll need to repeat the process above, but this time by disabling one application at a time.
First, re-enable the Load startup items. Then go to the “Startup” tab, and click on “Open Taskmanager”. This’ll open the Startup tab in Taskmanager. (You can also get here by pressing CTRL + SHIFT + ESC directly from anywhere within Windows)
You can now disable Apps that are loaded at startup, one by one, until the culprit is found.
Antivirus software or apps that run in the background are usually the cause, so start with these.
You can also run the PC in safe mode to initially troubleshoot whether a third-party application or driver is the cause — Safe Mode starts up the device with only the essential drivers and services.
Here’s how to access Safe Mode in Windows 10 and 11.
If this method hasn’t fixed the issue, you can revert the changes by simply going back into the system configuration and re-selecting “Load Startup Items.”
Don’t forget to also unclick “Hide All Microsoft Services” and “Disable All.”
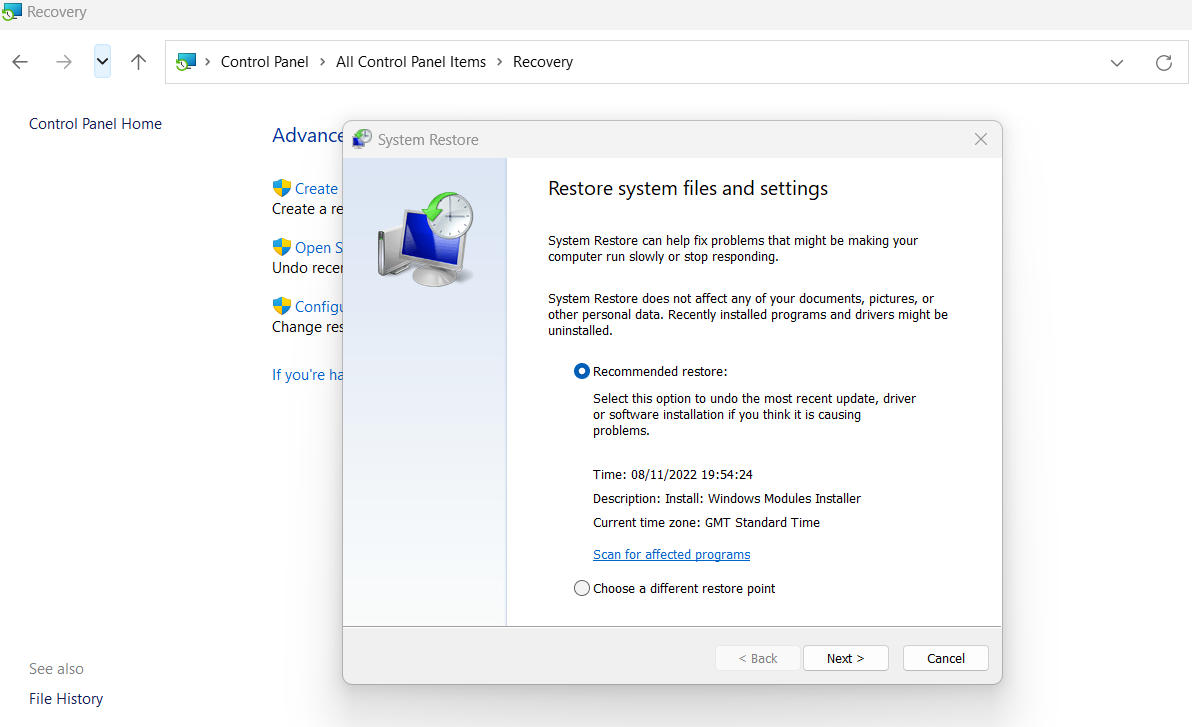
6. Try Windows System Restore
A Windows system restore can potentially fix the issue if the root cause is a corrupted app or file.
However, this method will only work if you have either: a) manually created a system backup in the past or b) set up your system to make backups automatically.
- Go to Windows Start and type “Control Panel” in the search bar.
- Open the “Control Panel” and search for “Recovery.”
- Select “Recovery” and click “Open System Restore.”
- Click on the restore point of your choice. Then, click “Next” and “Finish.”
Keep in mind that this method will only work if your monitor started having this issue after a system restore point.
If your screen has always had this problem, a restore won’t work, and you’ll need to try out other methods.
7. Undo Overclocking
Overclocking, which involves increasing the GPU or CPU’s frequency, is used to boost performance, especially for intensive tasks like gaming, video editing, and 3D rendering.
While it has its benefits, overclocking comes with its own risks and can make your device more susceptible to issues like overheating and display problems.

If your monitor keeps going black, you should undo any overclocking to see if it solves the issue.
8. Check for Internal Hardware Issues
Unfortunately, if none of the methods above have worked, it’s likely due to a hardware issue or fault in the monitor.
You’ll need to first determine whether it’s your monitor or device’s (e.g. PC’s) fault.
Temporarily swap your monitor with a different one and see if the black issue still persists. Then, try your monitor on a different PC (or Laptop).
If the monitor doesn’t work on any device, it’s likely faulty, and you’ll need to send it in for repair.
Most monitors come with a 12-month warranty, though the exact warranty length (and how the repair process works) depends on the manufacturer.
If your PC is the issue, then you’ll need to open up its case and examine the hardware. Beware that this is for experts who know their way around a PC only!
- Turn off the PC and unplug it from the wall before opening it up.
- Inspect to see if any component has become loose, especially the CPU Cooler, GPU, and RAM modules.
- Unplug and reset the core components, like the GPU, ram, and power cables to the GPU, CPU, and Motherboard.
- Clear out any dust or debris clogging up the internals. Make sure to pay close attention to the cooling, so examine the case fans, GPU heating and fans, and the CPU heatsink.
- Inspect each hardware component for signs of damage and wear. This isn’t always obvious, so you may need to swap out each component one by one to determine if there’s any damage.
- Ensure you’re using the appropriate power supply (PSU) for your device, and that all the cables are properly connected.
- Reapply new Thermal Paste to the CPU and make sure the Cooler is sufficient. The same can be done with the GPU, though that’s a more complex endeavor. Check thermals on CPU and GPU first before doing this,
Be aware that opening your PC’s chassis can sometimes void your warranty, so always check with your manufacturer before doing so.
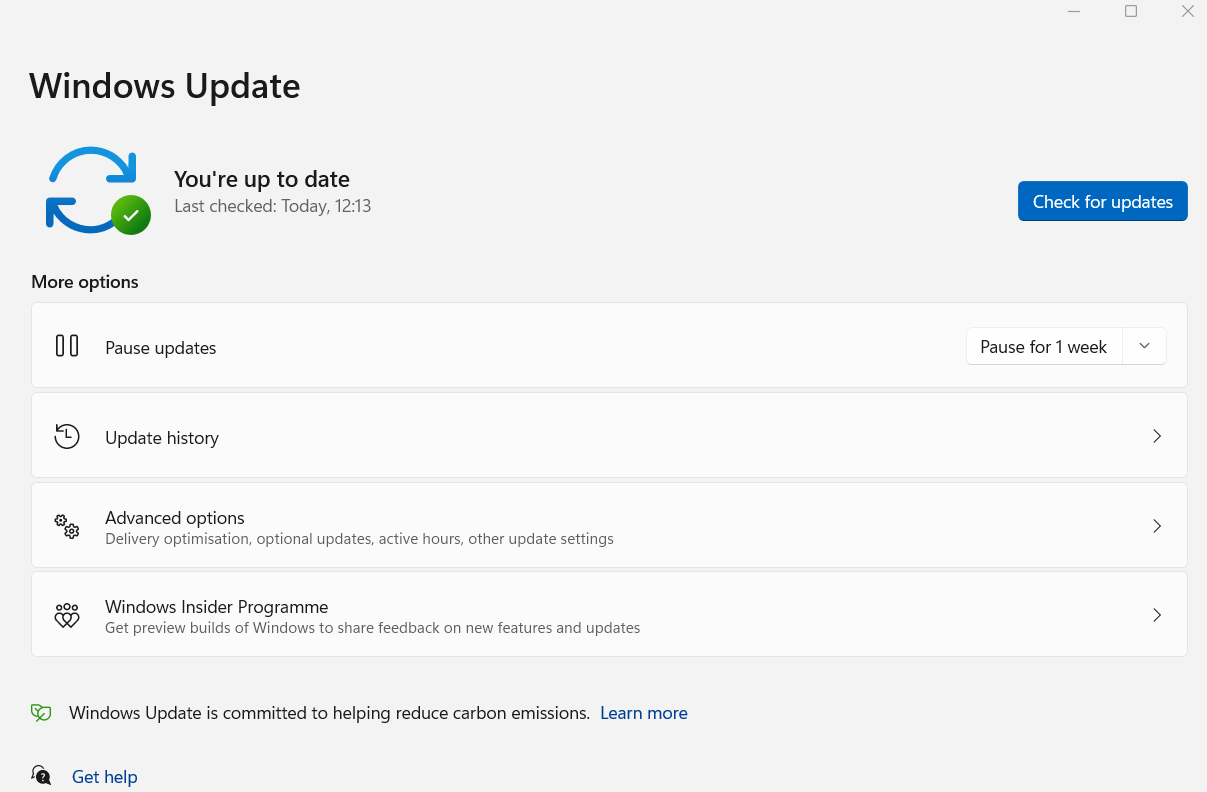
9. Make Sure You Have the Latest Windows Updates Installed
Installing the latest Windows update can potentially fix the monitor issue, especially since updates typically address bugs.
Hardware incompatibility can also occur with older versions.
- Go to Windows settings (press “I” and the Windows keys simultaneously).
- Click on “Windows Update” / “Security & Update.”
- Click “Check for Updates,” then “Install Updates” if required.
- Restart your PC to apply the changes
10. More ways to fix this issue
We’ve had many readers report on things that fixed this issue for them. Here they are in no particular order:
- Lower the Monitor’s refresh rate to 60Hz if you have a high refresh-rate Monitor to see if this helps
- Lower the Monitor’s resolution below 3840×2160 (4K) in case you have a 4K+ Monitor to see if this helps
- Use just a single monitor if you have multiple monitors and see if this changes anything
- Use a shorter cable, buy a new cable
- If it’s HDMI you’re using, make sure you have the correct cable (there are many standards here, especially for high-res, high-refresh displays)
- Check your Power strips and wall power lines. Do you have power outages? Do you have your Monitor hooked up to a circuit that already has too many devices hooked up to it and gets overloaded?
- Use a different connector. Monitors usually have at least HDMI, DisplayPort and often VGA, DVI and USB-C to drive them.
- If this happens mostly when you’re running intensive workloads like a high-end game or GPU render session, the GPU might be overheating. Check its thermals!
- You may be using a Freesync monitor with nVidia G-Sync, which can cause black flickering. This is a known issue.
Feel free to let us know of any ways you’ve fixed the “Monitor goes black for a second” issue in the comments so we can add it to this list!
FAQ
Why Does My Monitor Go Black for a Second?
Damaged cabling, outdated drivers, software incompatibility, and faulty hardware can all cause a monitor to go black for a second.
What Causes My Second Monitor to Go Black?
The most common cause of a second monitor going black is interference with the connection, such as a faulty cable, damaged adapter, or wrong input signal.
Why Does My Monitor Go Black While Gaming?
If your monitor goes black for a second while gaming, it’s likely because your GPU is outdated or faulty.
Your power supply may also be inadequate to handle the intensive nature of gaming.
Another possible cause is your PC overheating. Gaming generates a lot of heat, and if your device can’t effectively mitigate this heat it can cause performance problems and display issues.
Over to You
Hopefully, our guide above has helped you troubleshoot and permanently fix this infuriating monitor issue. If it did, let us know in the comments below or in our forum which method worked for you.
And if your monitor is faulty and needs replacing? Make sure to check out our dedicated buyer’s guide. We cover all the features you need to look for when shopping for a new monitor, including the best brands on the market.
")
![How To Enable/Set Your Monitor To 144 Hz [Updated]](https://www.cgdirector.com/wp-content/uploads/media/2023/12/How-To-EnableSet-Monitor-To-144-Hz-Twitter-copy-594x335.jpg "How To Enable/Set Your Monitor To 144 Hz [Updated]")

![The Monitor Guide to Refresh Rates and Response Times [Updated]](https://www.cgdirector.com/wp-content/uploads/media/2020/05/TheGuideToRefreshRates-Facebook_1200x675-594x335.jpg "The Monitor Guide to Refresh Rates and Response Times [Updated]")

11 Comments
10 August, 2025
Hey I am umar and my desktop black screen problem please how to fix
17 February, 2024
If you goes across this comment:
1 – First test another DP Port of your GPU. It happened many time and it’s not cable related most of the cases (especially if the cable is new). Depending your GPU’s brand, not all the display port have the same version and also not all of them are grounded perfectly. It’s very unlikely that all your DP ports are faulty but it happens pretty often that one of them is at least.
2 – Be sure to check the DP cable version, your GPU DP port version and their capabilities according to your monitor’s desired resolution@frequencie@colordepth. This is very important because if the bandwidth asked by the monitor is too high, the lost signal can occur very frequently.
3 – If you have HDMI 2.x port on your GPU you can switch for it. Most of the cases HDMI’s grounding works better than DP. I never had any issues with GPU’s HDMI ports until now. The only downside is that HDMI below 2.1 cannot reach 4K@more than 120hz frequencie above 8bpc.
4 – Only after testing those 3 points above, you can check for driver issues.
2 January, 2024
BTW at the end of the article the resolution is wrong “3840 x 2560”
correct > 3840 x 2160
2 January, 2024
Thanks for the heads-up! 🙂 Fixed!
Alex