 by
by ![How To Clean Your Graphics Card / GPU [The easy way]](https://www.cgdirector.com/wp-content/uploads/media/2022/06/How-to-Clean-Your-Graphics-Card-GPU-Twitter-1200x675.jpg "How To Clean Your Graphics Card / GPU [The easy way]")
TABLE OF CONTENTS
Cleaning is the most important aspect of maintaining the health and performance of a PC that we all tend to *cough*ignore*cough* at times.
Especially when it comes to the GPU. Considering that most GPUs face downwards, you don’t even see how dirty it might’ve gotten.
But you’ll sure feel it when your programs are grinding to a halt.
An overheating GPU is a major hassle, especially if it hits at a critical time.
So in this article, I’ll explain how you clean your GPU to keep it in tip-top shape.
Why Do You Need to Clean Your Graphics Card?
Because it’ll overheat and break down if you don’t. It’s as simple as that.
GPUs are expensive investments. It’s not like you can just throw away a broken one and pop another in all willy-nilly—unless you’re rich, of course, but still, don’t do that.
So it’s very important that you take care of it and make sure that you periodically clean it so that it doesn’t just break down on you one day in the middle of a heated game or a 16-hour render.
What Do You Need to Clean Your Graphics Card?
Cleaning a GPU is surprisingly easy. Unless you’re going for a deep clean, all you really need are a couple of tools.
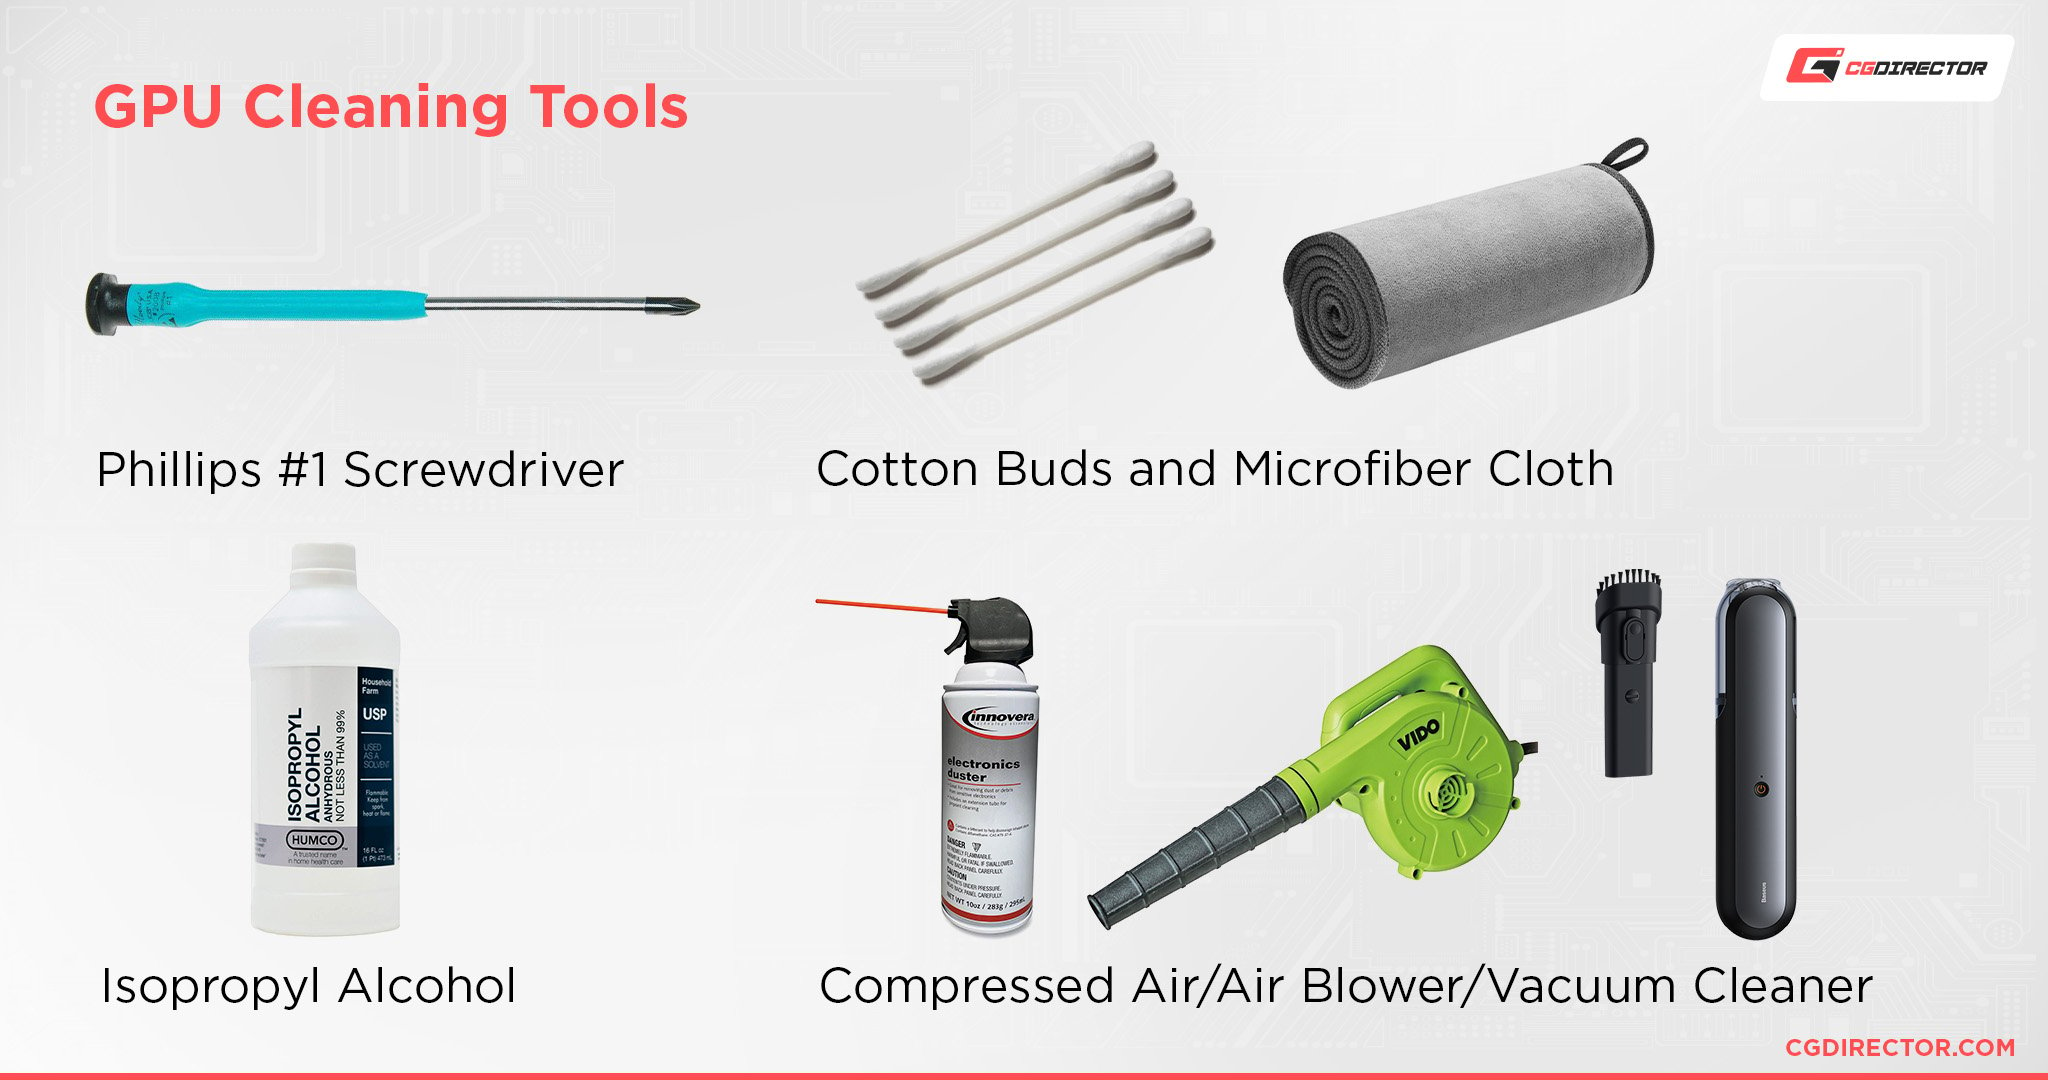
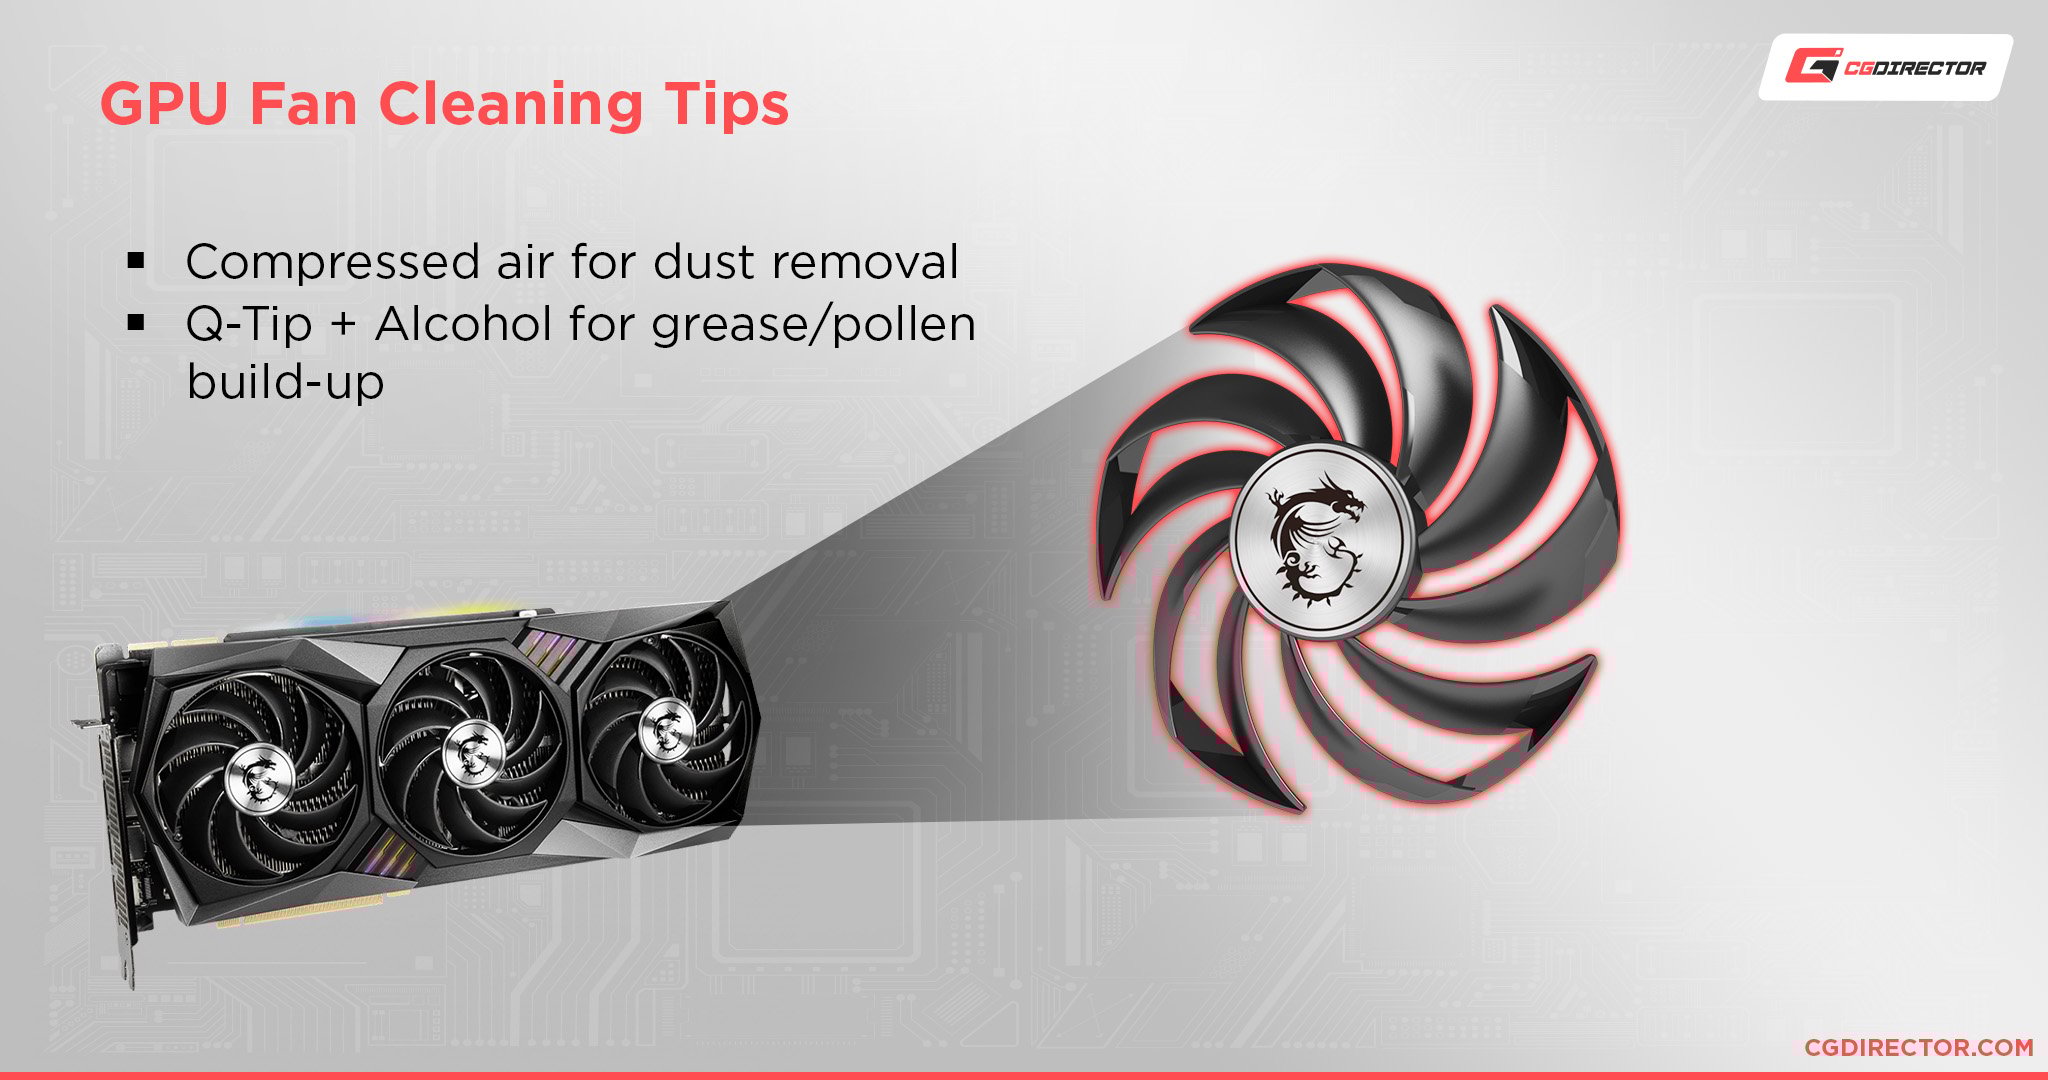
The first and most important thing is getting a can of compressed air or an air pump/blower. It’ll be the main thing that gets rid of all the dust.
You can technically use a vacuum as well if your dust/debris isn’t caked on too much, but I personally haven’t had the greatest experience with vacuums.
Compressed air or an air pump might be messy, but it gets the job done.
I’d also recommend getting some cotton swabs and a microfiber cloth. Sometimes the dust can be really caked on and you just need to brush it off with a swab or a cloth.
Getting some isopropyl alcohol (at least 70%, 90% recommended) is also good to dampen your swab/cloth to more easily clean any dust/debris.
And finally, if you plan on removing your GPU to clean it, get a Phillips #1 screwdriver.
Most GPU bracket screws these days are just thumbscrews, so you might not end up needing this, but it’s better to be prepared.
And that’s all you need.
How Do You Clean Your Graphics Card? (The easy / quick way)
1. Turn Off Your PC and Your PSU
First things first, you need to turn off your PC and PSU.
You should never do any sort of work with a PC that’s turned on unless you’re absolutely confident that you know what you’re doing and won’t mess something up. Even then, better to be safe than gamble with hardware worth thousands of dollars.
I don’t think I need to explain how to turn off the PC.
Simply turn it off from within whatever OS you have installed and wait until all the lights in your PC go off (Some motherboards have lights that are always on, you can just ignore them).
You could also just hold down the power button and turn it off that way, but doing it the proper way is safer and makes sure that you don’t corrupt anything.
After you’ve done that, you need to turn off the PSU.
Even if your PC has turned off, your PSU is still providing small amounts of power to it. So if you want to clean your PC, you need to stop this.
Pretty much every half-decent PSU out there has a switch near the back where you plug it in that you can turn off. Flip that switch. I also tend to completely remove the PSU power cable. You don’t need to do this, but I prefer to err on the side of caution.
If for some reason your PSU doesn’t have a switch, first of all, get a new PSU because even ancient chinesium PSUs have on/off switches.
Second of all, you can just remove the power cable completely to accomplish the same thing.
To sum it up:
- Turn off your PC through the OS (Recommended) or by holding down the power button (Not Recommended).
- Flip the power on/off switch on the back of your PSU.
- (Optional) Remove the cable attached to the PSU.
2. Remove All External Cables Attached to the GPU (Optional)
After you’re done turning everything off, it’s the best time to remove all the display cables that might be attached to your GPU, or your PC in general if you plan to take it outside to dust it off.
If you’re only going to clean the GPU lightly without removing it, this step can be safely skipped.
To sum it up:
- (Optional) Remove all cables attached to your GPU.
- (Optional) Remove all cables attached to your PC—if you want to take it outside to clean.
3. Open Up Your Case to Access Your GPU
Now it’s time to open up your case so that you can access your GPU for cleaning.
Because different cases can have different methods of removing the side panel, it’s best to take a look at your manual first of all to see how to safely remove the side panel of your computer.
If you don’t have the manual, simply Google the name of the case followed by “manual”, and you’ll most likely find an online version or PDF of the manual from the manufacturer’s website.
Generally, for most modern cases, your side panel will be held with two thumbscrews behind the case. Get rid of those, and you can slide or open up the side easily.

To sum it up:
- Consult your case manual.
- Remove any screws or latches that might be holding on your side panel.
- Slide off/open up the side panel and place it in a safe location—especially if it’s made of glass.
4. Remove the GPU From Your Motherboard (Optional)
This is another optional step that I recommend that you do because it’ll make cleaning a lot easier, but you don’t have to if you simply want to quickly clean your GPU without much fuss.
We have a whole article that covers how to remove your GPU safely from your motherboard, so I won’t go into too much detail here, but the gist of it is this.
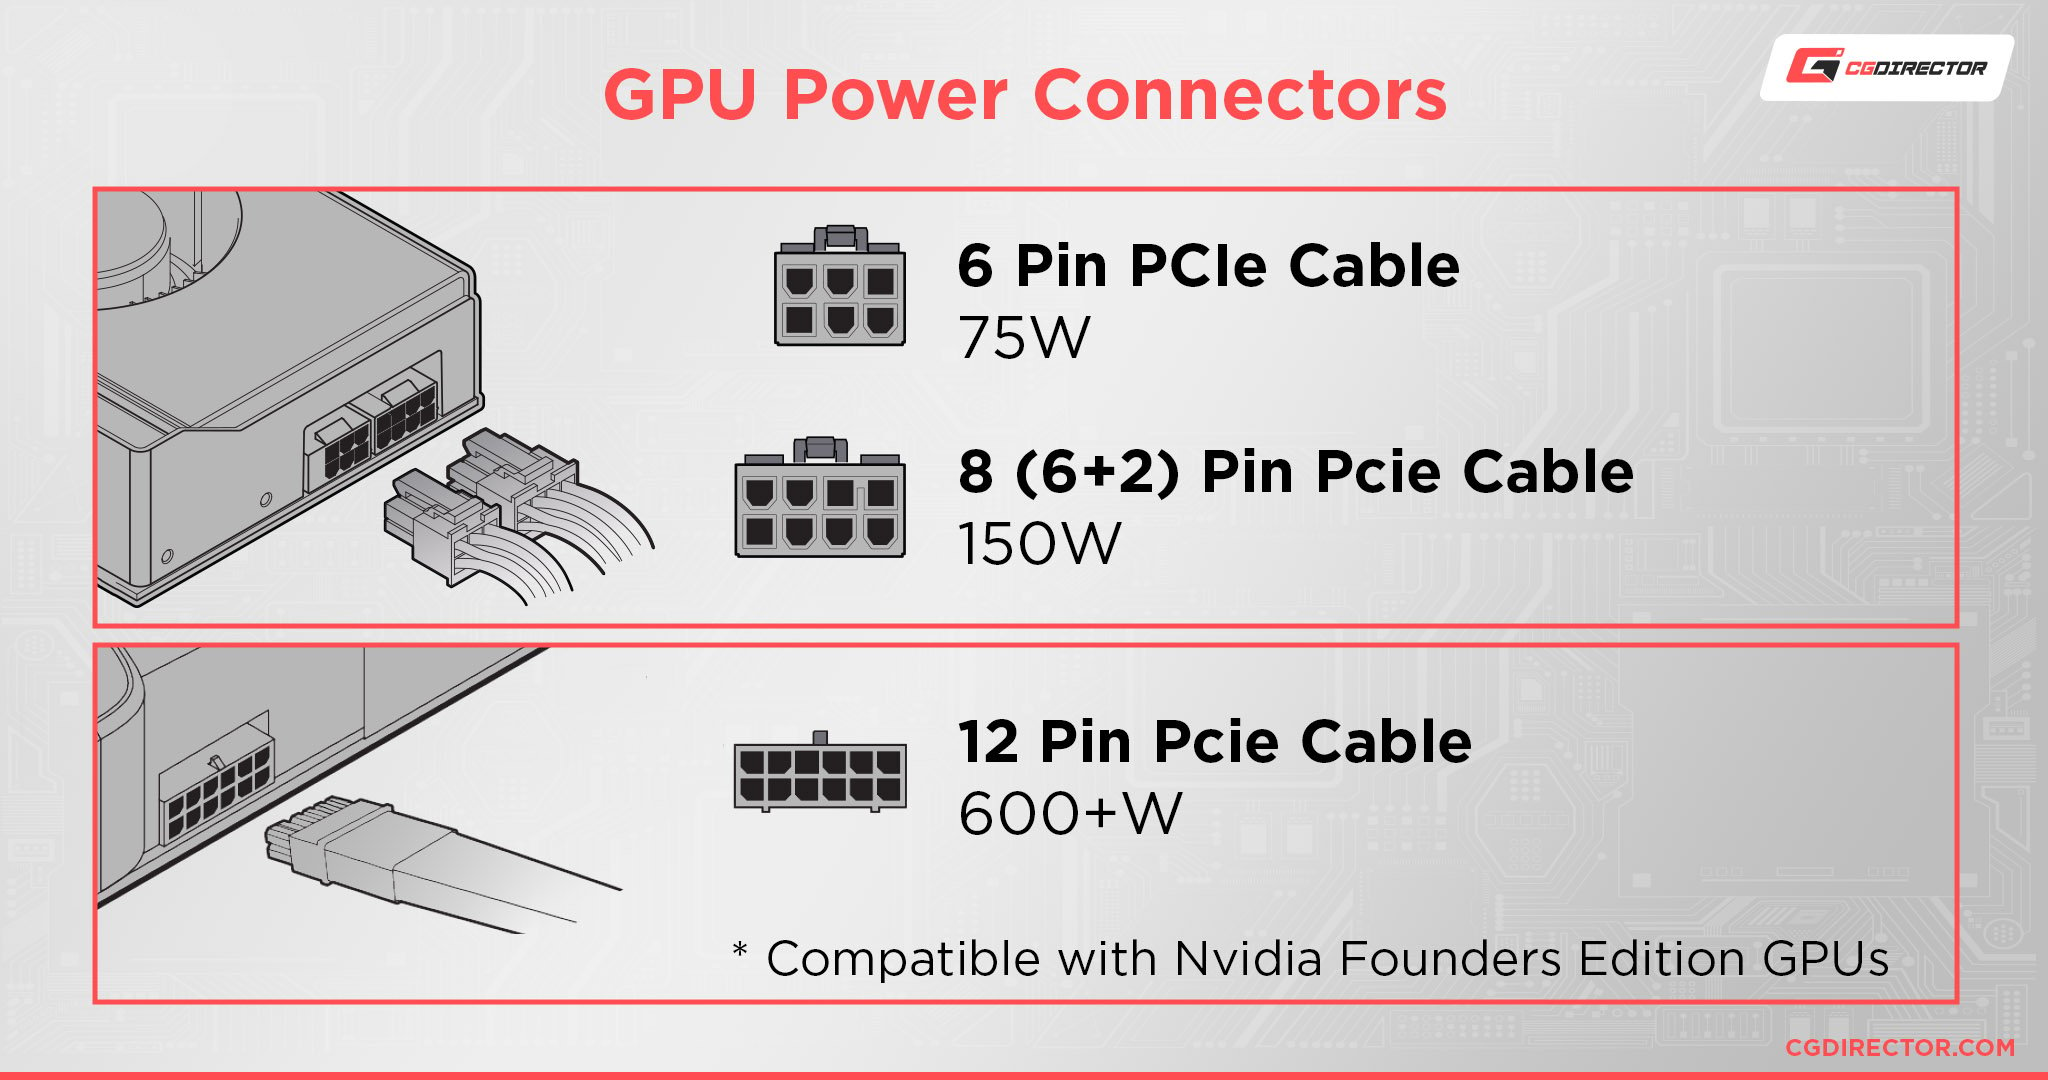
First, remove the power cable that might be connected to your GPU. It will generally be opposite the I/O side.
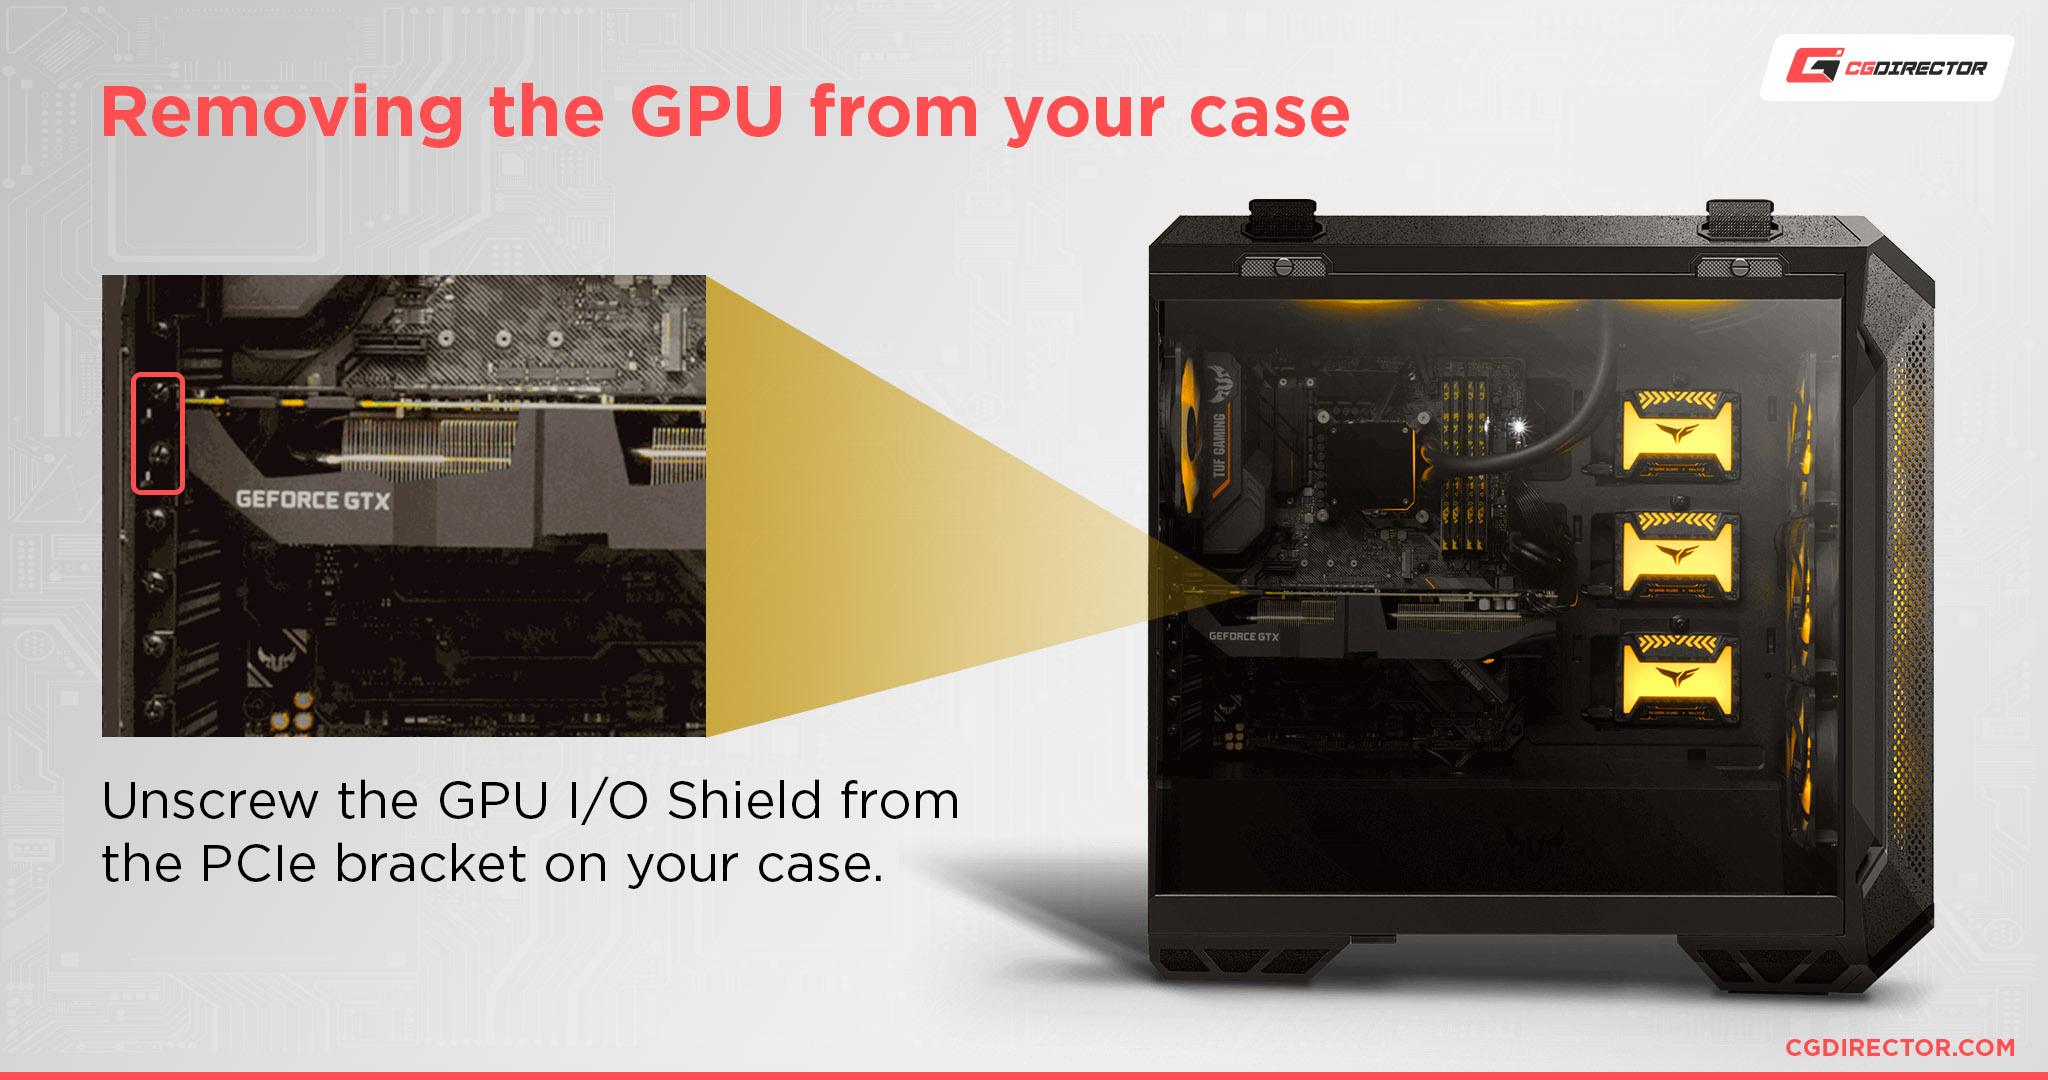
Second, find the screws near the back of the case where the GPU is attached to the PCIe bracket.
You will most likely have one or two screws there. Remove them.
Third, this is the tricky bit, after you remove the screws, put your hand into the case near the front of the GPU and try to find the PCIe slot to which the GPU is connected.
Afterward, go towards the front of the PCIe slot and you should feel a sort of latch. It’s there to secure your GPU. Pull it back.
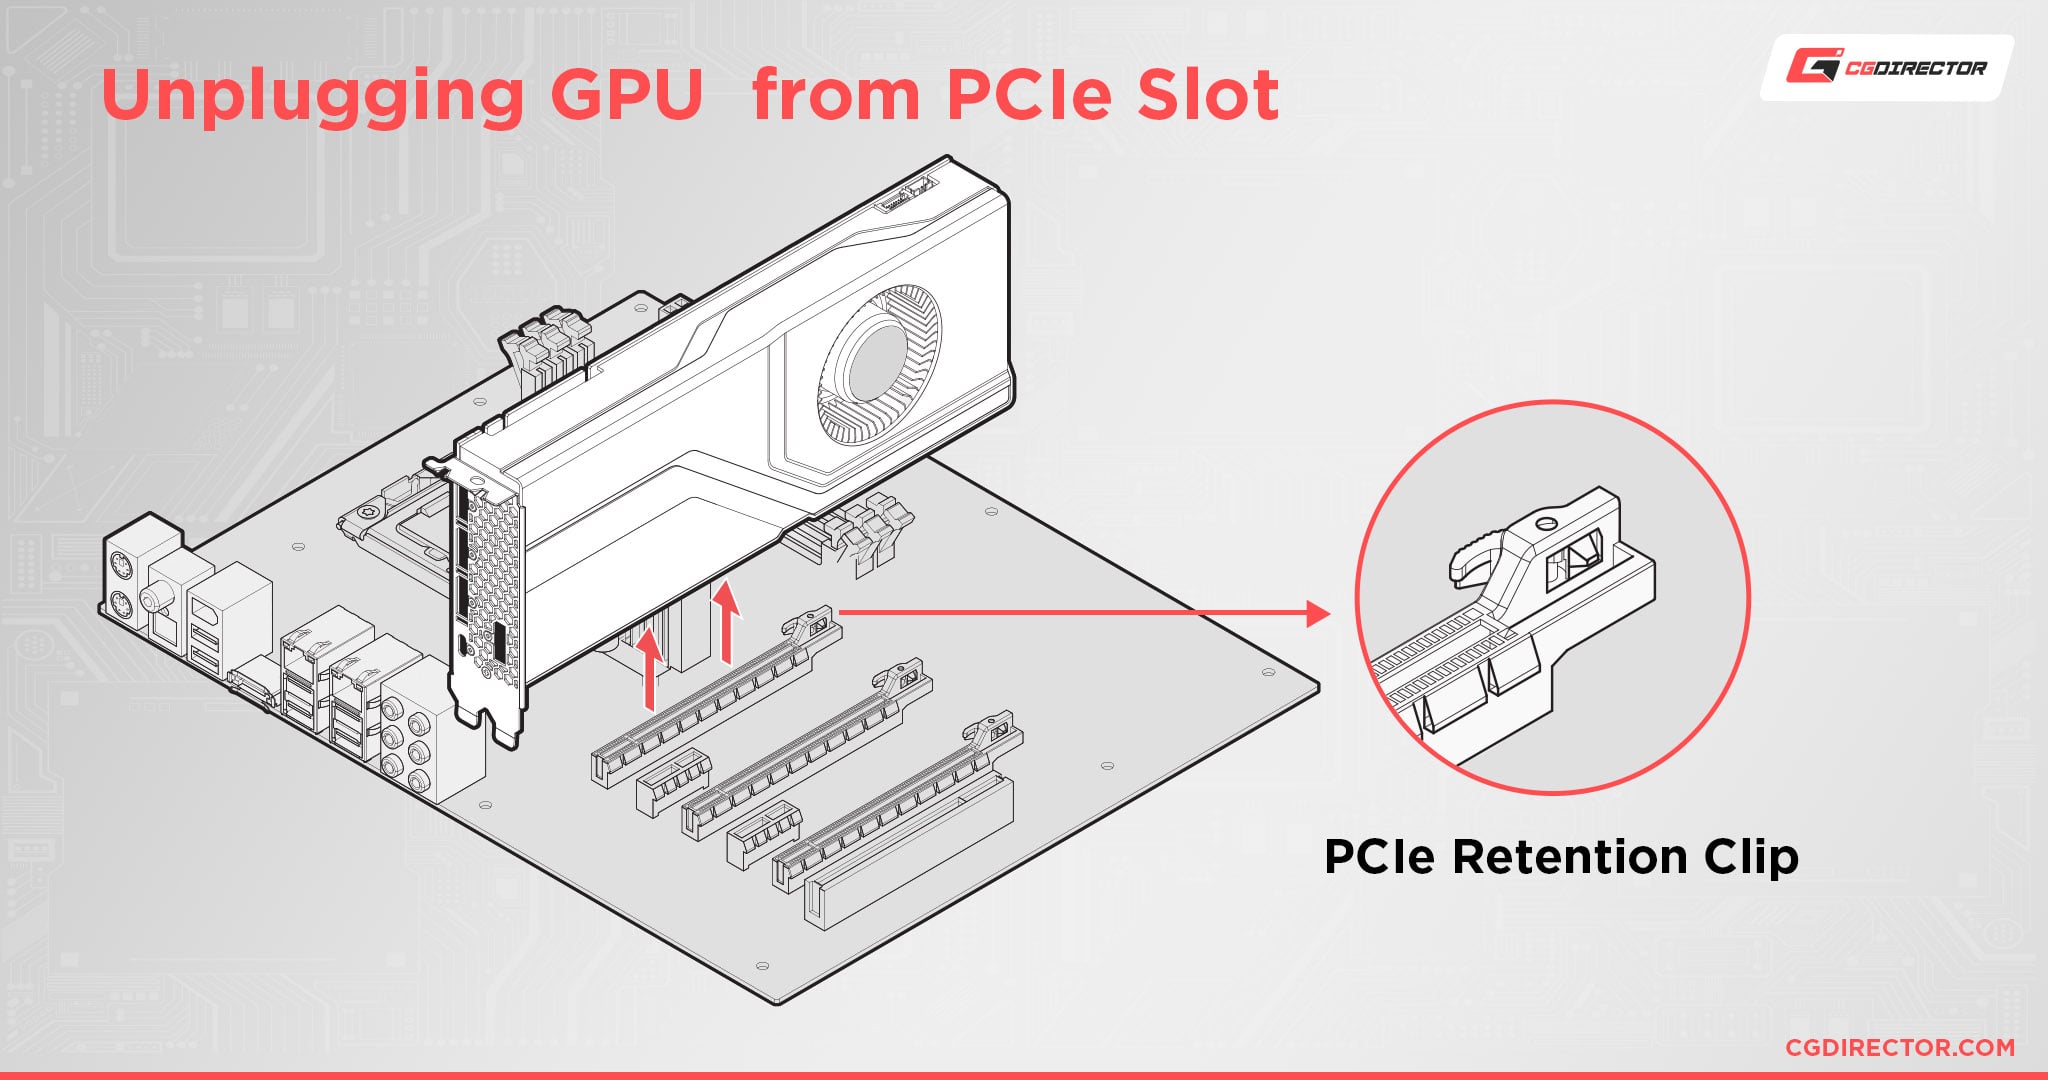
After you feel the latch unlatch, carefully remove the GPU I/O side first.
You should do it I/O side first because GPUs have a small hook-like piece that goes into the PCIe socket. If you pull carelessly, you could break it.
To sum it up:
- Remove the power cable that might be attached to your GPU.
- Unscrew the screws that are securing your GPU to the PCIe bracket.
- Unlatch the PCIe latch.
- Remove the GPU I/O side first.
5. Clean Your GPU
And now, to the final part. You can finally clean your GPU.
If you opted to remove the GPU completely, simply rest it on a clean, uncarpeted surface like a table, and then just clean.
If you opted to keep the GPU in the case, you might have to bend into weird angles to get at the GPU, but it shouldn’t be too hard to clean.
GPUs are pretty hardy and hard to mess up. Unless you drop it or throw water at it or something, you shouldn’t have too many issues just cleaning it as you’d clean anything else.
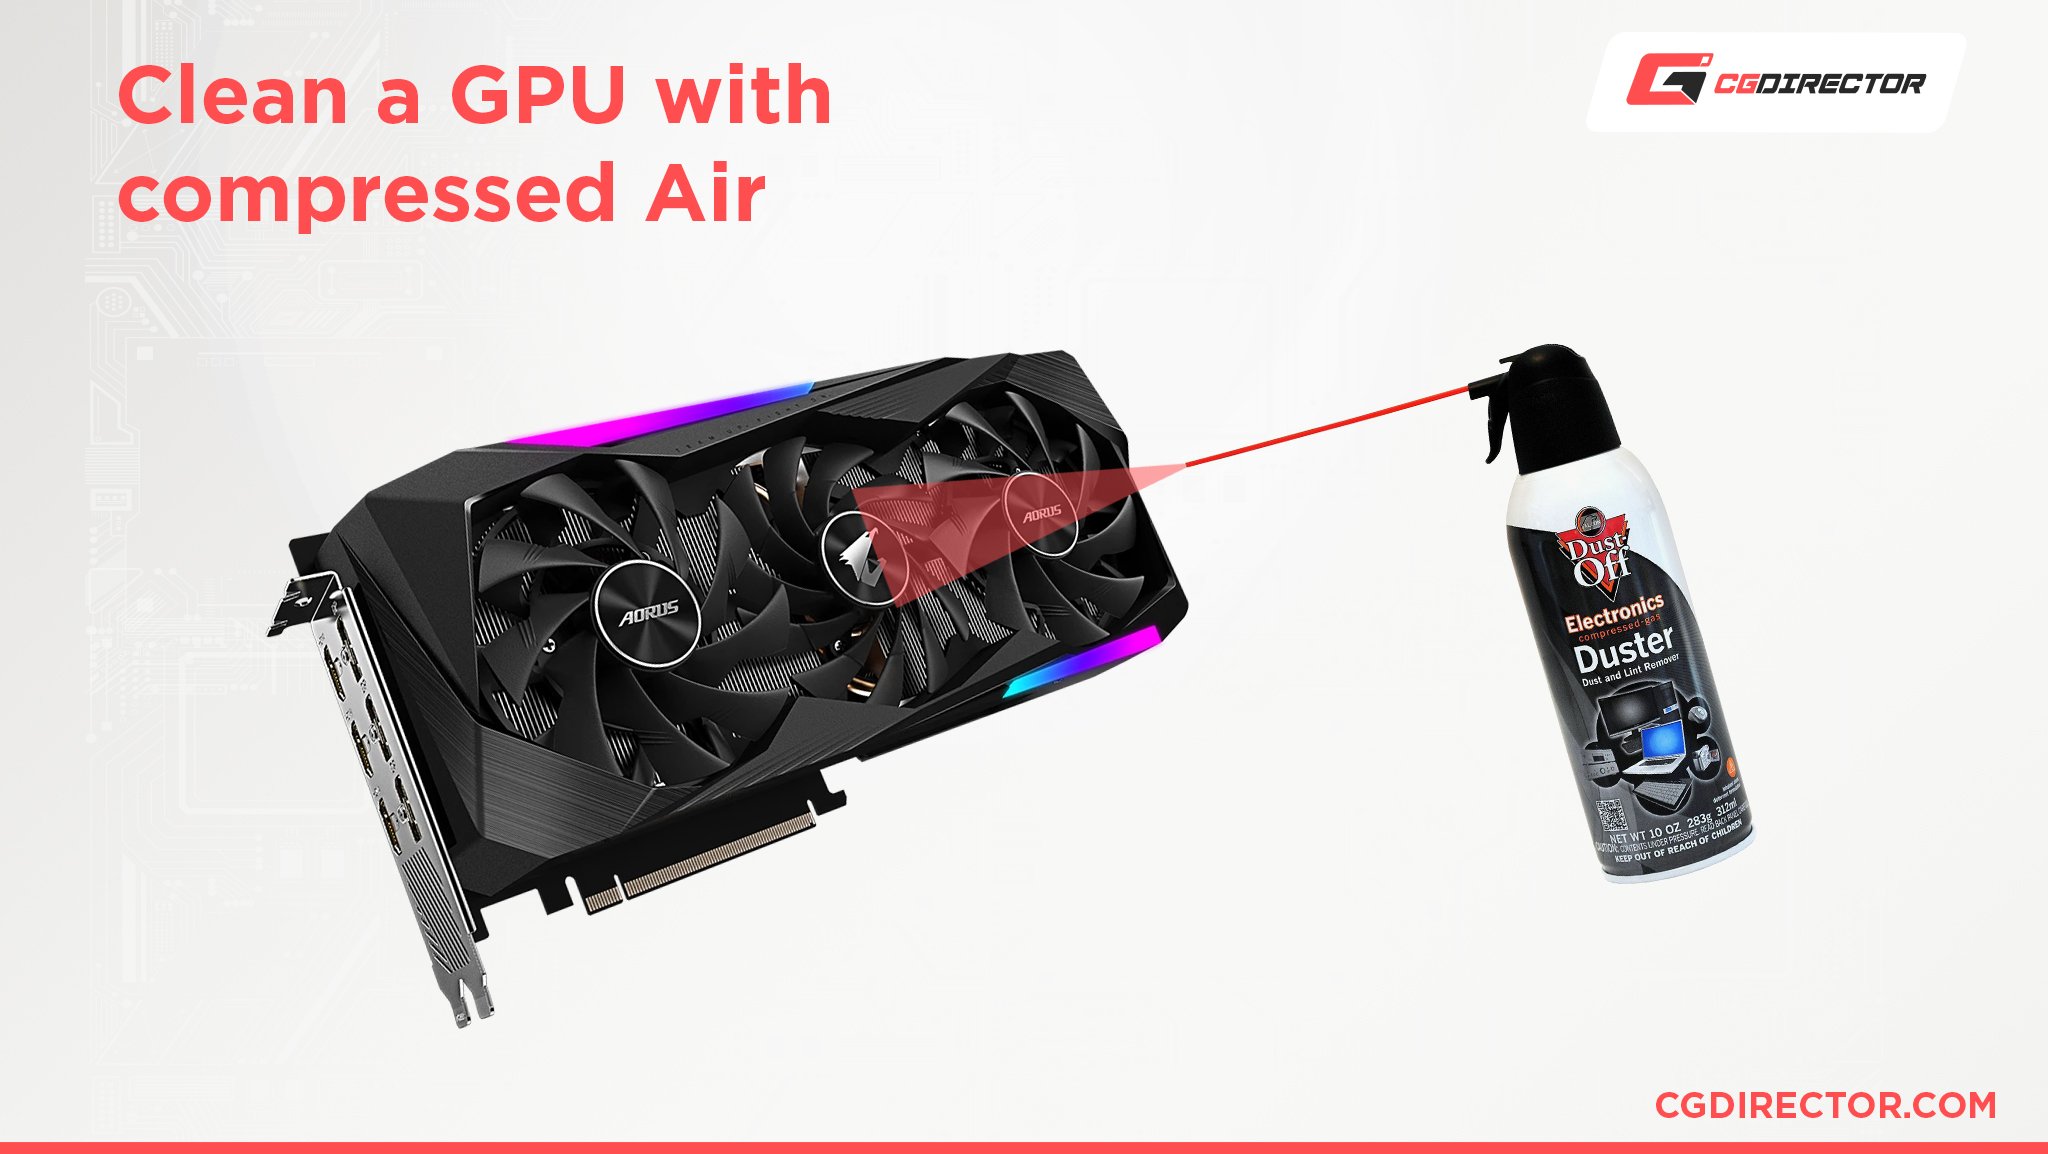
One thing to keep in mind, however, is that when using compressed air or an air pump, you should never let your GPU fans—or any fan for that matter—spin freely.
It might be fun to see the blades go, but it’s extremely detrimental to your fans. It can even overload the fan and short circuit it. And that’s never fun.
So make sure that you hold on to your fans when blowing at them.
After you’re done with the fans, make sure that you properly clean out any dust between the fins on your GPU’s heatsink.
A can of compressed air can come in handy for this because it can send extremely concentrated and pointed gusts of air that can get all the stubborn dust in between the fins.
After you’ve properly cleaned it up, simply redo all the steps backward and you’ll have yourself a nice and shiny GPU.
To sum it up:
- Put the GPU on a clean, uncarpeted surface if you’ve taken it out of the case.
- Take the case outside if you’ve not taken the GPU out of the case.
- Use your microfiber cloth, swabs, and isopropyl alcohol to clean out the outside surface of the GPU.
- Use your compressed air can or air pump to blow the dust inside the GPU off—especially the dust inside the fins.
- Let the GPU rest for a minute or two so that any isopropyl alcohol that’s still on the GPU can evaporate.
- Plug the GPU back into your PC and then enjoy your now clean GPU.
How Do You Clean Your Graphics Card? (The Advanced way)
Now, what I’ve described above is simply basic GPU cleaning, nothing too advanced.
It’ll get your GPU looking pretty nice, but if you really want to clean it, it’s not enough.
There’s so much more that can go into cleaning out your GPU, everything from changing out the thermal paste, changing out thermal pads, taking off the fans and cooler to properly clean them, and more.
However, it’s kind of pointless to try and explain those through text because seeing how to do it visually is so much better.
Because of that, I would suggest that you take a look at this video by Greg Salazar to see how to thoroughly clean your GPU.
How Do You Maintain a Clean GPU?
The best way to maintain the cleanliness of your GPU is to repeat the steps that I’ve outlined above every month to every three months depending on how dusty your home might be.
I would also recommend a more thorough deep clean every six to 12 months.
There are some other preventative measures that you can also take to keep your GPU clean as well.
- Keep your workspace and room tidy and clean it on a regular schedule.
- Keep your pets well-groomed so that they don’t shed hairs that might get sucked up into your PC.
- Keep your PC on a table or some surface away from the ground.
- Use a case with mesh covers.
FAQ
Do You Need to Wear Static Protection When Cleaning Your GPU?
As always, unless you’re cleaning hundreds of GPUs a day or are in a static-prone environment, you don’t need to wear static protection to clean your GPU.
How Often Should You Clean Your GPU?
Preferably every month. More realistically, every three months at least.
And a deeper clean every six to 12 months.
How Do I Know if My GPU Needs Cleaning?
Have your fans gotten louder than usual?
Are your thermals higher than normal?
Is your GPU thermal throttling?
These are all indicators that you might need to think about cleaning out your GPU. You could also just look at the GPU and see if it’s dusty.
What Happens if I Don’t Clean My GPU?
Nothing much will happen at first, but as time goes on, more and more dust will accumulate, heating up your GPU.
Your fans will speed up to try and compensate, but then they too will slow down, heating up your GPU.
And, eventually, your GPU will meet a sad death. Circuits have taken too soon.
Does Cleaning a GPU Increase Performance?
Cleaning a GPU can absolutely increase performance.
The amount of performance you might gain is dependent on how dirty the GPU was, though.
If your GPU was already decently clean, you probably won’t see any change. But if your GPU was close to death’s door, you’ll see some massive performance and thermal improvements.
Can You Use Water to Clean GPUs?
Absolutely not.
The GPU cooler, however, is a different story. The corrosion-resistant metal fins of the GPU are hard to clean with air alone but easy to clean with water, so a lot of people wash it with water to fully clean it out.
That’s completely fine as long as you let it dry fully before putting it back on the GPU.
Over to You
Hopefully, that gave you a good overview of how to take care of your GPUs!
It can be a bit of a daunting task at first, especially considering the fact that you’re handling very expensive equipment, but it’s really not too bad. Just take it slow and don’t yank on anything, and you’ll be fine.
Have any other questions about PC components? Feel free to ask us in the comments or our forum!
![Guide to Undervolting your GPU [Step by Step]](https://www.cgdirector.com/wp-content/uploads/media/2024/04/Guide-to-Undervolting-your-GPU-Twitter-594x335.jpg "Guide to Undervolting your GPU [Step by Step]")

![Are Intel ARC GPUs Any Good? [2024 Update]](https://www.cgdirector.com/wp-content/uploads/media/2024/02/Are-Intel-ARC-GPUs-Any-Good-Twitter-594x335.jpg "Are Intel ARC GPUs Any Good? [2024 Update]")
![Graphics Card (GPU) Not Detected [How to Fix]](https://www.cgdirector.com/wp-content/uploads/media/2024/01/Graphics-Card-GPU-Not-Detected-CGDIRECTOR-Twitter-594x335.jpg "Graphics Card (GPU) Not Detected [How to Fix]")

0 Comments